Last updated at Tue, 17 Jan 2023 21:10:32 GMT
We use React here at Komand as one of our core libraries in our front-end applications and while it does a great job of abstracting away the code for managing the DOM, sometimes that can be problematic. With React, you have JSX which is just XML sugar for declaring what DOM elements you want React to render. React just renders the elements where they are defined within the JSX. For example, this JSX…
<div className=“content”>
  Content
  <Modal>
    I’m a modal
  </Modal>
</div>
... would result in something like this for the rendered HTML:
<body>
  <div class=“react-render-element”>
    <div >
      Content 1
      <div >
        <div >
          I'm a modal
        </div>
      </div>
    </div>
  </div>
</body>
The react-render-element element is just the root element you give to React’s render() method. In most cases this is exactly want you want however there are times where this might actually make certain things more difficult or just impossible, which is the main topic of this article.
My go to example where this is an issue is the good old modal window. If you render a modal element deep in the DOM structure you can run into issues with them.
For one, you might get styles applied to it that you might not be expecting but of course that can be dealt with relatively easily by making sure you are applying styles properly to CSS classes and you don’t have overlapping names.
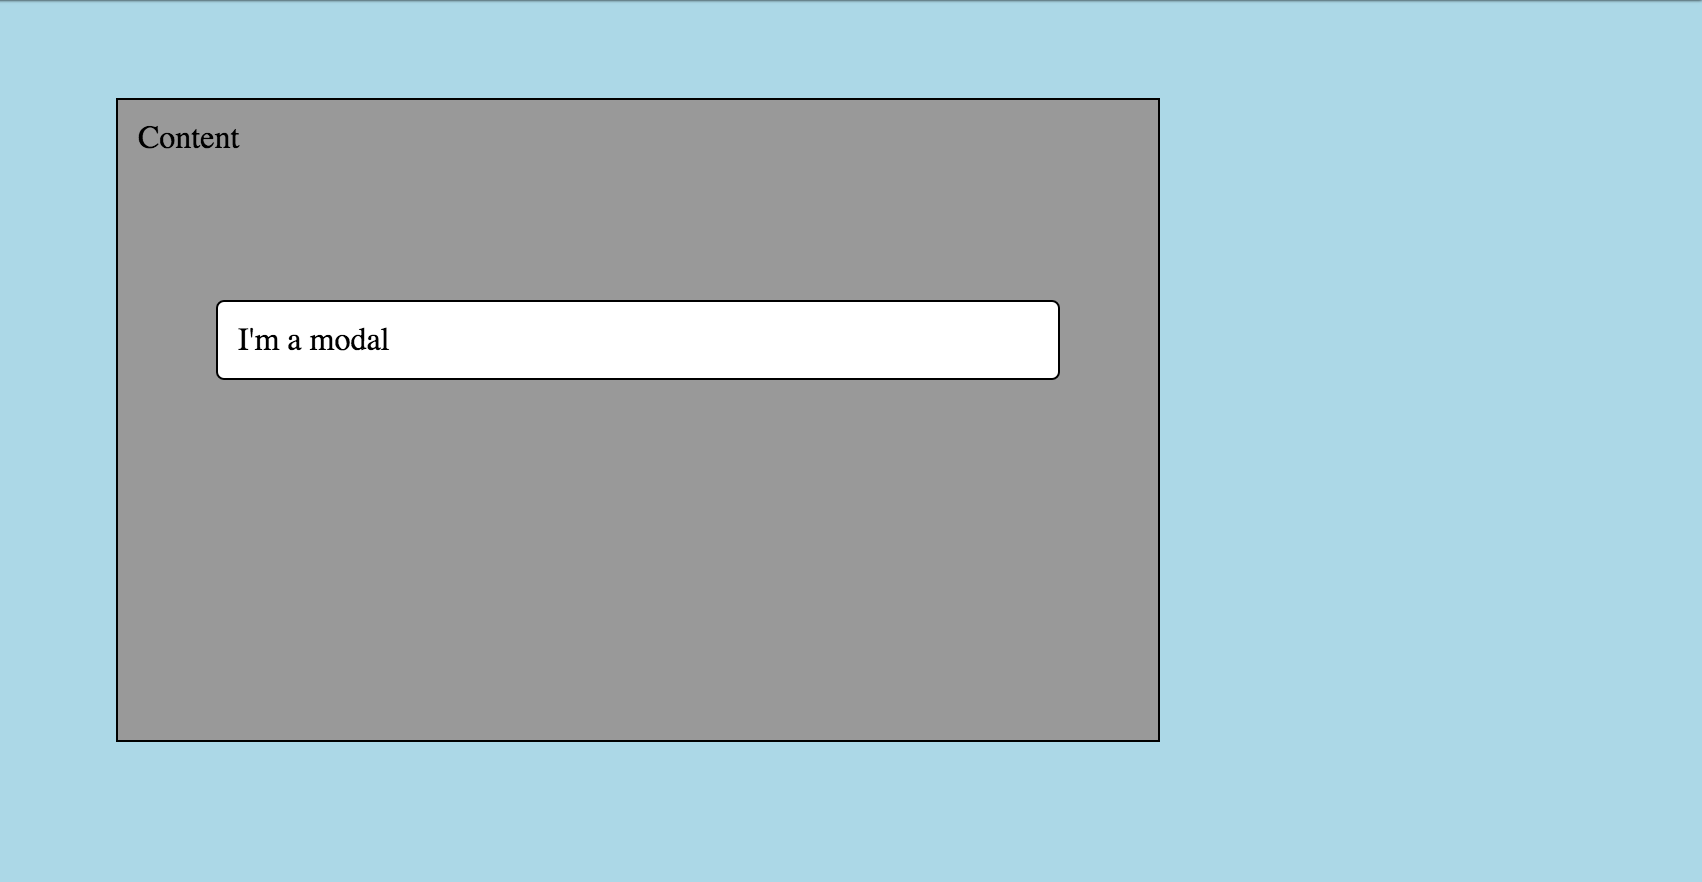
But a bigger issue happens with positioning a modal window which can be affected by some parent element’s style in the DOM structure. If we take the above HTML and you had some semi-standard modal styling, you would get something like this:
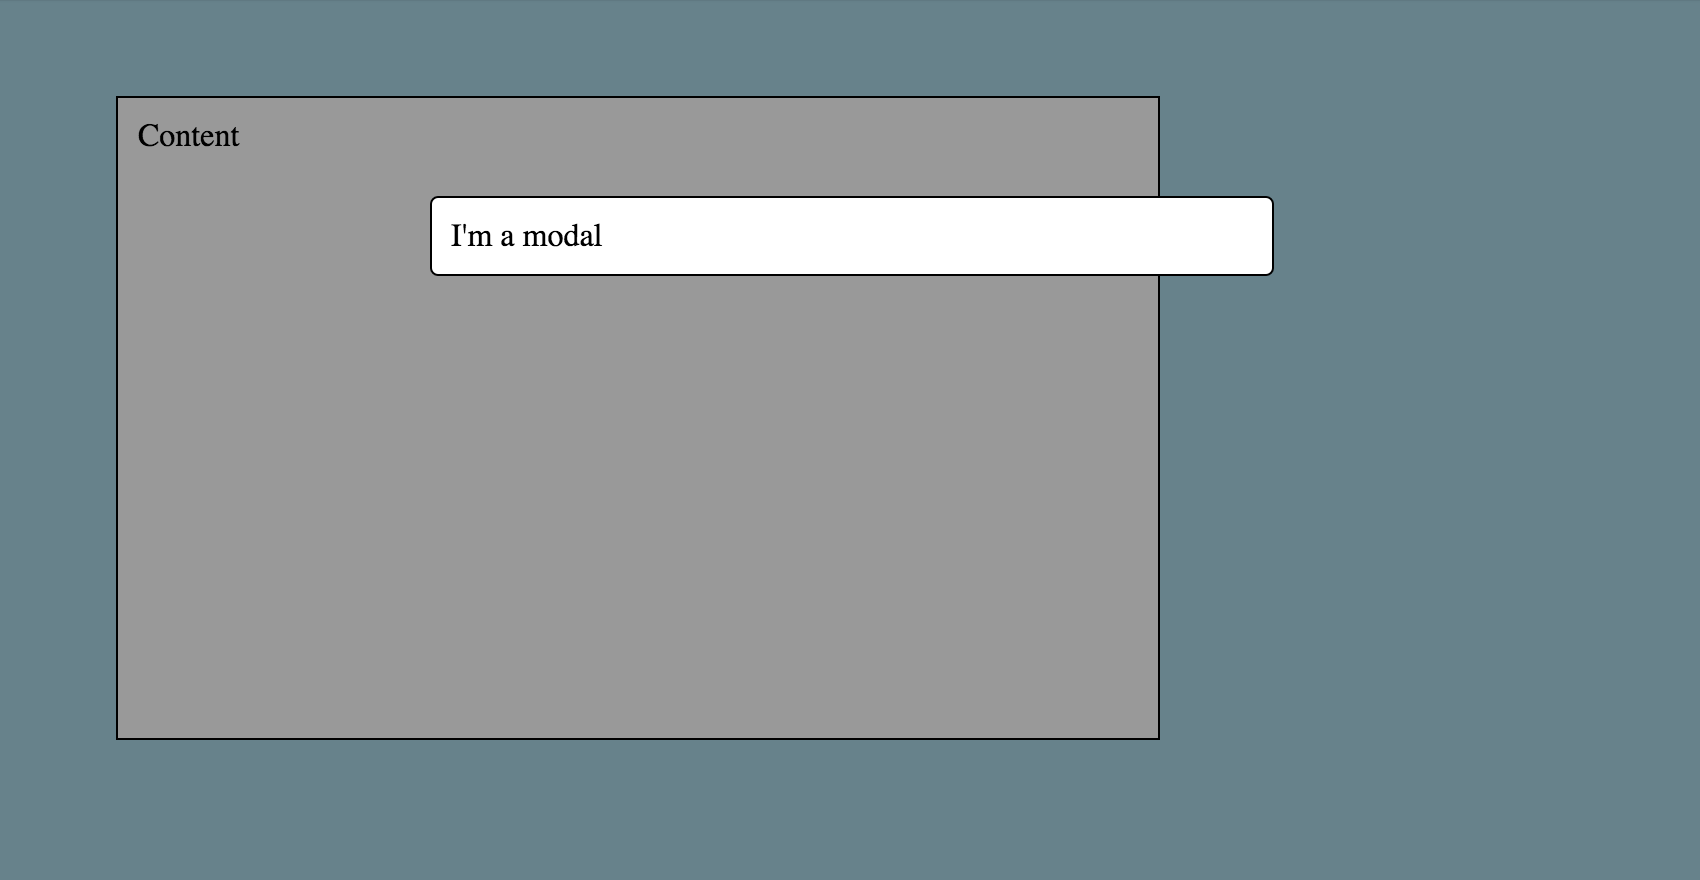
Now if we add to the .content parent element of the modal a transform: translate(…); CSS property, your modal would look like this:
Not exactly what you are generally looking for with a modal window. Because of the parent's style, the modal's positioning is now relative to the .content element instead of the entire window (even though we used position: fixed;).
You might not always have full control to be able to avoid this type of situation. In our case, we ran into this issue with a layout manager library we were using and needed to implement a better way to handle modal windows with this library.
What we did, and it is something that a lot of other modal libraries do, is render the modal element outside the main application’s DOM structure to get it as close to the body element to prevent other styles from interfering with this element. We needed to have a solution that: Let us use React as we still wanted to be able to use React components to render the modal but allow us to place the rendered HTML of these components outside of the main React application element.
So something like this...
<div className=“content”>
  Content
  <Modal>
    I’m a modal
  </Modal>
</div>
… would result in HTML like this:
<body>
  <div class=“react-render-element”>
    <div >
      Content 1
    </div>
  <div>
  <div >
    <div >
      <div >
        I'm a modal
      </div>
    </div>
  </div>
</body>
This would allow us to define components in logical locations but render all these elements in a different location in order to make it easier / possible to have stuff like modal elements render like this:
The Append Body Component
The core to this technique is a custom component I generally call AppendBodyComponent. This component stores all the functionality that makes it easy to manage numerous components that you might want to append to the body (or at least as close as we can get to it). Lets take a look at the full code and then break it down:
import React from 'react';
import { render } from 'react-dom';

const appenedElements = {};
const appendElementContainer = document.querySelector('.append-element-container');

function getAppendedElements() {
  const elements = [];

  const keys = Object.keys(appenedElements);
  const length = keys.length;

  if (length > 0) {
    keys.forEach((key) => {
      elements.push(appenedElements[key]);
    });
  }

  return elements;
}

class AppendBodyComponent extends React.Component {
  constructor(props) {
    super(props);

    this.appendElementContainer = appendElementContainer;
  }

  setAppendElementId(id) {
    this.appendElementId = id;
  }

  updateAppendElement(content) {
    appenedElements[this.appendElementId] = content;

    this.updateAppendElements();
  }

  updateAppendElements() {
    render(<span>{getAppendedElements()}</span>, appendElementContainer);
  }

  removeAppendElement() {
    delete appenedElements[this.appendElementId];

    this.updateAppendElements();
  }
}

export default AppendBodyComponent;
There is not a ton of stuff going on here so lets dive right in.
const appenedElements = {};
const appendElementContainer = document.querySelector('.append-element-container');
Here we have a variable that will store all of the appended elements and a variable to store a reference to the DOM element that should be used as the mounting point for all the appended elements. The appendElementContainer should reference an element that is outside of the element used to render the main React application (since the main React render will want full control of that). We store the elements as an object instead of an array in order to be able to have a key value pair to easily identify the exact element (for updating and deleting) by a user defined unique key.
function getAppendedElements() {
  const elements = [];

  const keys = Object.keys(appenedElements);
  const length = keys.length;

  if (length > 0) {
    keys.forEach((key) => {
      elements.push(appenedElements[key]);
    });
  }

  return elements;
}
This function is responsible for converting the object of elements into an array of elements, a format which React will be able to work with very easily.
constructor(props) {
  super(props);

  this.appendElementContainer = appendElementContainer;
}
The constructor is just adding a reference to the appendElementContainer to the class. While generally this should not be needed, it can be useful to provide access to the container DOM node to any component extending this one.
setAppendElementId(id) {
  this.appendElementId = id;
}
Every appending element must have a unique id associated to it and this method is used to set that which the extending component must call.
updateAppendElement(content) {
  appenedElements[this.appendElementId] = content;

  this.updateAppendElements();
}
This method is used to update the appended element itself. This is one of the places where the unique id is important as you can have multiple appended elements at once, the unique id is used to make sure you are updating the correct appended element. It then makes a call to the updateAppendElements() method that handles rendering of all the appended elements.
updateAppendElements() {
  render(<span>{getAppendedElements()}</span>, appendElementContainer);
}
This is the method that is used to render all of the appended elements to the container element. This method is internally called from the updateAppendElement() and removeAppendElement() methods to make sure the rendered appended elements are kept up to date.
removeAppendElement() {
  delete appenedElements[this.appendElementId];

  this.updateAppendElements();
}
This methods removes the appended element from the list of appended elements using the unique id and then makes a call to the updateAppendElements() method that handles rendering of all the appended elements.
Using the Append Body Component
Now that we have this nice component that can manage and render appended elements outside of the main React application, lets put it into use. Like before, I will give you the full code and then break it down. Here is an example of what a very simple modal component might look like:
import React from 'react';
import uuid from './util/uuid';

import AppendBodyComponent from './AppendBodyComponent'

class Modal extends AppendBodyComponent {
  constructor(props) {
    super(props);

    this.uniqueId = uuid();

    this.setAppendElementId(this.uniqueId);
  }

  componentDidMount() {
    this.updateSelf();
  }

  componentDidUpdate() {
    this.updateSelf();
  }

  componentWillUnmount() {
    this.removeAppendElement();
  }

  updateSelf() {
    this.updateAppendElement(
      <div
        key={this.uniqueId}
        className="modal"
      >
        <div className="modal__container">
          {this.props.children}
        </div>
      </div>
    );
  }

  render() {
    // NOTE: since this is an append body component, we need to manage the rendering ourselves
    return null;
  }
}

Modal.propTypes = {
  className: React.PropTypes.string,
};

Modal.defaultProps = {
  className: null,
};

export default Modal;
Now lets break down the relevant code from that component .
class Modal extends AppendBodyComponent {
Here we are going to extend the new class we created instead of the normal React.Component class.
constructor(props) {
  super(props);

  this.uniqueId = uuid();

  this.setAppendElementId(this.uniqueId);
}
Since this is going to be an appended element, we need to created a unique id for it so we are using a uuid utility function. There are other ways you could do this, the important part is that you pick a technique that will keep the chances of a collision in the unique id from happening as low as possible. We store this on the class itself, that way we have easy access to it later, and then pass it to the method defined in the AppendBodyComponent.
componentDidMount() {
  this.updateSelf();
}

componentDidUpdate() {
  this.updateSelf();
}

componentWillUnmount() {
  this.removeAppendElement();
}
Since this element needs to be managed by the AppendBodyComponent.updateAppendElements() method, we hook up the appropriate lifecycle methods to the corresponding methods. When this component mounts or updates, we need to call updateSelf() which is the method that calls AppendBodyComponent.updateAppendElement() which we will see next. We also need to call AppendBodyComponent.removeAppendElement() when this component unmounts as it is no longer needed.
updateSelf() {
  this.updateAppendElement(
    <div
      key={this.uniqueId}
      className={this.getCssClasses().join(' ')}
    >
      <div className="modal__container">
        {this.props.children}
      </div>
    </div>
  );
}
This method handles using AppendBodyComponent.updateAppendElement() in order to perform whatever updates are needed for this component. It is important to note that you need to give the root element a key property otherwise React will complain with the Each child in an array or iterator should have a unique "key" prop warning because the AppendBodyComponent.updateAppendElements() method is converting that object of elements into an array of elements that React can render.
render() {
  // NOTE: since this is an append body component, we need to manage the rendering ourselves
  return null;
}
Lastly we have the render method which in this case just returns null. Since we are handling the rendering of this component outside of the main React application, returning null will tell React in the main application to not render anything as far as where this component is defined in the JSX of your application.
You can take a look at a working example of the code here: https://codepen.io/ryanzec/pen/yVYojq
Conclusion
Well that is it, we now have a Modal component that will render itself outside of the main React application which provides us with a bit more of a resilient component when it comes to styling / positioning it. While I am sure there are other techniques to solve this problem, this is one that has worked well for me in the past and maybe you can draw some inspiration from this code if you find yourself running into a similar situation.