If you’re like many security practitioners, you spend a lot of time working with spreadsheets. Whether you’re trying to prioritize your findings or distribute work to remediation teams, an all-too-common workflow is to export this data into a spreadsheet to then be sorted, filtered, copied, and distributed.
This tedious, manual effort seems to be the standard for vulnerability management programs everywhere, but with our vulnerability management solution, InsightVM, you can automate this workflow very easily.
That was then...
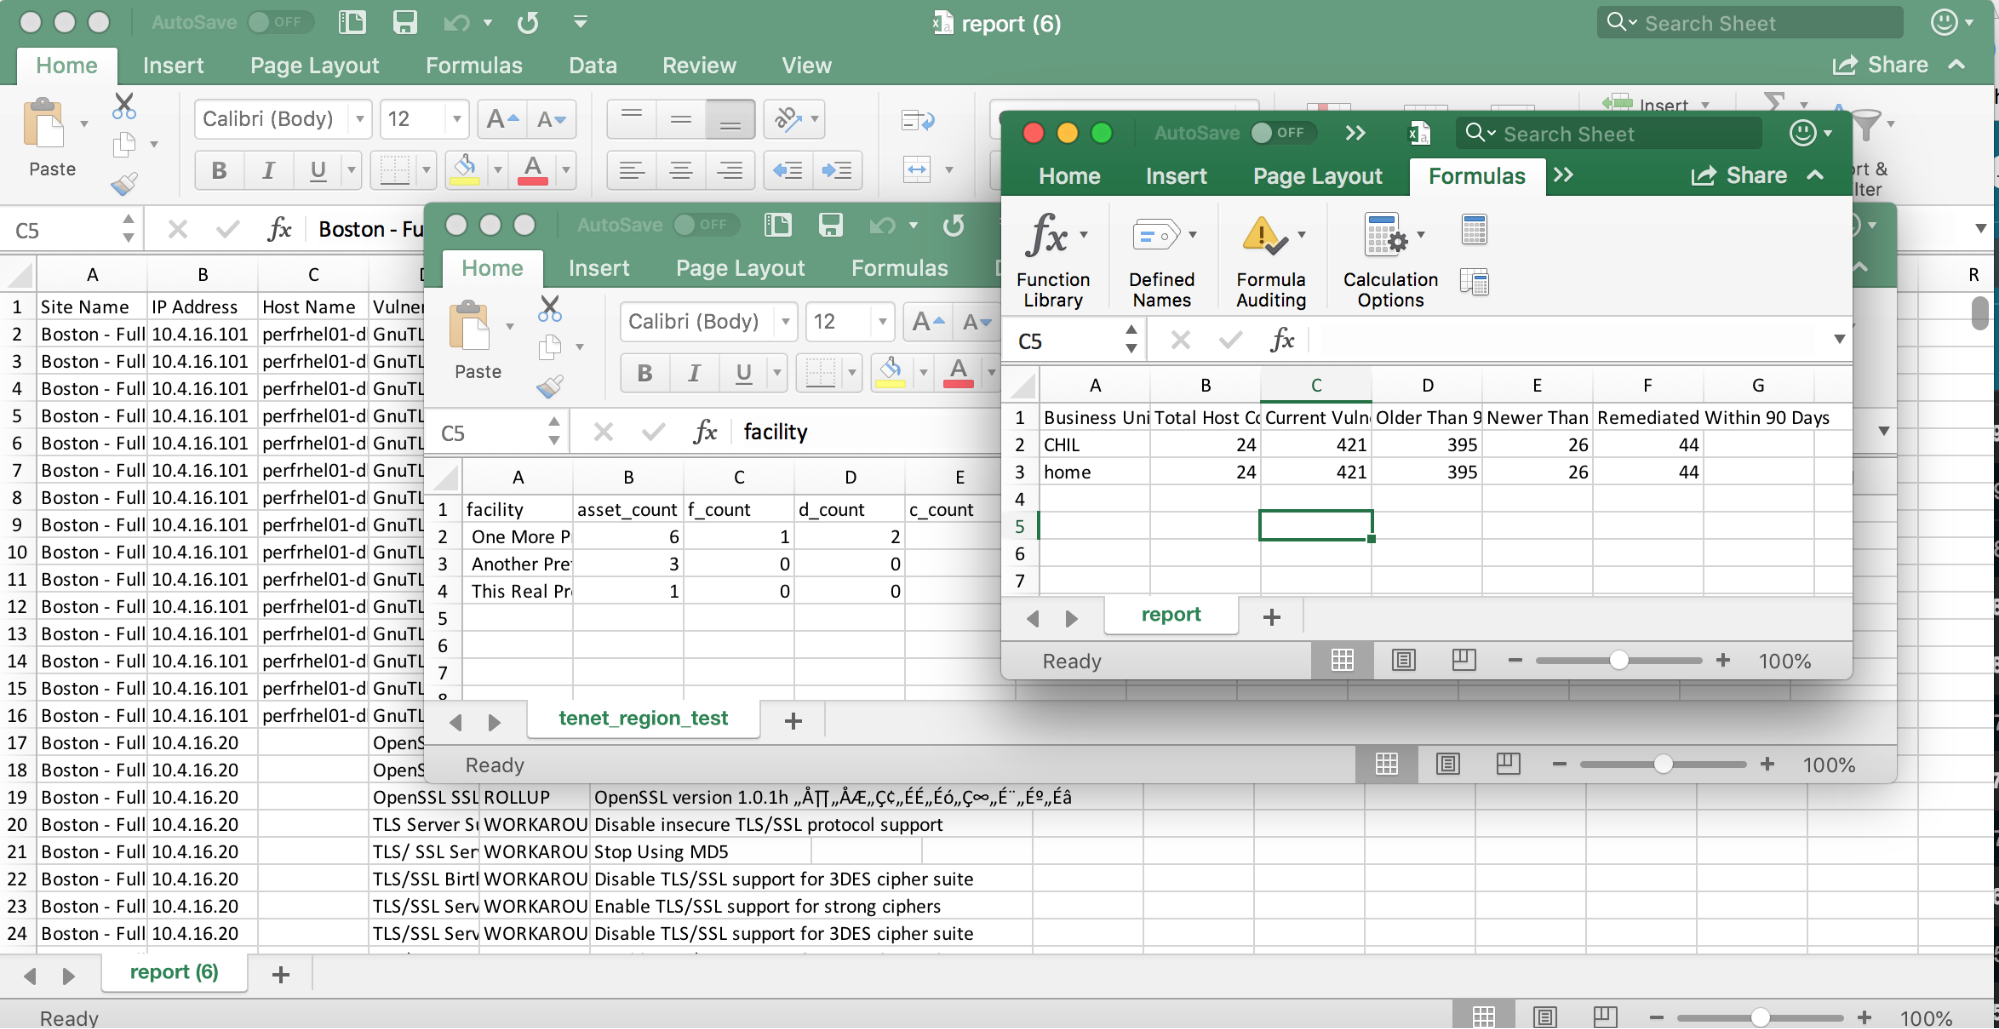
Let’s look at a typical scenario. Like many organizations, you may have a vulnerability management policy that outlines an SLA such as, “all vulnerabilities with a CVSS score of 7.0 or higher must be remediated within 30 days.” Many security practitioners assign this work to the remediation teams by exporting all vulnerability results to CSV, filtering by asset group to target each working team, sorting by CVSS score, cutting off the ones below 7.0, and shipping it out.
Each of the IT teams then gets a spreadsheet with thousands of rows listed out by vulnerability, requiring them to dig into each one to figure out what they’re expected to do to resolve it. Even worse, they usually end up filtering again on each solution to figure out which vulnerabilities share the same remediation steps, then create a pivot table or spend time copying and pasting to get the list of assets that require similar solution steps. Is it any wonder, then, that these teams end up sticking to their standard patching workflows and seeing what sticks?
This is now.
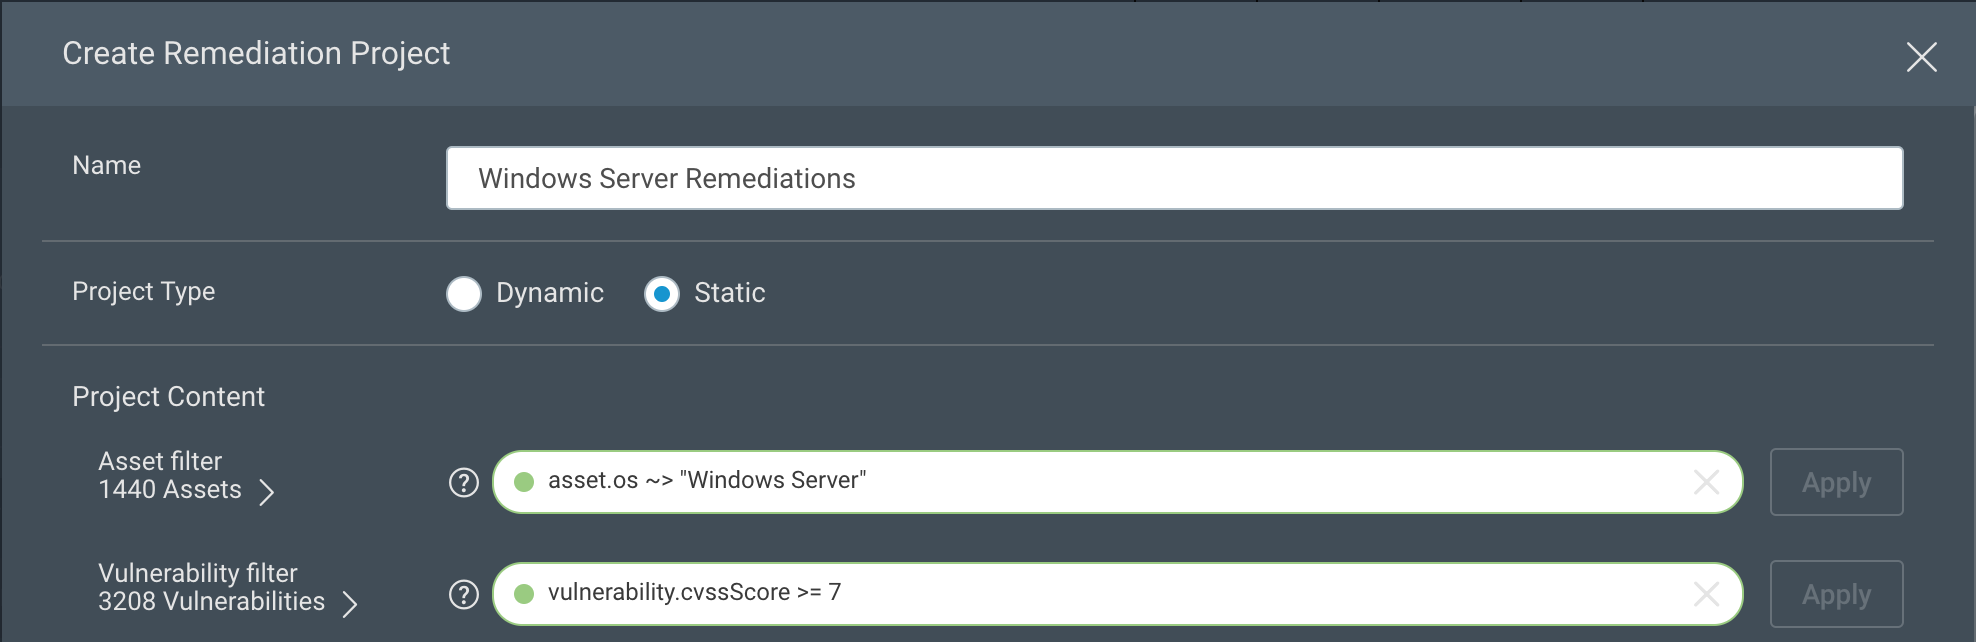
All this being said, let’s look at how much simpler it can be with InsightVM Remediation Workflow. After navigating to the Projects tab, create a new project for one of these remediation teams. In this example, we’ll create one for the Windows Server administrators. I’m using an OS filter to narrow this down to just Windows Server assets, but you could also use a filter for a tag or dynamic asset group if you’ve already created groupings like this for your remediation teams. For vulnerabilities, I’ve filtered on just vulnerabilities with a CVSS score greater than or equal to 7.0. I’ve also assigned it to my Windows Server administrator, Doug, and set the due date for 30 days from today.
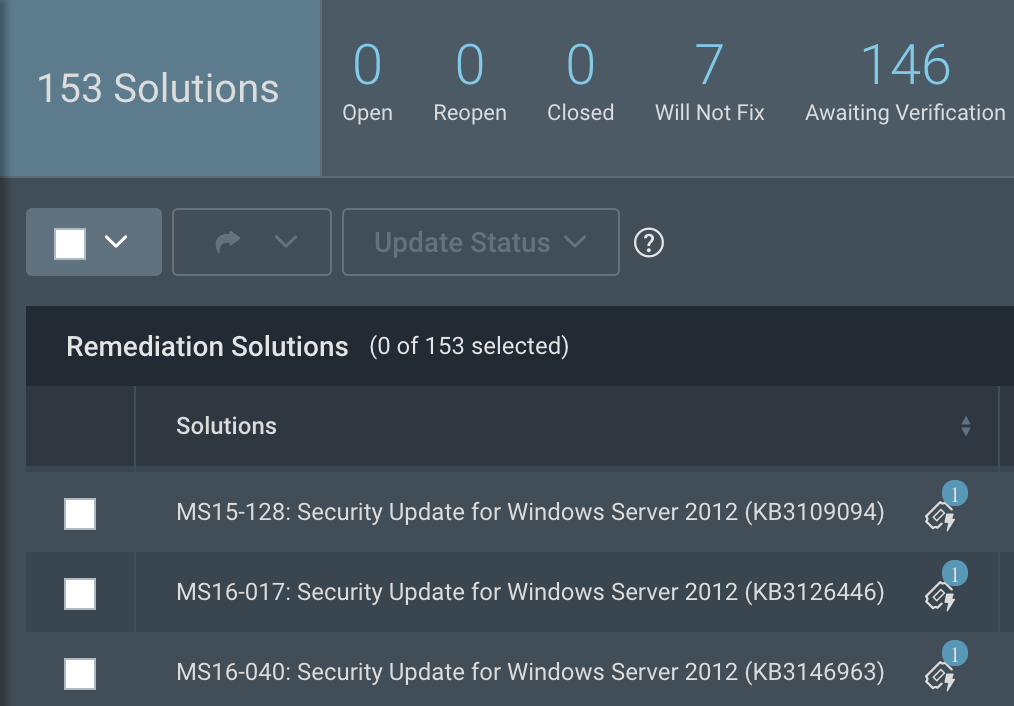
Historically, the work involved in creating this report was only half the battle. With projects, however, the solutions for all the in-scope vulnerabilities are rolled up and become the central focus. When Doug views his project, he’ll see a succinct list of the things he needs to do to meet the goals or remediation SLAs—without any additional filtering, sorting, pivot tables, or copy-pasting. He can also sort these to his liking by solution title, the number of assets affected, the risk remediated by the solution, or status of the solution in the project.
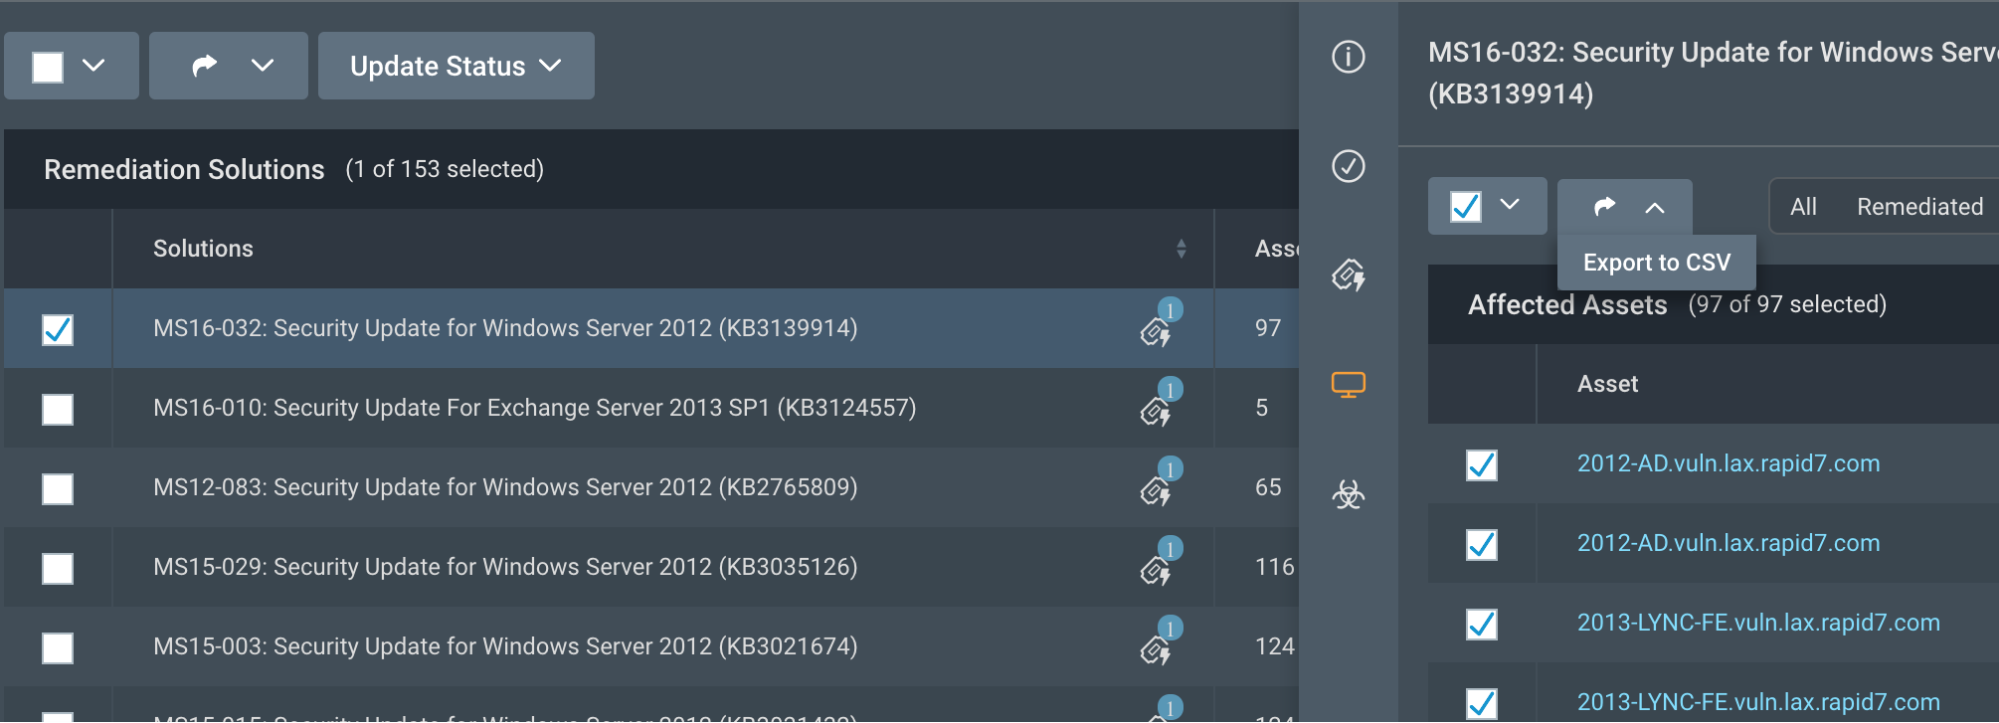
From each solution, he can also drill down to get solution details and references or details about the vulnerabilities that would be resolved by this solution. Within the asset details, he can also select all of the impacted assets and export these to CSV, which allows him to easily drop this list into his patching tool or assign the task to someone on his team.
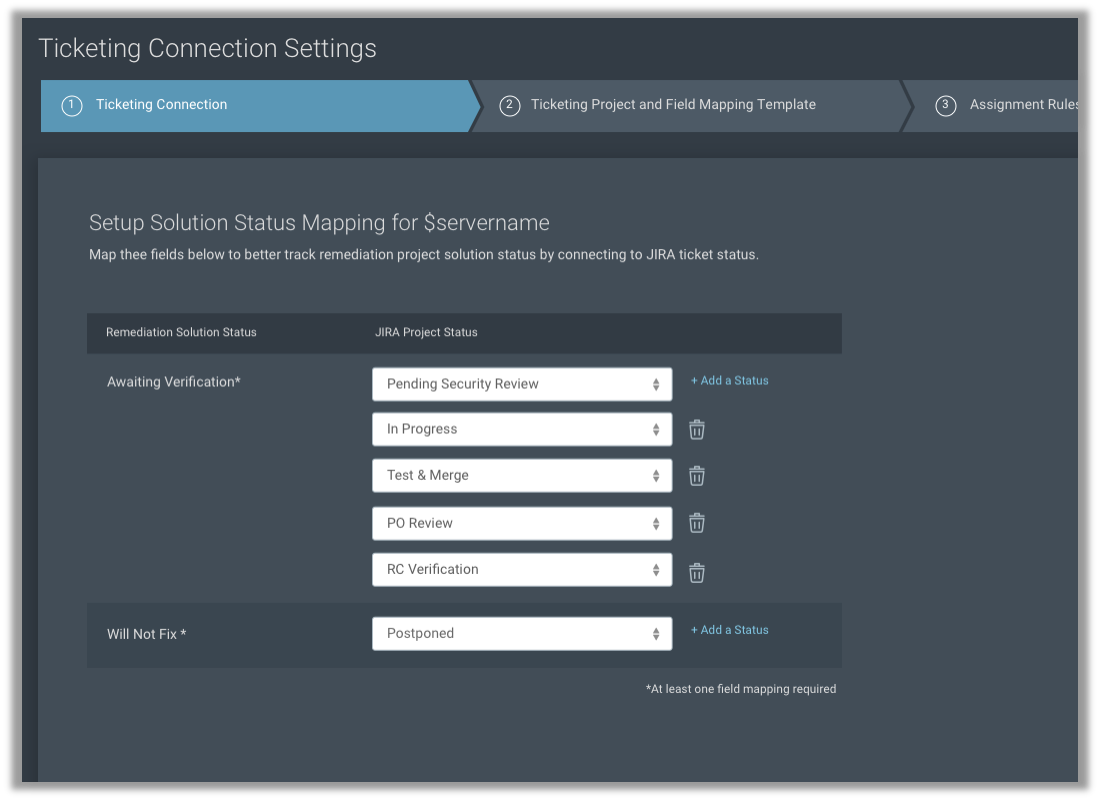
Of course, many IT teams rely on tickets being entered into their ticketing system, and don’t want to use another product to get this work assignment. From the project creation, integrations with ServiceNow and Jira allow you to automatically assign tickets to the correct group with the necessary details to carry out remediation steps, such as solution details and affected hosts. If the ticket is marked as complete, it will update the project to “awaiting verification” and update the progress accordingly.
Don’t have ServiceNow or Jira? You can assign remediation tickets to any email address, such as the generic address associated with your IT ticketing system. Don’t have a ticketing system? You can use InsightVM to directly track your tickets and assign them to the IT professionals responsible for remediation. The system will even send updates to the technician when they are ahead of or behind schedule.
Suppose an administrator completes the work without noting it in the ticket. When the asset is assessed again by either a vulnerability scan or a running agent, and found to no longer be vulnerable to the in-scope vulnerabilities, those solutions (as well as the ticket) will be closed in the project. You’ll always be in sync with your remediation teams, even if they’re working within their ticketing system.
Now what?
By using Remediation Workflow, you can easily create filtered, prioritized, and—most importantly—actionable projects. By using projects to distribute this work, you’ll be able to easily demonstrate remediation progress while reducing your organization’s overall risk.