By: fuzzy borders
Are you having trouble trying to get your Azure assets into your InsightVM security console? In this blog post, we wanted to bring additional insight into leveraging the Azure Discovery Connection with InsightVM.
This blog post is brought to you by the Fuzzy Borders project, whose members come from different teams across Rapid7. Our goal is to find answers for requests that may fall into gray (fuzzy) areas. Our past work includes example API calls and SQL queries for InsightVM Security Consoles.
We hope this blog will help you get started with assessing your Azure virtual machines in InsightVM.
There are 3 main areas of configuration: Azure App Registration, IAM Subscription, and InsightVM Discovery Connection configuration.
Here is the overview of the steps:
Azure Configuration
- App Registration
- API Permissions
- Generate and Save the Secret Value
- IAM role permissions (Subscriptions Tab)
- Attach Reader role to App Registration
InsightVM Discovery Connection Configuration
Prerequisite: Allow outbound traffic to Azure from the InsightVM console server.
- Create a new site for Azure assets*
- Create Azure Discovery Connection
- Enter Azure Tenant ID, Application ID, Application Secret certificate Value
*The Azure Site should be dedicated to this discovery connection only.
Please keep note of the following items:
Application ID
Directory ID (a.k.a Tenant ID)
Value for the certificate Secret.
Configure Azure
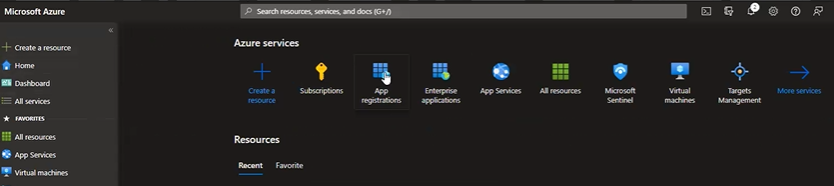
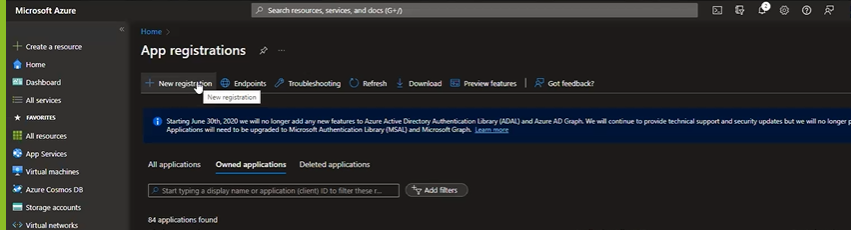
We need to establish trust between Rapid7 and Azure. Click on “App registrations”
Click: New registration
Enter a display name for the application and click Register at the bottom. In this example we use “FuzzyDiscovery”
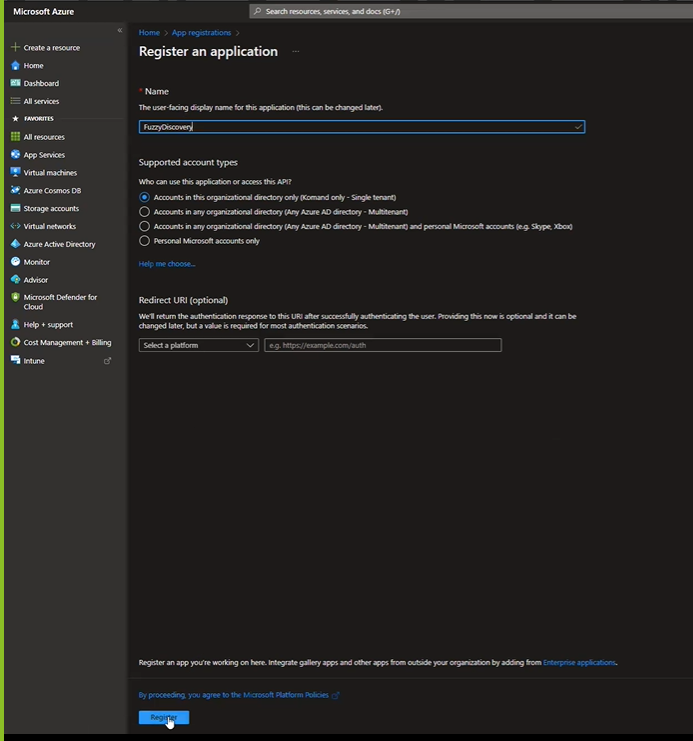
We leave default values. Once you click Register it will return the Application ID, and Directory ID (a.k.a Tenant ID) that will be required in later steps.
Tip:
Either take a screenshot or copy and paste both the Application and Directory ID to a secure location to reference later.
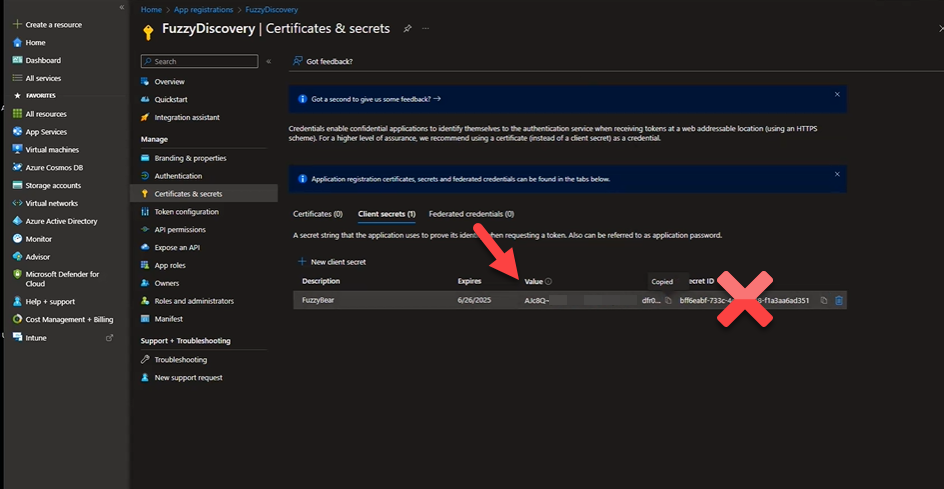
Generate and Save the Secret Value
Click on Certificates & Secrets, click: Client Secrets, and add New Client Secret
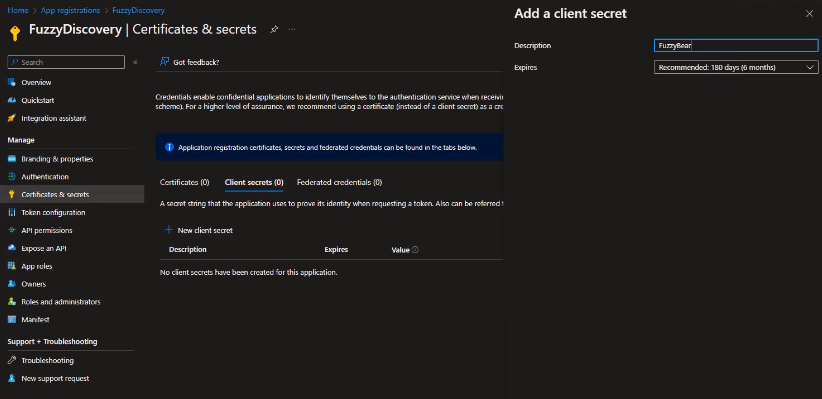
Important Note: We require the generated Secret Certificate Value, not the Secret ID.
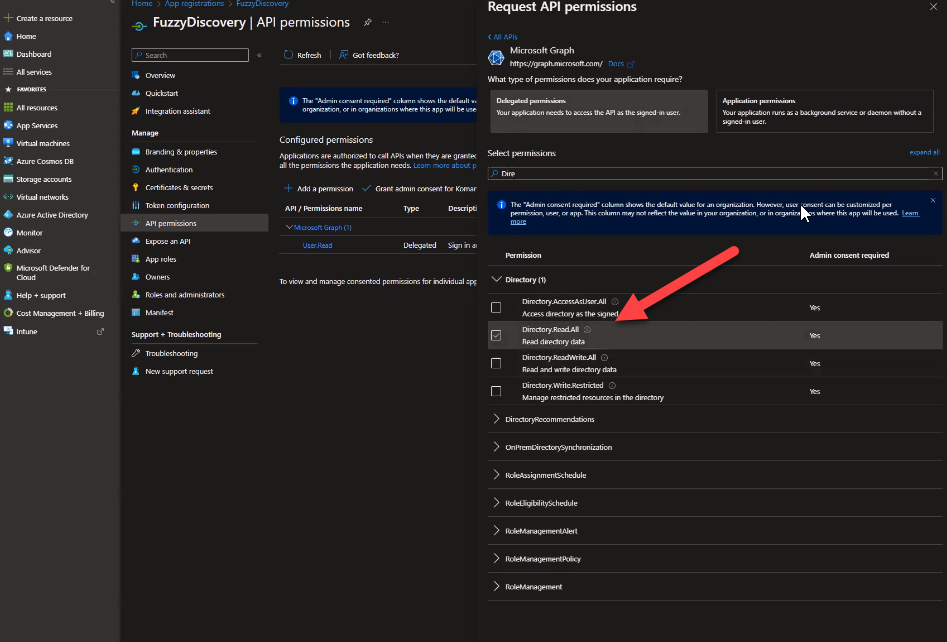
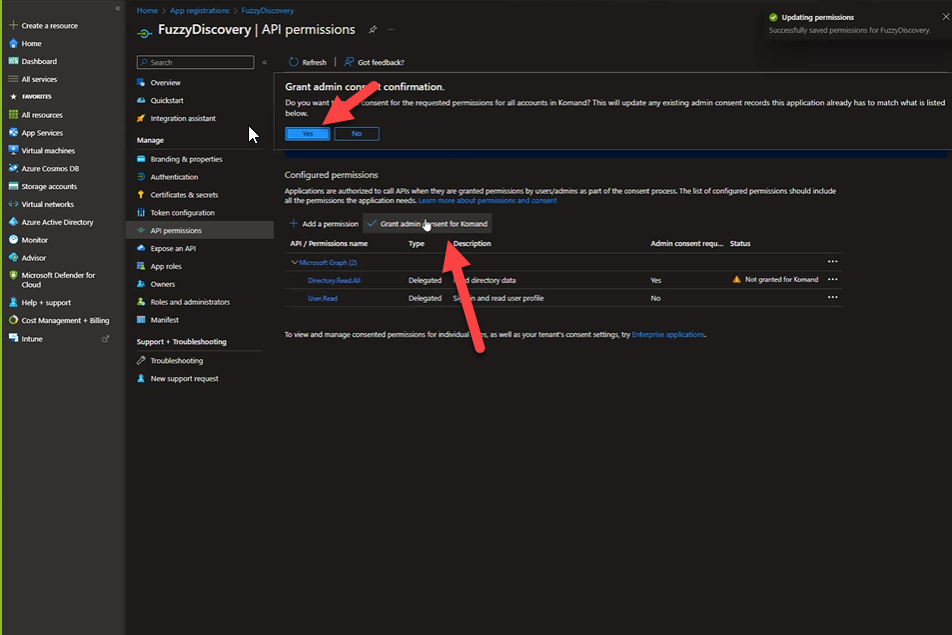
Configure API Permissions
Click on “Add a Permission” Search and Select: “Directory.Read.All”, and click Grant and Consent
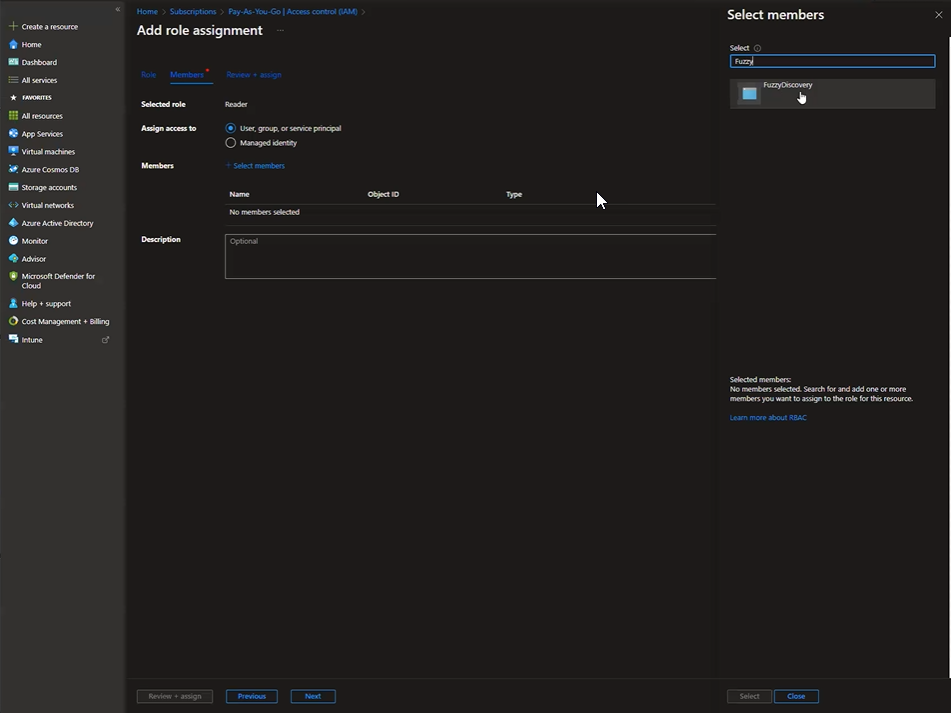
Subscription Access
Click Home, and click Subscription, to set up our IAM role.
In the Subscriptions page, click Access Control (IAM), and click Add Role Assignment under “Grant access to this resource”
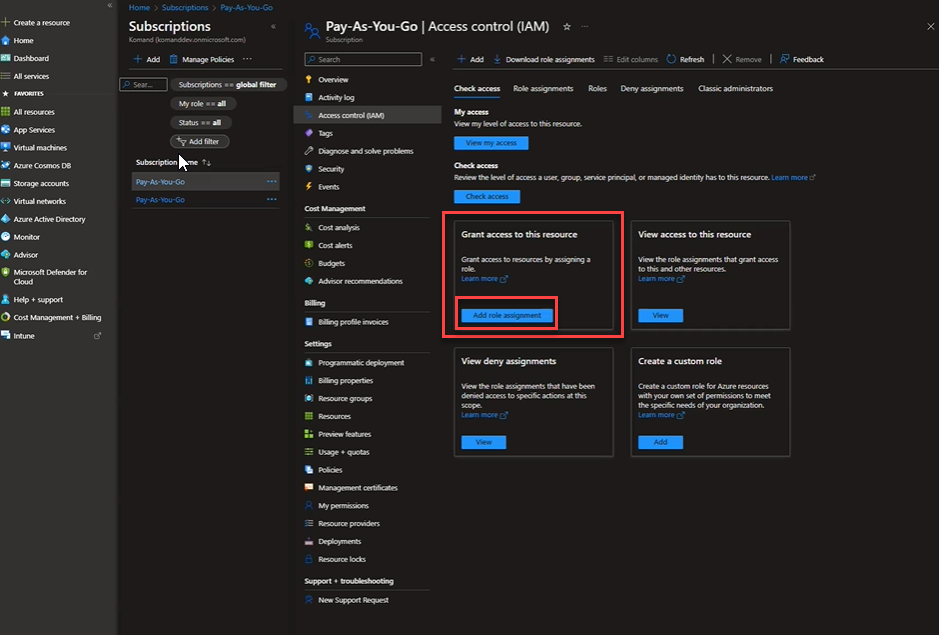
Select the Reader role

Enter the member created earlier. (Example: FuzzyDiscovery)
Configure Console
Prerequisite: Allow outbound access to Azure https://docs.rapid7.com/nexpose/creating-and-managing-dynamic-discovery-connections/#preparing-insightvm
Create a dedicated new Site as a Destination for your Azure assets https://docs.rapid7.com/nexpose/creating-and-managing-dynamic-discovery-connections/#adding-a-microsoft-azure-connection
Create Azure Discovery Connection
Navigate to Administration - click: Discovery Connections
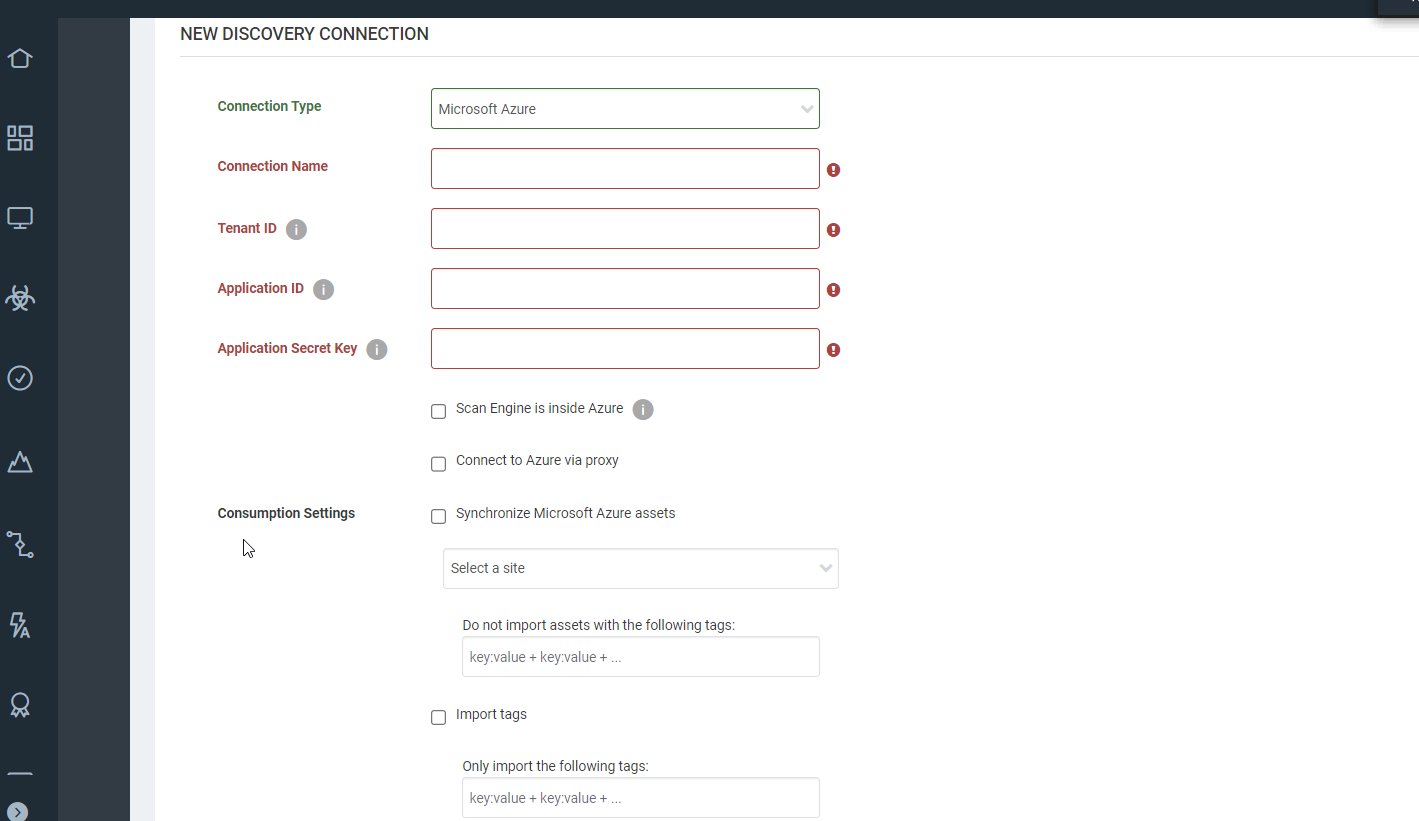
From Azure App Registration fill out:
Tenant ID
Application ID
Application Security Certificate Value previously generated in Azure
Please note: In the case the secret was not saved previously, a new secret will have to be generated, and the previously generated secret can be revoked.
Troubleshooting Tips:
In the InsightVM console logs, review the eso.log for any errors and provide logs to support via a case.