In Part 1, we talked about the need for organizations to test their security programs by performing social-engineering campaigns with their employees so they can understand employee susceptibility to these kinds of tactics, the potential impact to the organization of this kind of attack, and develop methods of defending against a real attack. We spoke about the need for accurately simulating threat actors by setting up an Asterisk PBX server and configuring a SIP trunk in order to communicate with a chosen service provider. We discussed how to create an extension, how to manually set your caller ID, and how to interact with your brand new SIP trunk with Linphone, a popular open-source softphone application.
This post will take it a step further. We will discuss how to setup a DID external telephone number, configure a DISA and forward your call to your PBX, and how to setup an extension configuration to create a menu for you and your users to automate the spoofing process. This way, you can dial a telephone number, enter (via touch-tone) the telephone number you want to spoof, and enter the telephone number you want to call.
And just to be completely and totally clear: The techniques described here are useful for bolstering your credibility when performing a penetration testing engagement that has a social engineering component. Spoofing your caller ID isn’t illegal in the United States, but misrepresenting your identity can be illegal in many situations. So, always get your client’s informed consent before tricking their employees. Always, always, always.
Alrighty, with that out of the way, let’s get started!
Setting up DID with your Service Provider
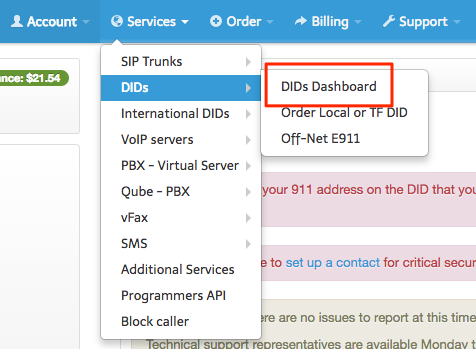
This step will be done through your service provider. You need to choose your external DID telephone number which will be used to externally dial in to your PBX. If your provider has a login portal like mine, you should be able to set this up online. Here’s an example of what it looks like on my provider’s portal:
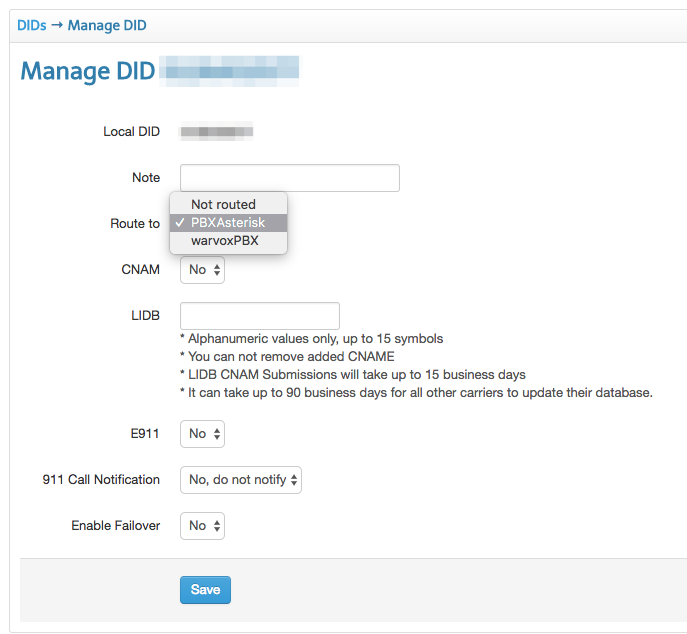
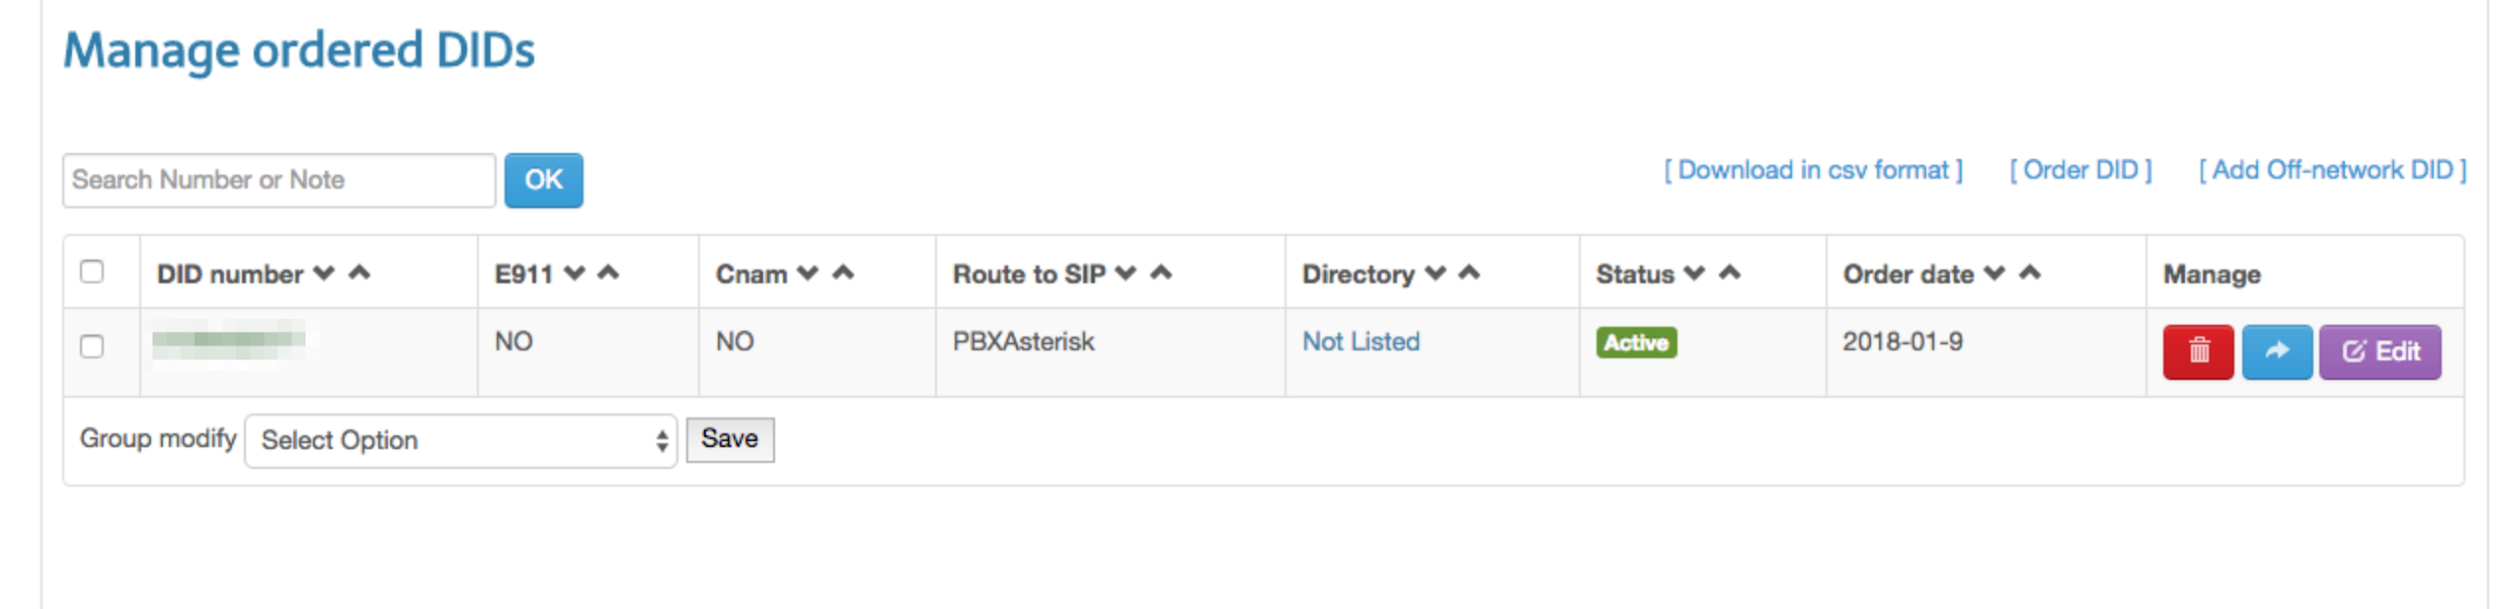
These DIDs should not be very expensive. My service provider charges about 50 cents a month. Once you’ve got your DID telephone number, you need to be sure to route your DID to the Trunk we setup on the service provider earlier. This should also be possible through your VoIP provider’s portal. Here’s an example of what routing DIDs looks like with my provider’s portal:
Configuring DISA to Route Internal DID Calls to Internal Extension
With this step, we’ll be setting up the bridge that will link the external phone number to your PBX. For network engineers, this is functionally similar to setting up a VPN. You’ll need to ensure the DISA module is installed in your version of Asterisk.
- Applications → DISA
- You can install this plugin by:
- Admin → Module Administration.
- Select Standard, Extended, and Unsupported and click ‘Check Online.’
- You can install this plugin by:

- Once installed, navigate to Applications → DISA

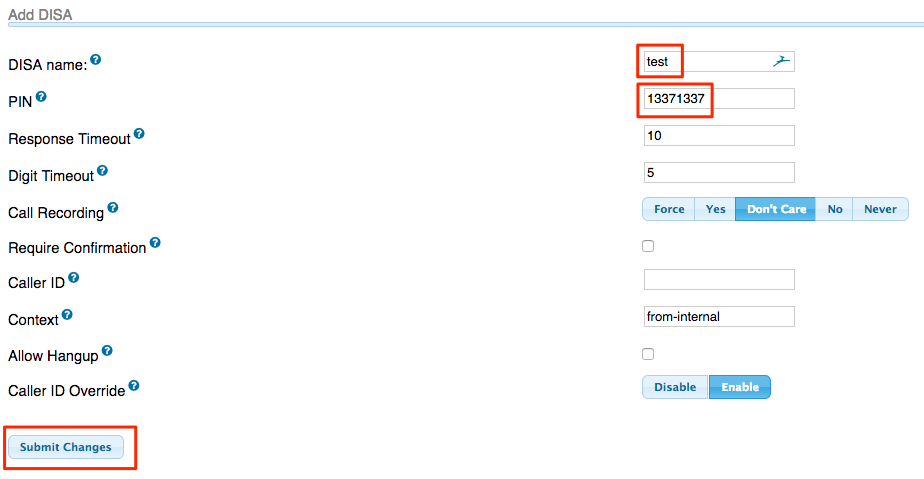
- Click ‘Add DISA’
- Create a name.
- Add a PIN to authenticate when dialing in to your DISA.
- Everything else should remain default.
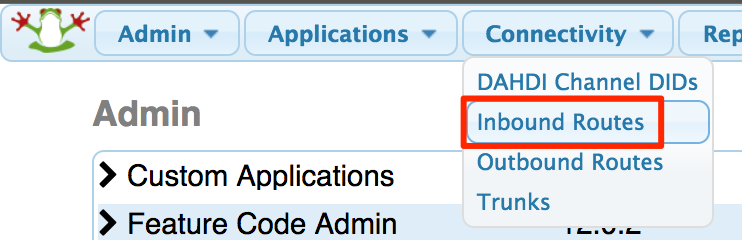
- Connectivity → Inbound Routes
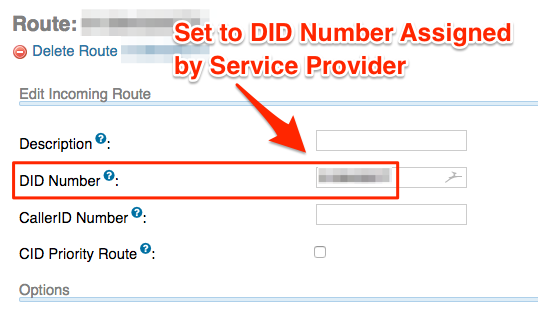
- Enter your DID telephone number provided from your service provider.
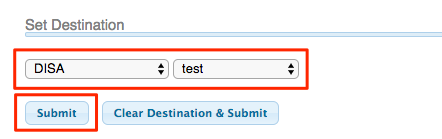
- Set Destination to the DISA we created earlier.
Writing Custom Extension to Spoof Calls on the Fly
Shoutout to Ventz from vpetkov.net for his blog on spoofing caller ID on the fly. I largely based my configuration off his example provided here:
Custom Asterisk configurations must be saved in ‘/etc/asterisk/’ and contain ‘custom’ in the name (e.g., vim /etc/asterisk/extensions_custom.conf). The following configuration answers the incoming call from our external dialed in DISA, reads the instructions (audio file), accepts the user input, and dials the user-specified number with the assigned user-specified caller-id:
`1 [from-internal-custom]
2 include => proof-of-concept-custom

3 [proof-of-concept-custom]
4 exten => 1,1,Answer
5 exten => 1,n,Wait(2)
6 exten => 1,n,Playback(custom/welcome)
7 exten => 1,n(collect),Read(digito,,10)
8 exten => 1,n,Set(CALLER ID(number)=1${digito})
9 exten => 1,n,Set(CDR(outbound_cnum)=1${digito})
10 exten => 1,n,Answer
11 exten => 1,n,Wait(2)
12 exten => 1,n,Playback(custom/call)
13 exten => 1,n(collect),Read(digito1,,10)
14 exten => 1,n,SayDigits(${digito1})
15 exten => 1,n,Set(OUTBOUND_GROUP=OUT_3)
16 exten => 1,n,Playback(custom/dialing)
17 exten => 1,n,Dial(SIP/<sip trunk name goes here>/${digito1},300)`
The configuration answers the call then waits two seconds. The file “welcome” is then played, which is located in /usr/share/asterisk/sounds/custom/welcome.gsm. The system then waits for user input, accepting up to 10 digits to be entered. The user submitted digits are then assigned to the outbound caller ID variable. The system then reads back the input submitted by the user, plays the /usr/share/asterisk/sounds/custom/call.gsm file, and assigns the user input to the destination phone number variable.
Conclusion
All of this information took me a few years to learn. Not because it was difficult, but mostly because I didn’t know I had a need for it, I had a different system/process in place for spoofing caller ID, and the information for how to spin up the infrastructure wasn’t readily available. Hopefully this will help you out with getting your spoofer rig setup. If you have any questions throughout the process, feel free to reach out via Twitter (fr4nk3nst1ner). We follow strict guidelines which are documented and approved in our customer contracts and only perform Vishing and spoof Caller ID after authorization has been provided. Remember to follow the rules, hack only authorized folks, and have fun with your next telephone pretexting gig!