When you first start setting up InsightVM, the No. 1 thing you should be focused on is building sites, running scans, and kicking off reports to start building your vulnerability management program. Once you start feeling comfortable with the vulnerability management flow, policy scanning should be the next thing to look at.
Getting started with policy scanning
Note: When we talk about policy scanning in InsightVM, we are talking about system hardening guidelines generally from the Center for Internet Security (CIS). We also include FDCC, DISASTIGS, USGCB, and custom upload options.
InsightVM’s policy management features are robust enough to do both targeted and system-wide scanning to see how your assets stack up against a policy guideline. Notice the word “guideline,” here—most policies are not hard-in-stone requirements and generally need to be tuned to your organization's internal requirements. InsightVM has a great cloud-based policy editor that will make it easy to do these customizations as needed. Customizing a policy template may be the best option early on, as most built-in policies may be a little too aggressive when just starting out.
I generally recommend that customers focus on a best impact strategy that requires minimal effort so you can focus on vulnerability management. In this blog, we are going to talk about a recommended workflow for doing basic policy scans for OS-specific policy scanning. This should allow you to start planting the seeds for success early on. Most organizations have four or five primary operating systems, which will equate to four or five additional sites with this workflow.
Building a policy scanning workflow
We are going to start things out with the “CIS Microsoft Windows Server 2019 Benchmark Level 1 - Member Server” as an example template. Many companies are going to have some type of Microsoft Server in their environment. The difference between “Level 1” and “Level 2” is that a “Level 1” policy is intended to be more practical without impacting usability, while “Level 2” is designed to provide a “defense-in-depth” hardening and may impact the usability of the server. While most customers lean toward the “Level 1” in the beginning, it’s completely up to you which one you go with.
Note: This workflow assumes that you have already done some vulnerability or discovery scanning, have assets in the database, and have good credentials for these assets. Policy scanning requires 100% certainty credentials with registry access, or it will not work.
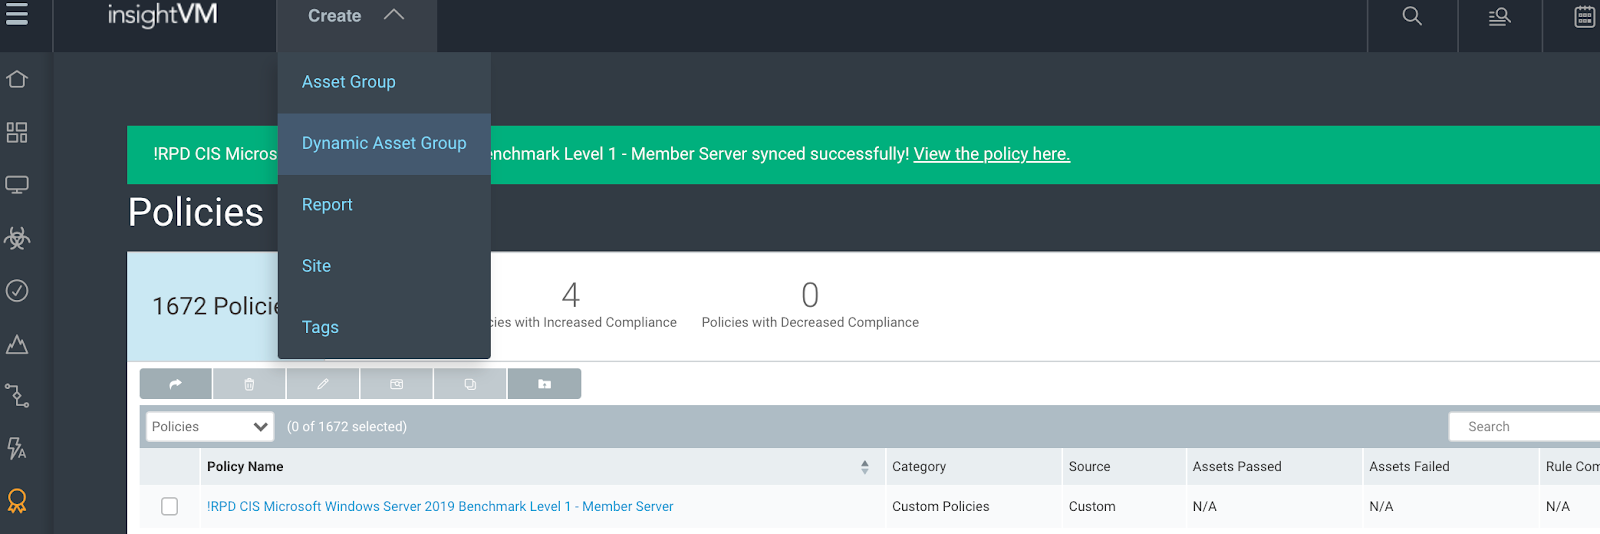
In the InsightVM console, you will see the Policies link on the left menu. After clicking on it, search for “Server 2019” in the upper right, find the policy you want to copy, select it, and hit the copy button at the top of the screen.
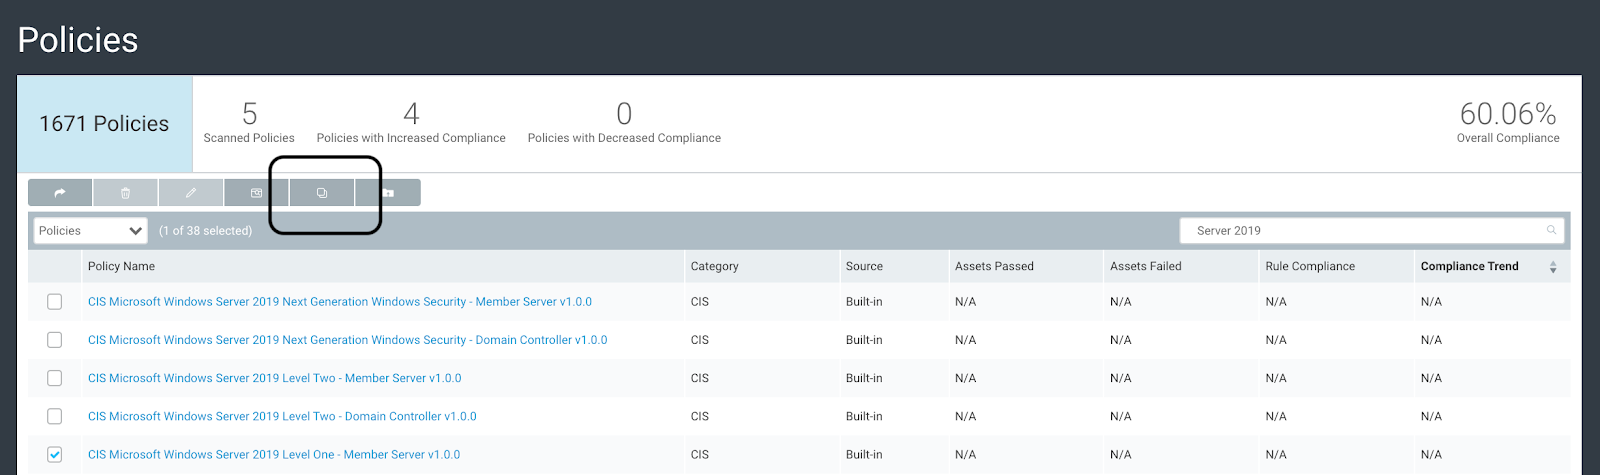
Just like scan templates, we cannot edit the built-in policy templates, but we can “Copy” them, then make all the changes we want to.
Customizing the policy for your organization
Next, you will be redirected into the cloud-based Custom Policy Builderpolicy editor. I recommend first changing the name, adding an explanation point (!) to the beginning, and removing Copy.
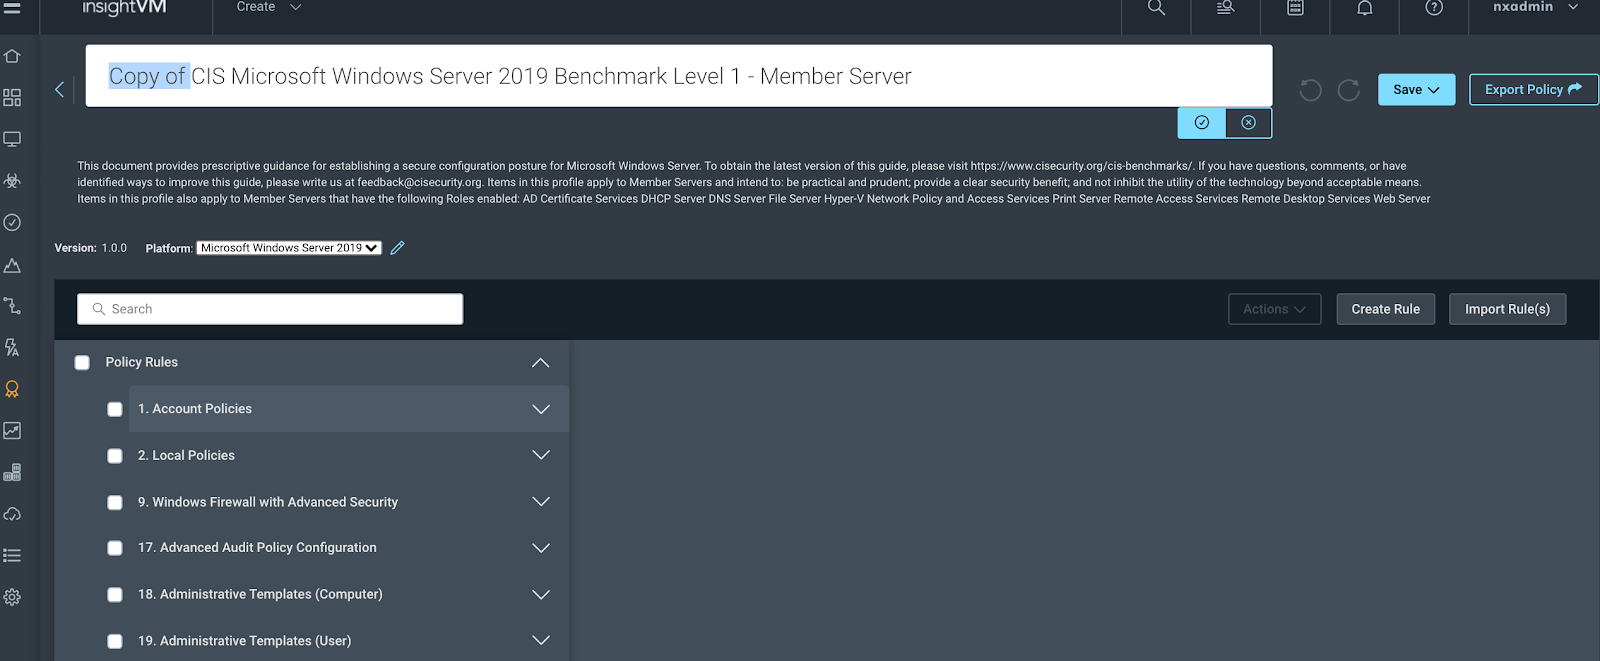
Now we can dig into the different rules in the policy and edit them as needed:
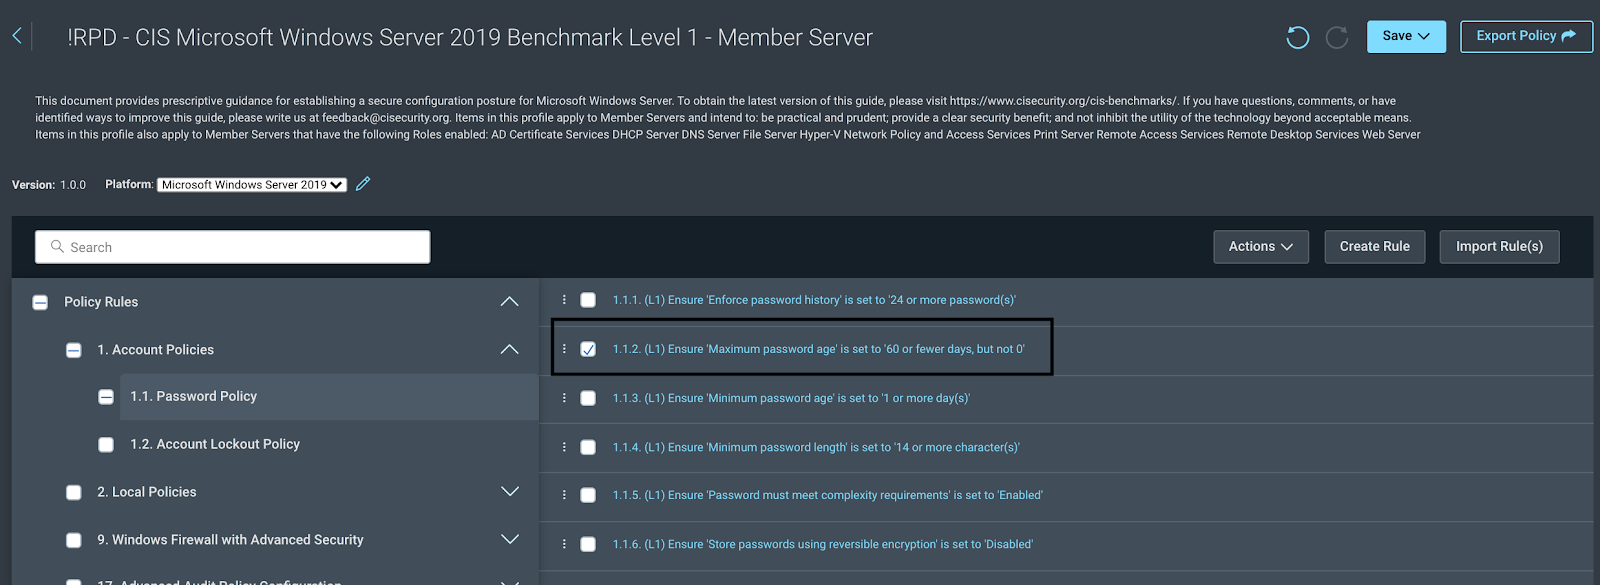
This will take you into the policy rules, where you can make any changes as needed:
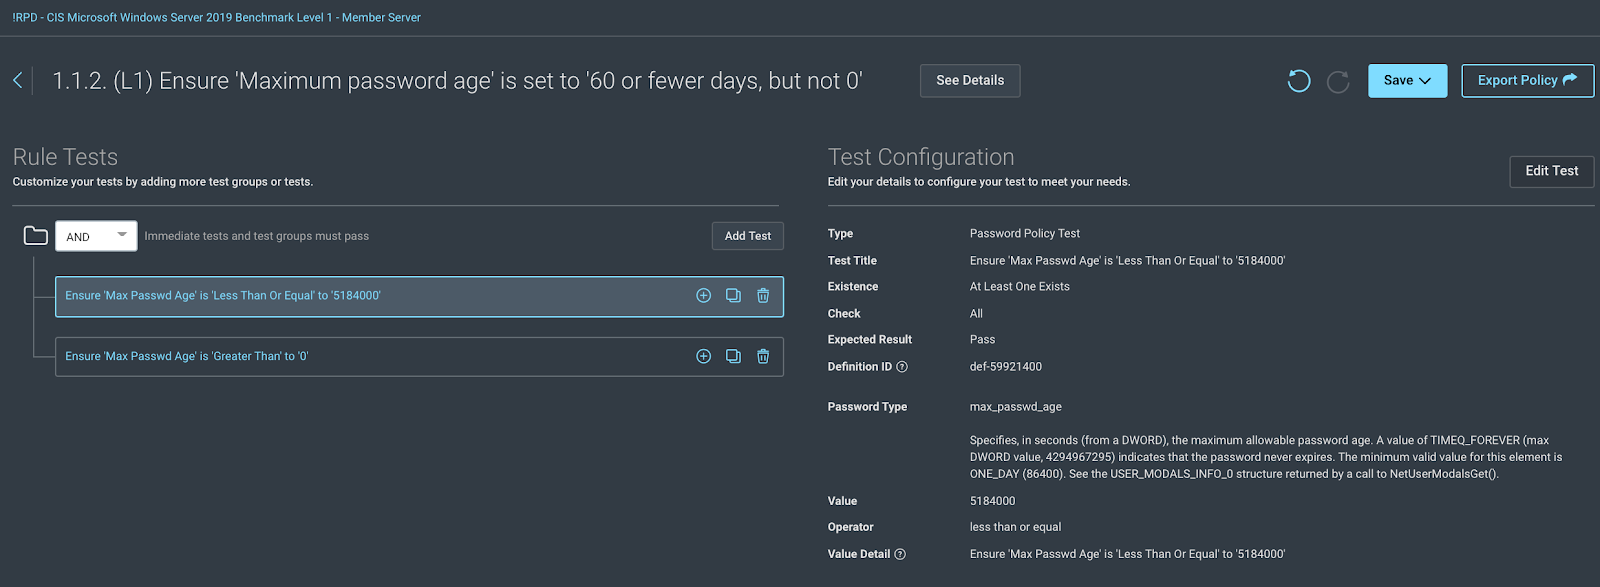
Click here for more information on some example edits.
Once all changes are done, hit the “Save” button at the top and click the “Sync and Save” option. This will sync the policy from the cloud-based editor back to the console, where we can use it in a scan template!
Now that we have our custom policy template ready to go, the next step is to find one or many Windows Server 2019 assets. (At this point I am assuming you have already been doing vulnerability scanning and most of your environment's assets are in the database. If they are not, this will not work.)
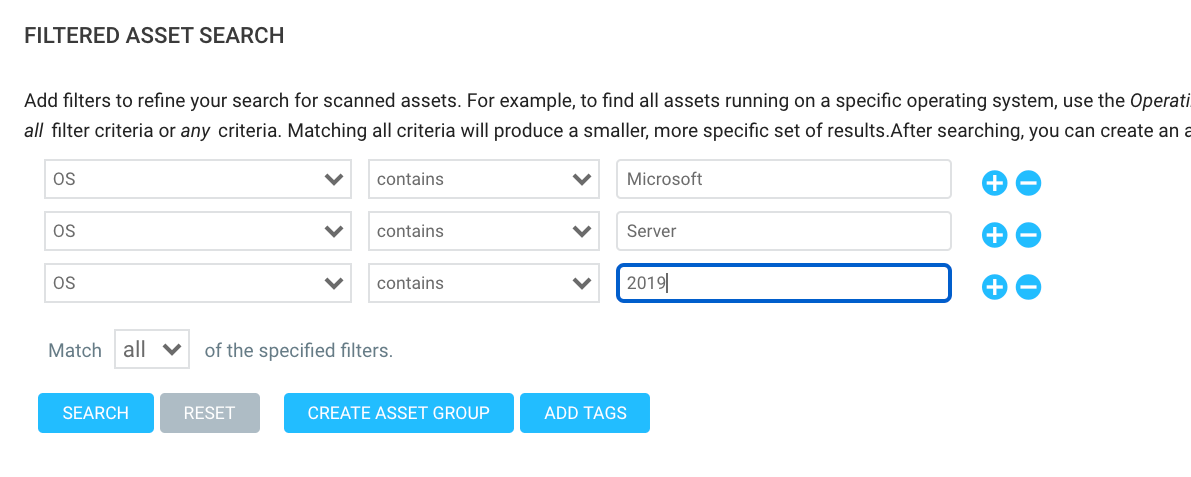
Using Dynamic Asset Groups to find all assets running on your target OS
Let’s create a Dynamic Asset Group by selecting the quick select (Create) at the top of the screen and select “Dynamic Asset Group.”
Recommended settings are as follows to find all Microsoft Server 2019 boxes in your environment:
Once it is set up, click “Create Asset Group,” name it, and save it. We can also do an asset search for a golden image scan, if we want, or just use the DAG. Either way!
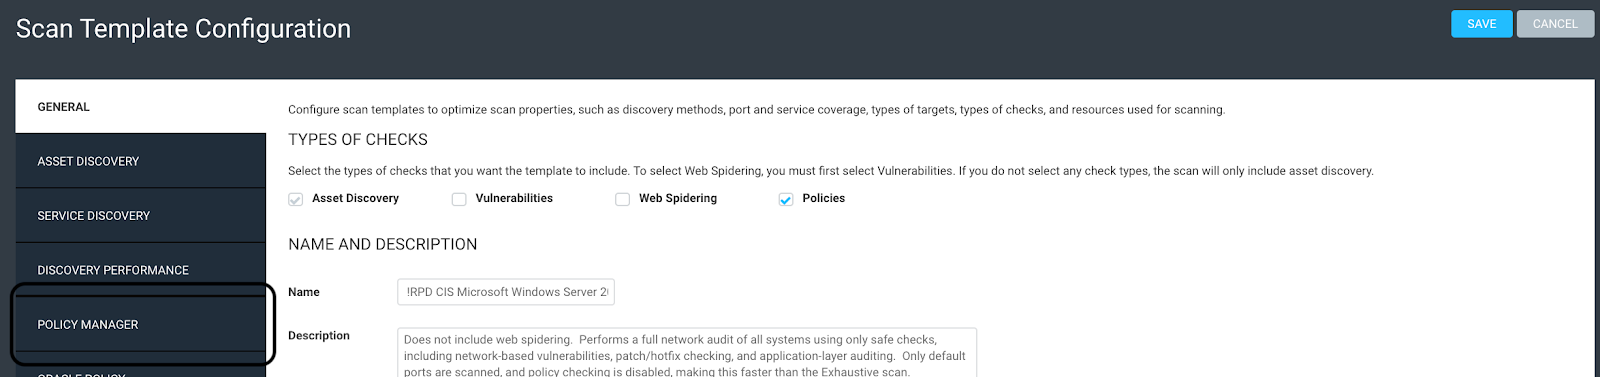
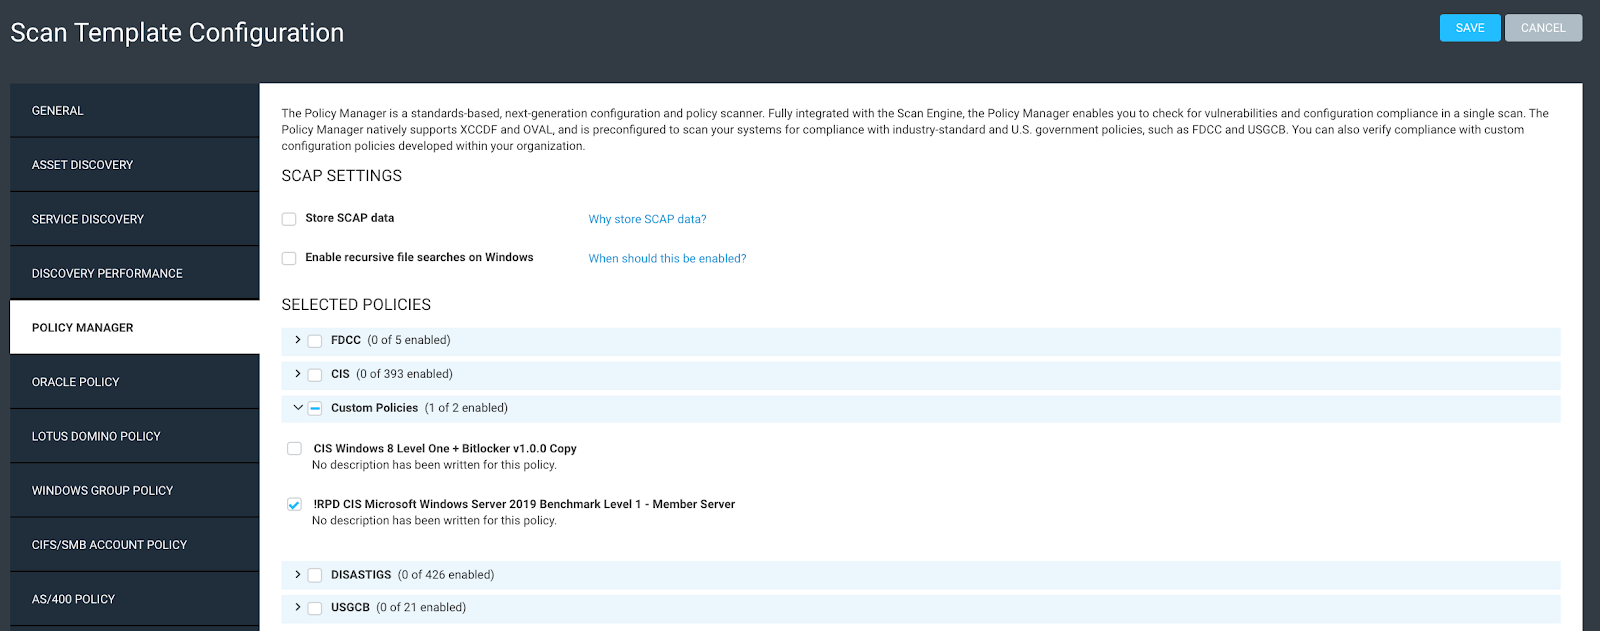
Now we will go to the Administration page, Scan Templates, and click on Manage to view the scanning templates. Select whatever scan template you are using for primary vulnerability scanning, copy it, uncheck Vulnerabilities (at the top), make sure Policy is checked (at the top), and change the name to the same name you called your custom Policy template. The Description is up to you. Then, click on “Policy Manager” on the left:
Next, find “Custom Policies,” expand it, select your custom policy, and hit save!
Now we have a scan template ready to go and set up with a custom policy that we can always go back and edit anytime we want to. We also have a Dynamic Asset Group ready to go with all of our target servers in it for scan and reporting scope!
Creating a policy scanning site
Next, we will need to create a policy scanning ‘site’:
- I recommend calling it the same name as your Policy
- Scope it with the DAG we created (or a single asset for Golden Image scanning)
- Ensure the best possible credentials are selected/added
- Select the new Policy Scan template
- Select your Engine
- Set up any alerts as needed and scheduling, then hit Save or Save & Scan
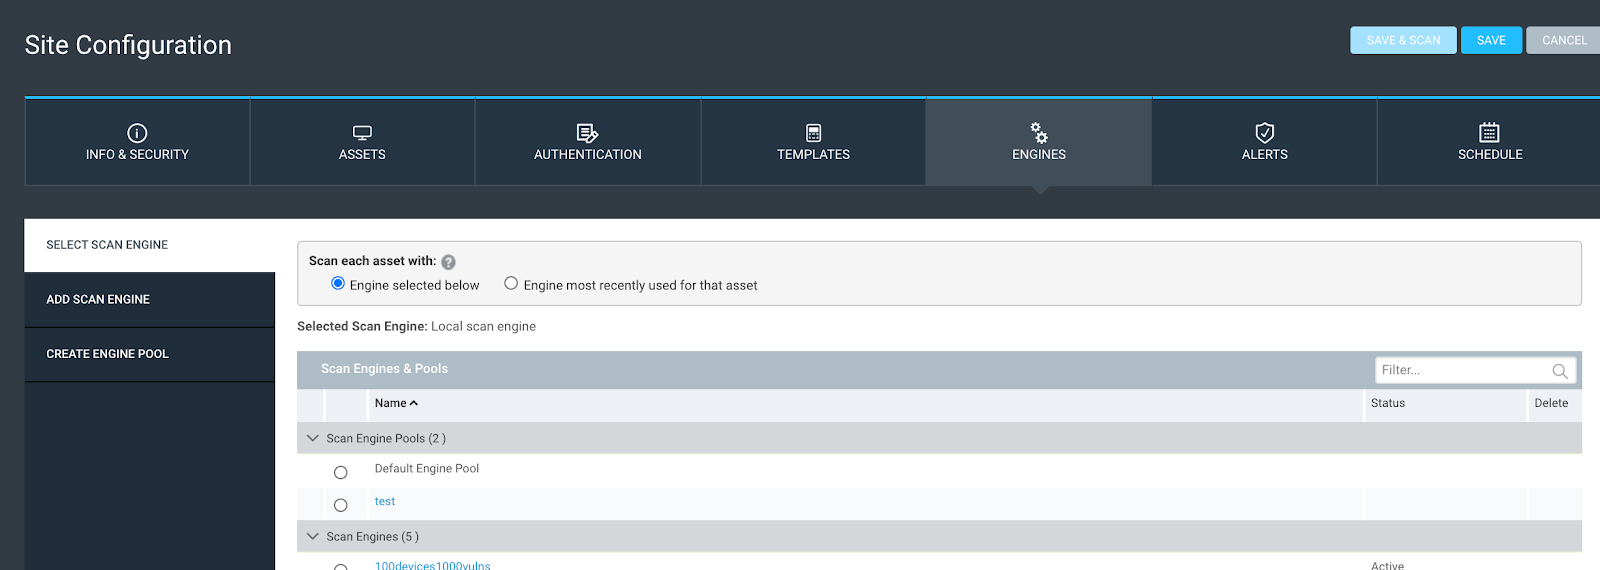
The reason why I went with the screenshot above for our site example is to show you a very cool feature that doesn’t get much use unless you are scoping a site with a DAG. That is the ‘Engine most recently used for the asset’ option. Even if you have multiple engines throughout your environment, in different networks behind firewalls, whatever it may be, the Dynamic Asset Group will not care, because we scoped it only using the OS, which means we can use this feature to dynamically use the last engine used for each asset for holistic policy-based scanning. This can be a very cool feature allowing us to scan all of a particular OS in the entire environment with a single site (which means less complexity!).
Custom policy reporting
Once the scan finishes, the next step is to look at the results. There are three or four good reporting options built into the InsightVM reports, and the report I find that most customers really like to use is the ‘Policy Details’ report.
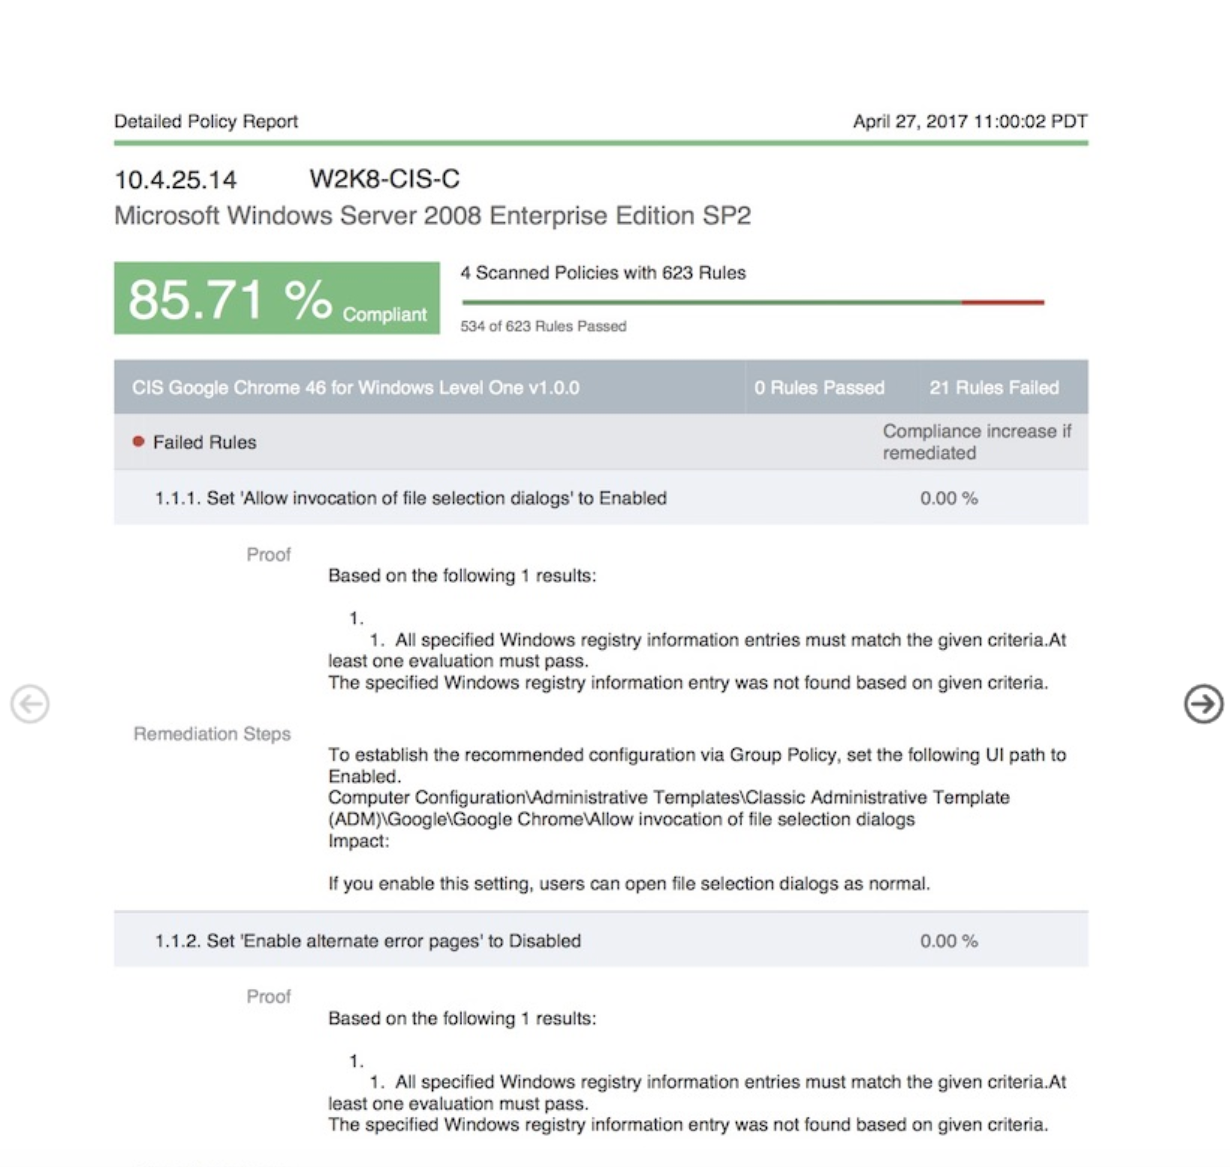
First, this report is highly detailed so I do not recommend running it against a ton of assets, since it’s going to be huge. However, against a single, golden image asset, it can be amazing. One could literally walk through this report and harden a box. It will still not be an easy challenge (even for a single asset I’ve seen this report exceed 400 pages). But I like it because it has the proof (to show why we found this finding) and the remediation steps for every rule being tested for the asset in question. This is basically the report I recommend sending to remediation folks. For higher-level understanding and reporting, I highly recommend using the UI options in the policy tab, as they can be very insightful and complete!
In summary, we started out by ‘copying’ a built-in OS based, policy template so we could have present and future editing options for that policy template. We then saved, synced, and added that ‘policy’ template to a custom ‘scan’ template. We also created a Dynamic Asset Group to help scope a site based on the OS, combined with the custom scan template to scan the assets in scope. Once we had data, we then created a report that can be used to harden one or many systems.
I’ve been working with many customers over the years, and of the many possibilities we can do with scanning policies, this has been the No. 1 requested policy workflow. Hopefully this helps get you going in adding some policy scanning to your vulnerability management program!