In this modern age, technology continues to make inroads into all sorts of industries. Everything from smartphones to late-model automobiles to internet-connected toasters requires software to operate, and this proliferation of software has brought along gaggles of software developers with their tools-of-the-trade. All this technology —not to mention the people utilizing it— can result in an increased attack surface for organizations doing software development.
In this blog post, we’ll explore how to use a custom resource script in a Metasploit Pro task chain to check for vulnerabilities in tools and services related to software development. Because we will only be checking for the presence of vulnerabilities (and not actively exploiting vulnerabilities), the task chain we’ll create is safe to use in most every environment.
Uploading a Resource Script to Metasploit Pro
Before we set up a task chain, we need to upload our custom resource scripts to Metasploit Pro.
NOTE: Metasploit Pro versions 4.14.1-2017103001 and higher already have the dev_checks.rc resource script, so you can skip this step and go right onto the next one.
For this task chain, we have one resource script to upload:
- dev_checks.rc: this script checks for vulnerable NodeJS, distcc, Jenkins, etc. instances
Click the above link to the script and download it to your system where Metasploit Pro is installed.
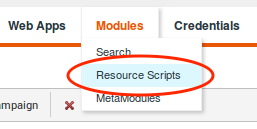
Next, we’ll need to import this resource script into Metasploit Pro. Go to your workspace and click on the Modules tab. You will see the Resource Scripts option as follows:
Click it to enter the Resource Scripts view, then click on the Upload button:
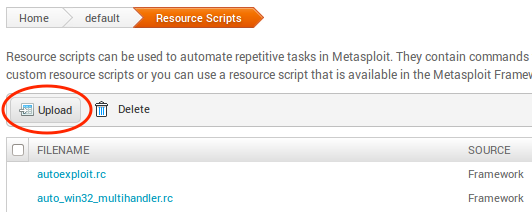
Go ahead and select the dev_checks.rc resource script you just recently downloaded. The new script should appear on the list, and now you are ready to move on to creating the task chain.
Getting Started with Task Chains
Using the dev_checks.rc script, let’s set up a task chain to automate the following:
- Do an Nmap scan to locate systems currently in your network
- Launch the dev_checks.rc script to check for vulnerabilities on those systems
- Generate a report of your findings
The Task Chains feature can be found in Pro’s workspace. It’s the last button next to Exports:

Once you click on that, the menu should expand. The Chains option is what you want to select:

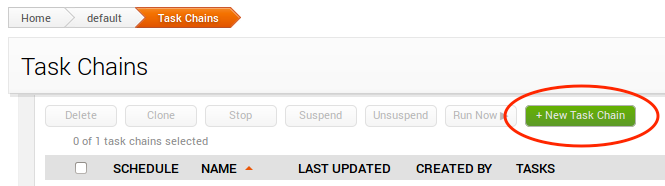
We’ll need to create a new Task Chain, which you can do by clicking on the green New Task Chain button:
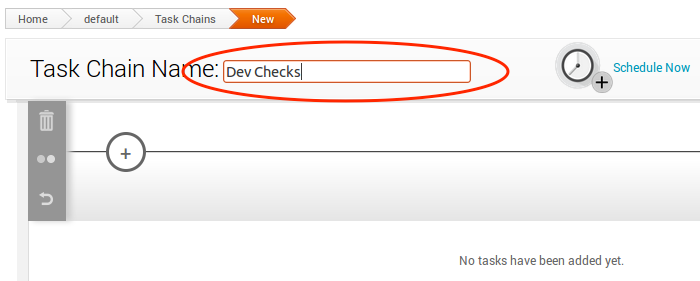
Now pick a name for your task chain. For our example, we’ll name it “Dev Checks”:
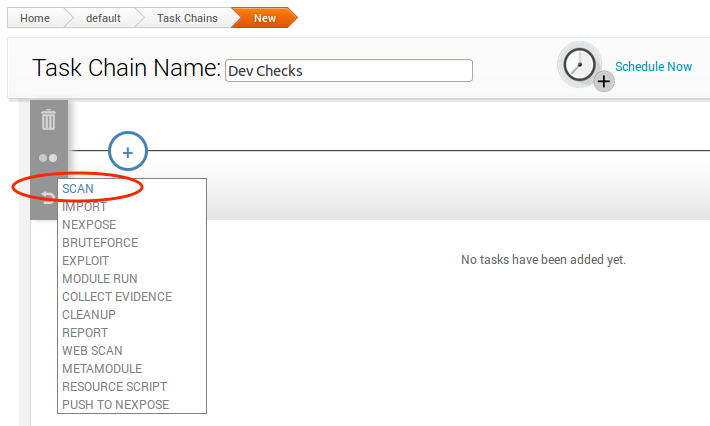
Task 1: Set up the Nmap Scan
We’ll want to perform an initial scan of the network to find out what systems are currently connected. In your newly-created task chain, click on the plus sign to assign the first task of the chain, and choose Scan, like this:
You’ll notice that the Scan task has a number of settings. It is recommended that you at least select/configure the following:
- Target Scan: set the address range you want to scan.
- Discovery Settings: uncheck all boxes in order to reduce scan time.
And we’re done configuring this task. Let’s move on to the next one.
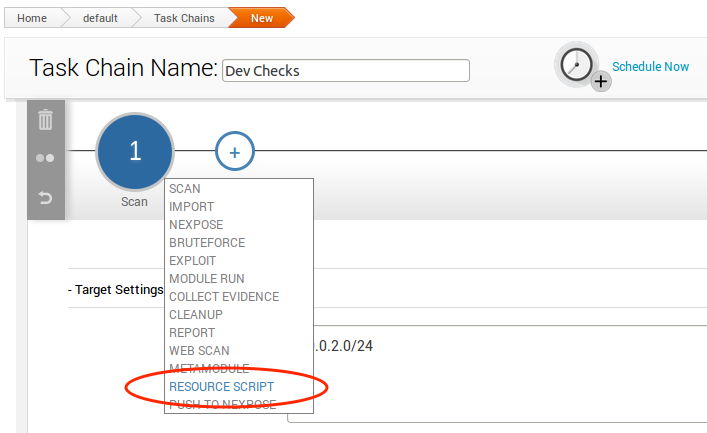
Task 2: Set up the Dev Check Resource Script Task
To create the next task, click on the plus sign again and then choose Resource Scripts this time:
The Resource Script option will take you a list of all of the resource scripts available for use. Choose the dev_checks.rc script:
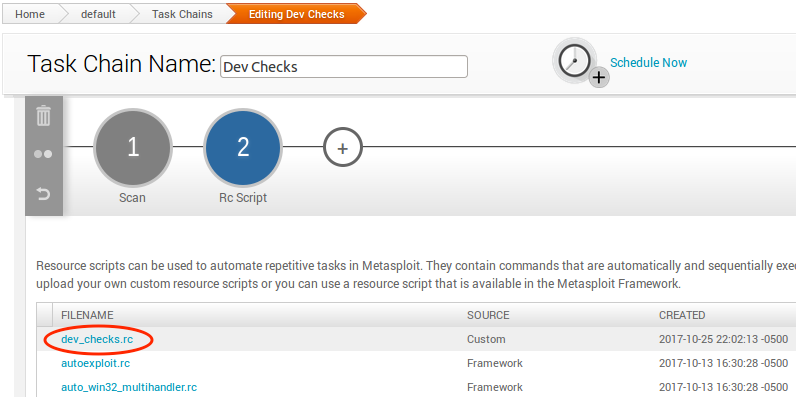
Once you select a resource script, you will see that you can set parameters and also view the source code of the script. For dev_checks.rb, there are no parameters to set. And the source code is view-only, you cannot edit it.
At this point, you are all set for task 2. Let’s move on to task 3.
Task 3: Generating a Vulnerability Report
Our final step in the task chain is to create a validation report. The report will contain information about the potential vulnerabilities discovered. Click the plus sign and select Report, like this:
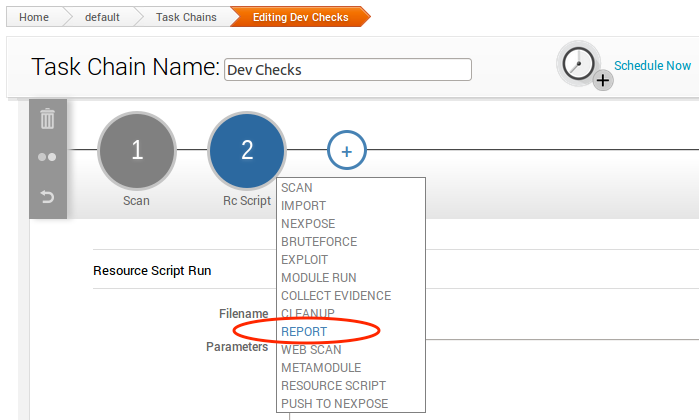
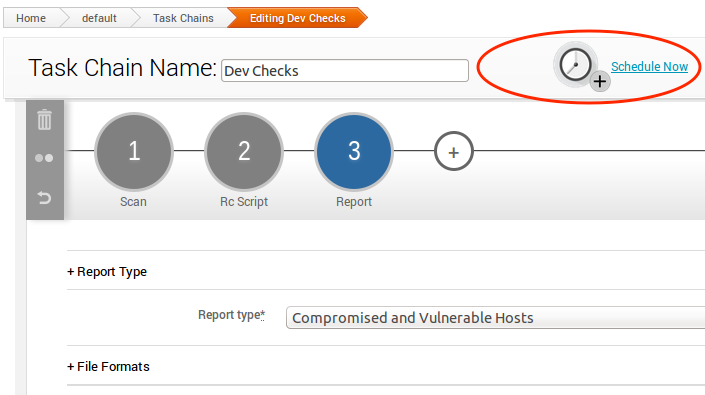
The ideal report type in this case should be Compromised and Vulnerable Hosts. The report options should be pretty self-explanatory, so we can leave it to you to decide.
The Report function also has a handy E-mail feature. If you wish to send the report to yourself and/or other people on the team automatically when the task chain completes, go ahead and check that as well.
Scheduling the Task Chain
The last step we need to do is actually set a timer for the task chain. If you scroll up on the page, you should see the Schedule Now button:
Click on this icon, you should see a pop-up like the following, which allows you to set up the time:
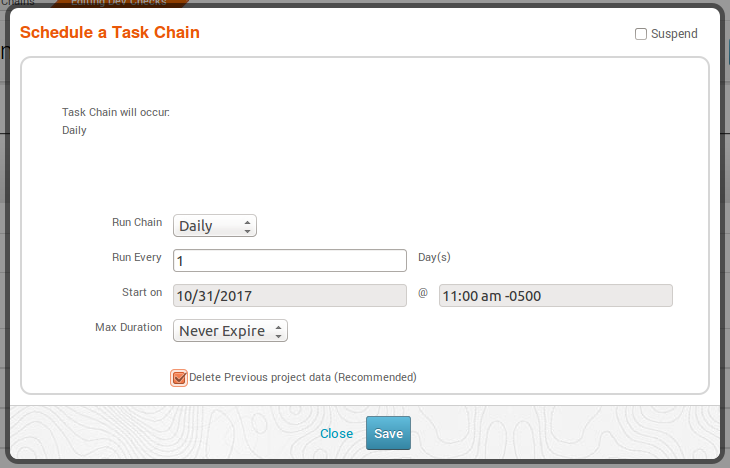
Exactly how frequently this task chain should run depends on your needs, including:
- Number of hosts: the more there are, the longer the task chain will take to complete.
- Network speed: a slow network can increase the time needed for the task chain to complete.
Saving the Task Chain
Finally, we are done configuring the task chain, so let’s save it! The Save button is located here:
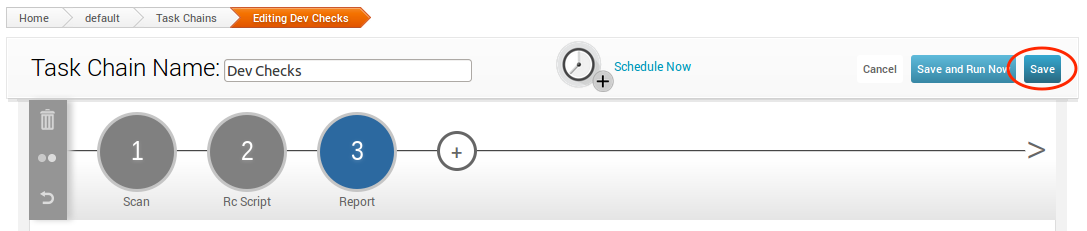
After the task chain is saved, it’s ready to go! Now you have an automated process that will search your network for vulnerabilities related to software development, while you can stay productive doing something else.
Software development is happening in so many places these days, and this user base brings a set of applications and services which should not be overlooked when maintaining a proactive security stance. Remember: it only takes one shell to lead to a full network compromise for the attacker. You need some kind of automated process to always be on the lookout for weakness, and Metasploit Pro’s Task Chains feature is perfect for something that needs to be done repeatedly in order to save you time and money.
If you are a current Metasploit Pro user, we hope you enjoyed today’s blog post on how to use Task Chains to automate checking for vulnerabilities related to software development. For those who have never tried Pro, obviously you are missing out. To fix this problem, you can request a trial version of Metasploit Pro here.
Want to know whenever Metasploit content is posted? Add us to your RSS feed.