A recently discovered severe vulnerability, nicknamed GHOST, can result in remote code execution exploits on vulnerable systems. Affected systems should be patched and rebooted immediately. Learn more about CVE-2015-0235 and its risks.
The Nexpose 5.12.0 content update provides coverage for the GHOST vulnerability. Once the Nexpose 5.12.0 content update has been applied, built-in vulnerability scans will include checks for CVE-2015-0235. If you have regular scans set up to cover your network, they will now check for this vulnerability. Note that the Nexpose 5.12.0 product update is not required to scan for GHOST. Having the content update alone is sufficient.
As of the Nexpose 5.12.0 product update, you can scan an existing site with a different template, and still keep the data from previous scans. If you need to determine as quickly as possible whether your assets are vulnerable to GHOST, you can create a scan template that will focus your scan on CVE-2015-0235 to the exclusion of anything else. Nexpose will check only for this vulnerability with this scan, but will retain data from previous scans about whether your assets were vulnerable to other exploits.
To create the custom GHOST scan template, after the 5.12.0 update, take the following steps:
Create a custom scan template.
- In the Web interface in the Sites section, click Edit to open the site configuration for the site you want to scan.
- On the Authentication tab, ensure the site is authenticating with Secure Shell (SSH). For guidance on permission elevation, see Elevating scan credentials in the Configuring scan credentials section of the Nexpose Help or User's Guide.

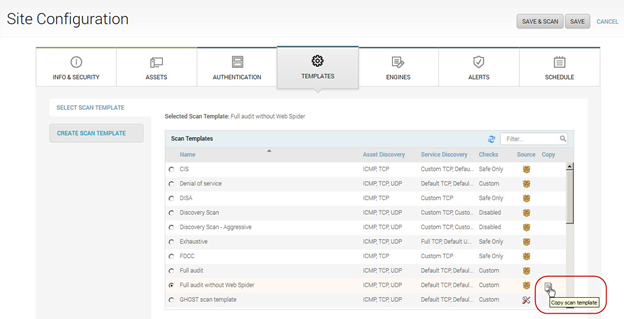
- In the Site Configuration, go to the Templates tab.
- In the Select Scan Template section, find the Full audit without Web Spider template, hover the mouse in the Copy column, and select the Copy icon.
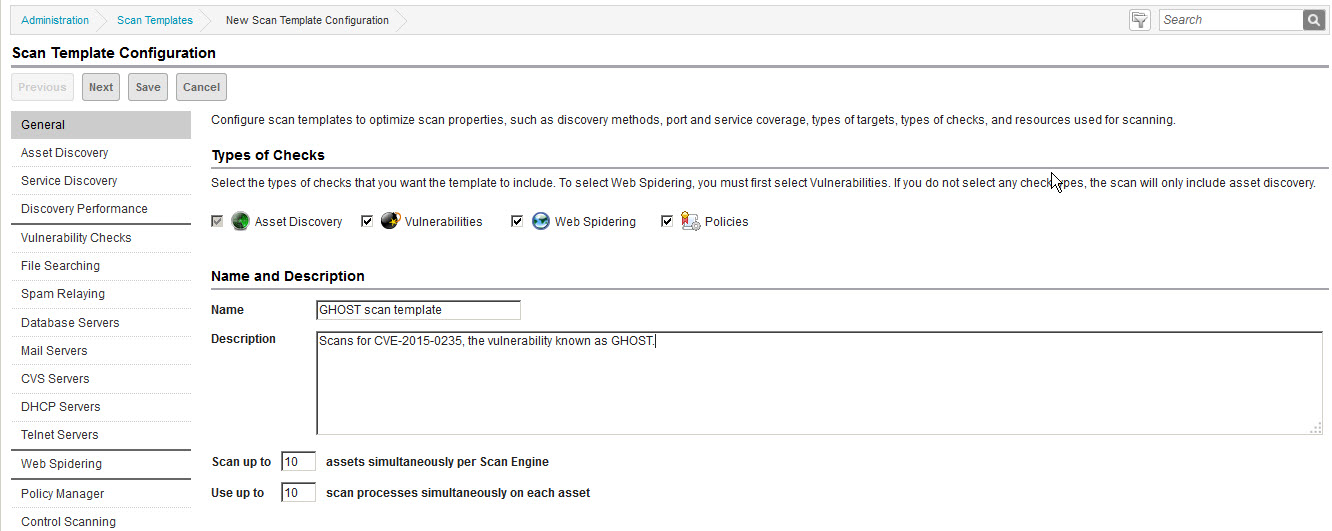
- The Scan Template Configuration opens. Ensure the Vulnerabilities option is selected. Clear the Policies option.
- Edit the scan template name and description so you will be able to recognize later that the template is customized for CVE-2015-0235.
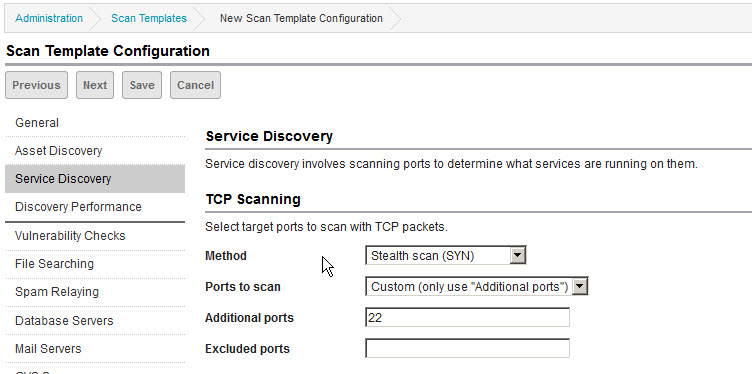
- Limit service discovery to port 22: In the Service Discovery section, set Ports to scan to Custom (only use “Additional ports”) and specify 22 for Additional ports.
- Limit host discovery to port 22: In the Asset Discovery section, specify only 22 for Send TCP Packets to ports and clear the checkbox for Send UDP packets to ports. The Send ICMP “pings” option can be set or not, without a major performance impact either way.
Select only the relevant vulnerability checks.
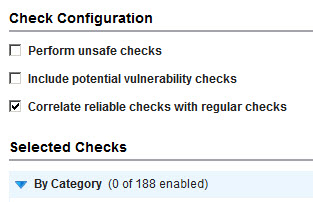
- Go to the Vulnerability Checks page. First, you will disable all checks, check categories, and check types so that you can focus on scanning exclusively for CVE-2015-0235.
- Expand the By Category section and click Remove categories.
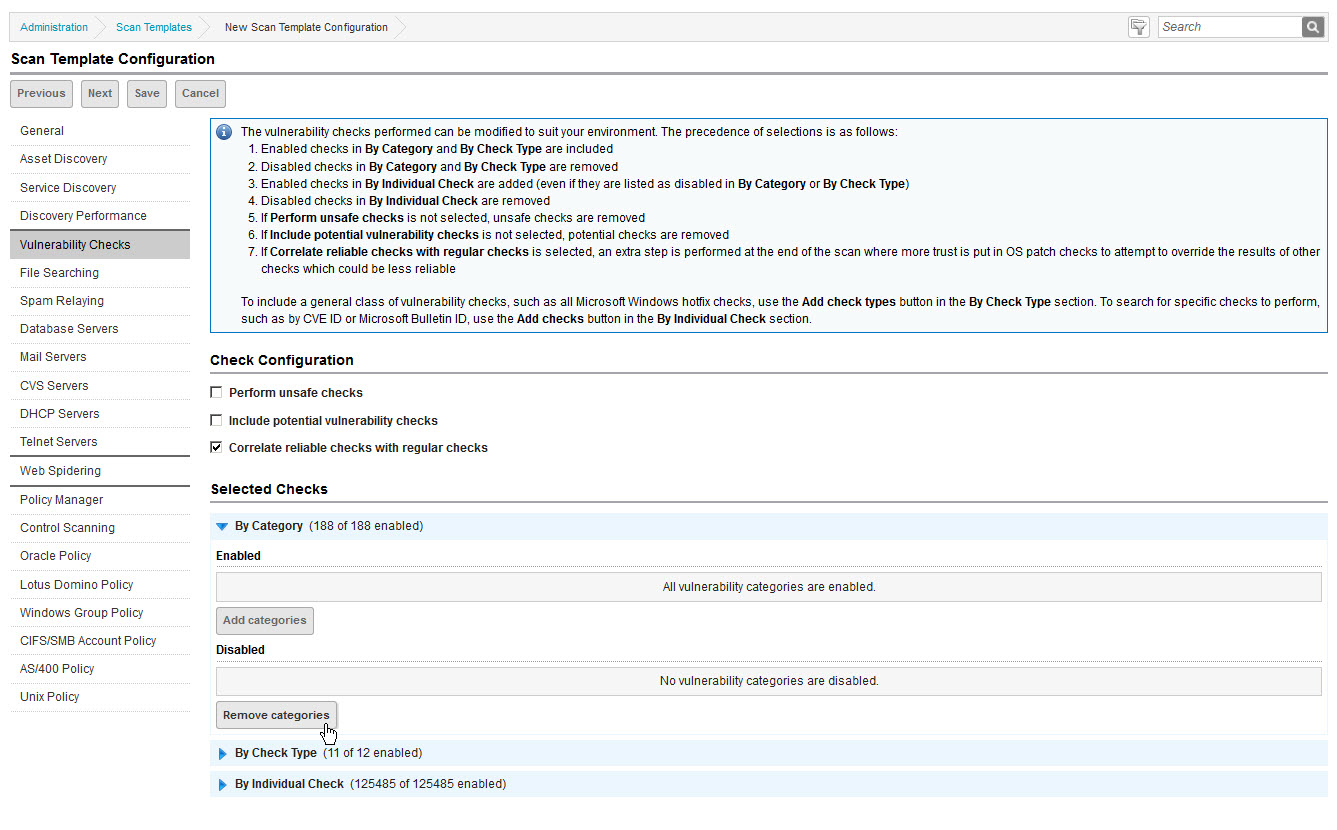
- Select the check box for the top row (Vulnerability Category), which will auto-select the check boxes for all categories. Then click Save. Note that 0 categories are now enabled.
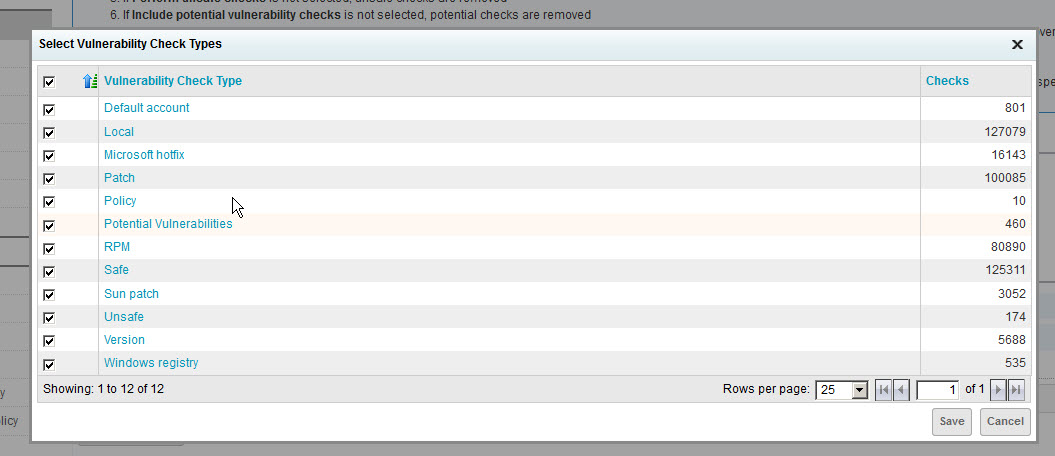
- Expand the By Check Type section and click Remove check types.
- Select the check box for the top row (Vulnerability Check Type), which will auto-select the check boxes for all types. Then click Save. Note that 0 check types are now enabled.
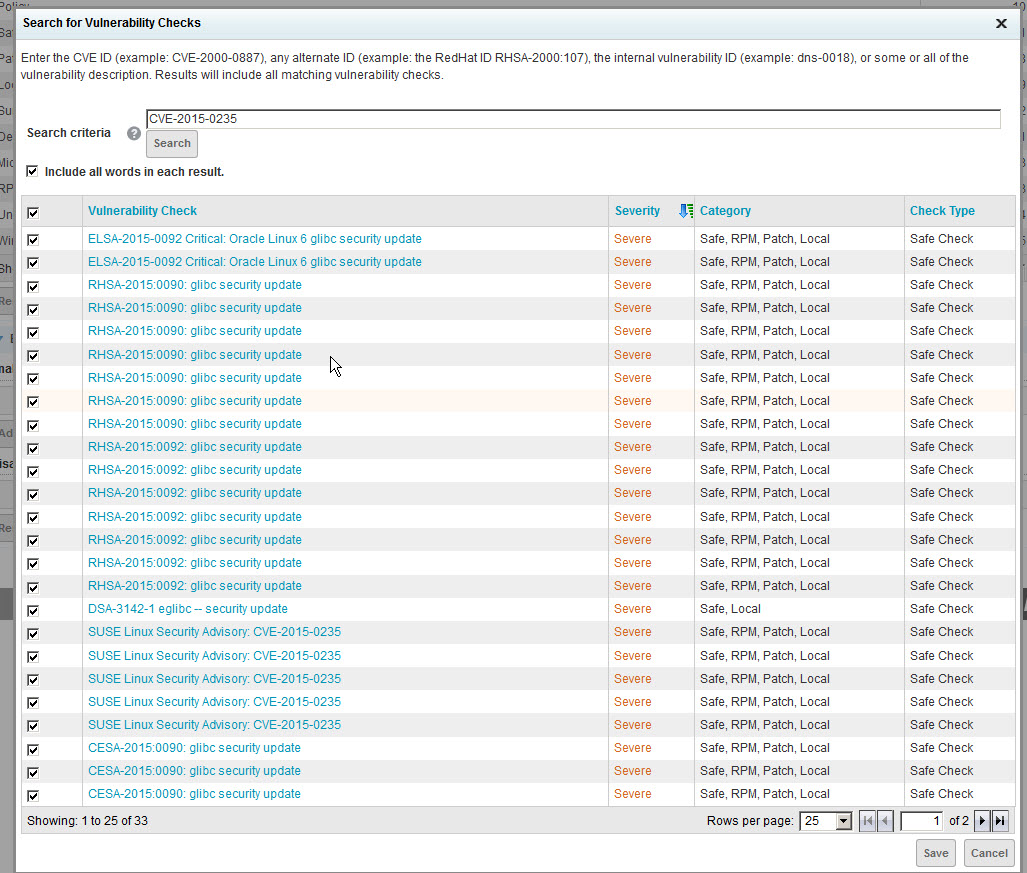
- Expand the By Individual Check section and click Add checks.
- Enter or paste CVE-2015-0235 in the Search Criteria box and click Search. Select the check box for the top row (Vulnerability Check), which will auto-select the check boxes for all types. Then click Save.
- Save the scan template.
Schedule your scan
- In the Schedule tab, select Create Schedule. Ensure that Enable Schedule is checked. Specify a start time and date – to get started right away, specify the current date and a time a few minutes in the future. Select your new scan template. If you only want to run this scan once, clear the Repeat scan every checkbox. Click Save.
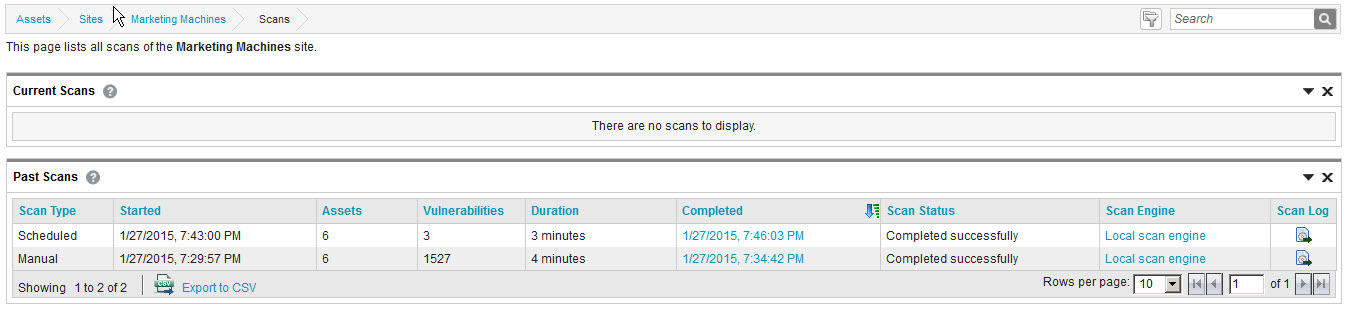
Once your scan has run, you will see the results of all scans in the scan history for the site. The vulnerabilities and risk score for each asset will reflect the most recent check for a given vulnerability, giving you a thorough picture of your risk based on this specific scan and your historical scans of that site.
You can create a report specific to the GHOST vulnerability so you can focus your remediation. Learn more and get the queries needed to create the report in this page.