Logging from the client side of a web application can seem like a challenge. The web browser exposes everything to the user. There is no way to hide anything delivered to the client from prying eyes, including your log token to your Logentries log. There is no reliable way to secure the token since everything is in plain text in the browser. Logging directly from a client browser can put the efficacy of your log at risk.
The vast majority of users will ignore that information. Unfortunately, you do risk exposing the token to that small number of users that may use this as an opportunity for mischief. Using that token, they could readily post bad data to your log. It is important to avoid anything that can risk reliability of your log data.
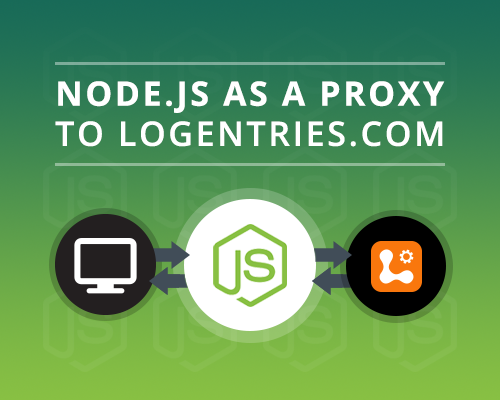
Direct access may not be an option but there are other ways to send data to your Logentries log without risking exposure. This post will look at one of the most common approaches used successfully for years: a proxy. Using a simple Node.js server, we will walk through creating a proxy server that can accept log data from the client, and will forward it to the right log in Logentries. Node.js is the article’s server of choice, but this approach is possible with any web server capable of receiving HTTP POST requests.
The Architecture

The architecture is straightforward. The client will send log data to a web server over a pre-configured route. The server will read the proper log token from a secure file. Finally, the server will forward all data from the pre-configured route to Logentries.com using the loaded log token.
The server acting as a proxy can do more than just shuttle the data forward. In our example, the code will not be doing anything to the data upon receipt except moving it along. However, in a more robust environment, the proxy could add data to the message, it could scrub the information, or even reformat the data.
The server has two main files:
token.json – This file stores the log token. It could store additional configuration information as needed. The token.json file can be locked down to specific users thereby blocking it from being casually read.
server.js – This is the proxy server code. The server is using the very popular Node.js web server called Express.
The app directory holds the client side application code. These files are not essential for running the proxy. They provide an illustration of how to shuttle log data along.
The Server
Let’s take a look at the server code.
var express = require('express');
var parser = require('body-parser');
var fs = require('fs');
var le = require('le_node');

var token = '';
var logger;
The top three variables are packages that the server needs to run as a web server and to interpret incoming information. The fourth variable, “le”, is the Logentries Javascript library. The final two variables will be used as environment globals to store the token value and a reference to the Logentries Logger object.
try{
    fs.statSync('token.json');
    token = JSON.parse(fs.readFileSync('token.json')).token;
    logger = new le({
        token:token,
        console: true
    });
}catch (e){
    console.error (e.toString());
    process.exit()
}
This section reads and stores the token value stored in the JSON file. We wrap it in a try/catch to notify the administrator if the token.json is missing. If it is missing, we cleanly close down the server. Once token.json is read, the server uses the token id in the Logentries configuration object. Next, the code loads the Logentries logging object. Additional options and more detail about the logger itself are available here.
var app = express();
app.use(express.static('app'));
app.use(parser.urlencoded({extended:false}));
Here we launch Express. The code tells Express to read static assets from the ‘app’ directory. Finally, it parses the incoming data into a JSON object which is available on the request’s body object.
app.post('/log', function (req, res) {
  try{
    var vals = req.body;
    var msg = vals.msg;

    logger[vals.type](msg);
    res.sendStatus(200);

  }catch (e){
    logger.err(e);
    res.status(400).send(e.message);
  }
});
This is the section where the logging magic happens. The server listens for data being *posted *to the server at the ‘log’ route. Anything sent to the server at /log goes through this code block.
The code grabs the data from the incoming requests (req) body. The “msg” field contains the log data to send. The client sends the type of log to create (‘info’, ‘error’, among others) in the “type” field. The combination of the two fields tells the Logentries logging object to send a log of the specified type with the supplied message.
Our try-catch block is to avoid an error killing the server. If the server experiences an error, it sends a 400 status code to the client along with the error’s message.
This code gives us a functioning proxy. All our client side application has to do is send a message to the /log route. The server sends the message to the correct Logentries log. In tests, the log was visible in the Logentries log within a few seconds of firing from the client side.
The Client Code
Most of the browser code is HTML and should be easy to decode. The bulk of the process happens in the app.js file in the sendLog function. Let’s review that function here:
function sendLog(type, msg) {
    $.ajax({
        url: '/log',
        method: 'POST',
        data: {
            "type": $('#logType').val(),
            "msg": $('#msg').val()
        },
        success: function(){
            $('#result').text('Congratulations! You logged a client message without exposing your log token.');
            $('#result').show();
        },
        error: function (err){
            $('#result').text('Ooops! An error occured: ' + err.responseText);
            $('#result').show();
        }
    });
}
The function is using jquery to make an AJAX call to the server. It sends a post request to the “/log” route. The browser passes the values of the selection box and the message fields from the UI into the data section, which the server parser will turn into the body object. That is all it takes to send log data to a proxy for delivery to Logentries.
Conclusion
Using a proxy to protect your log token from client-side tampering should be considered a best practice. It is always a good idea to keep valuable information about your infrastructure removed from the browser. Node.js, or any web server, can provide an excellent path for delivering your log data while protecting your privacy.
The code for this proof of concept can be found here. Happy Logging!
Ready to start centralizing and analyzing your Node.js data? Start a Logentries free trial today to get started.