When scanning a web application in InsightAppSec, you might see it take several hours, if not several days, to run. This can be due to the size of your web app, but plenty of settings in your scan configuration can be modified to help scans complete faster.
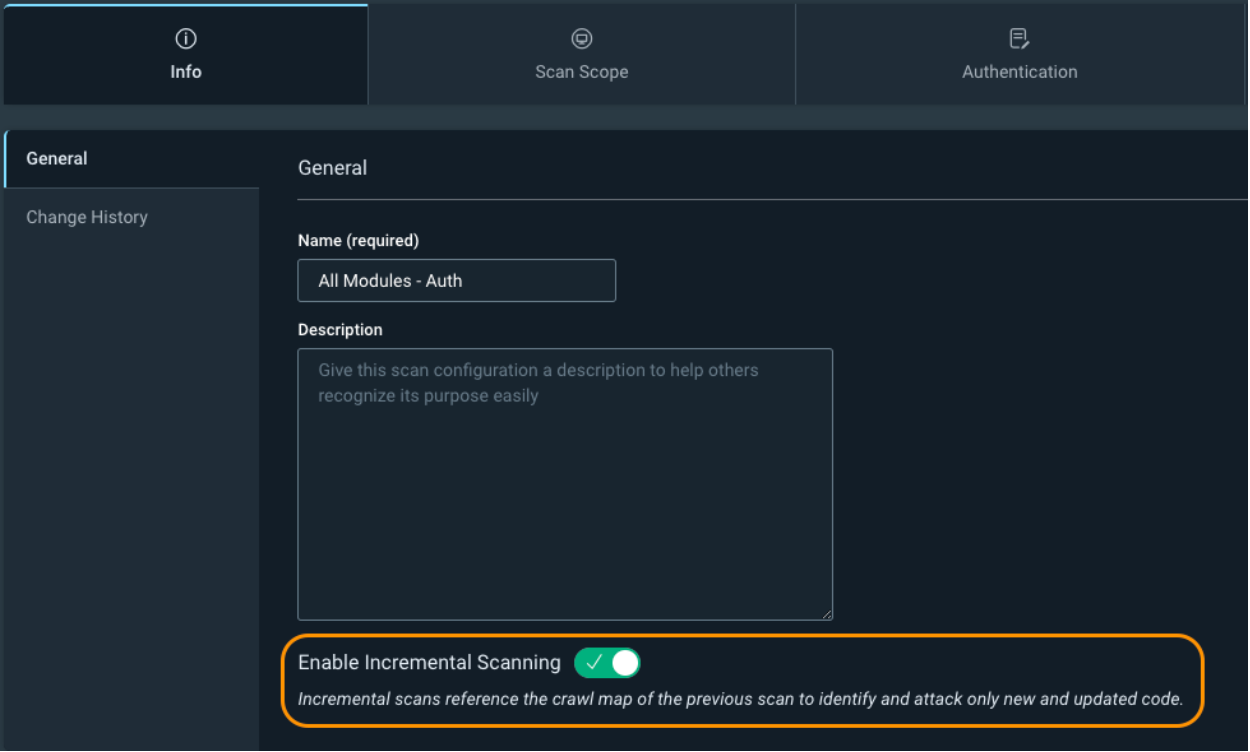
The first setting is Info -> Enable Incremental Scanning. Incremental scanning will take the crawl map of the previous scan and only hit new or updated web pages. It uses the crawl signature of a page, and if it doesn’t exist in the previous scan, or is different, then the scanner will attack it. This is especially useful if you have InsightAppsec as part of your CI/CD pipeline process, and you don't need to run a full scan every time a new build gets created. Just be aware that you will see fewer vulnerabilities on your web app because we are scanning fewer pages. It is still recommended you run periodic full scans of your web app without incremental scanning enabled to ensure maximum visibility into the vulnerability findings.
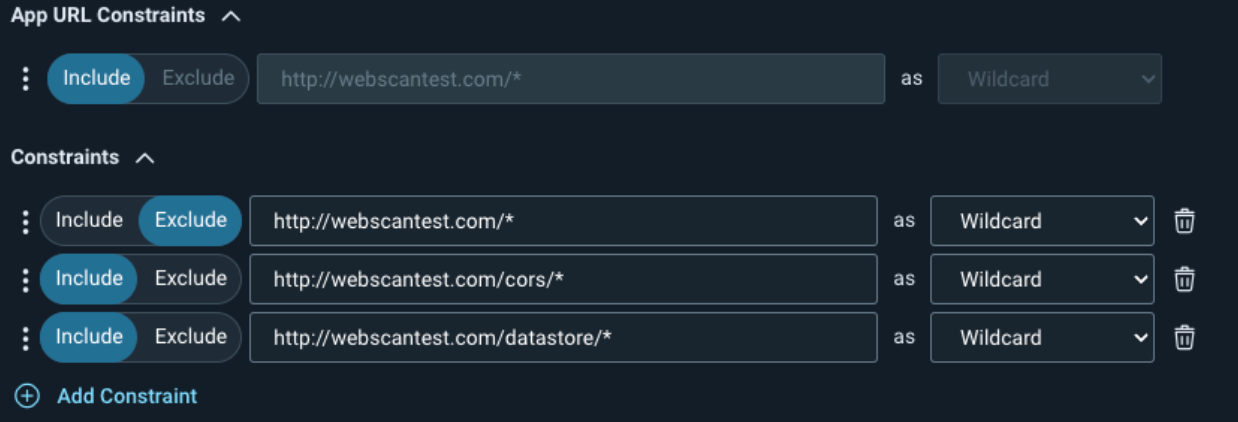
Your second option is Scan Scope -> Crawling Restrictions. This allows you to explicitly limit certain pages or directories from being crawled. For example, if you have product manuals in multiple languages, we don’t necessarily want to attack the same pages several times. We can explicitly allow one directory to be attacked while excluding another. In the example in the screenshot below, we are allowing the scan to hit the /manuals/EN/ directory while excluding all other directories under /manuals/.
https://docs.rapid7.com/insightappsec/scan-scope/#crawling-restrictions

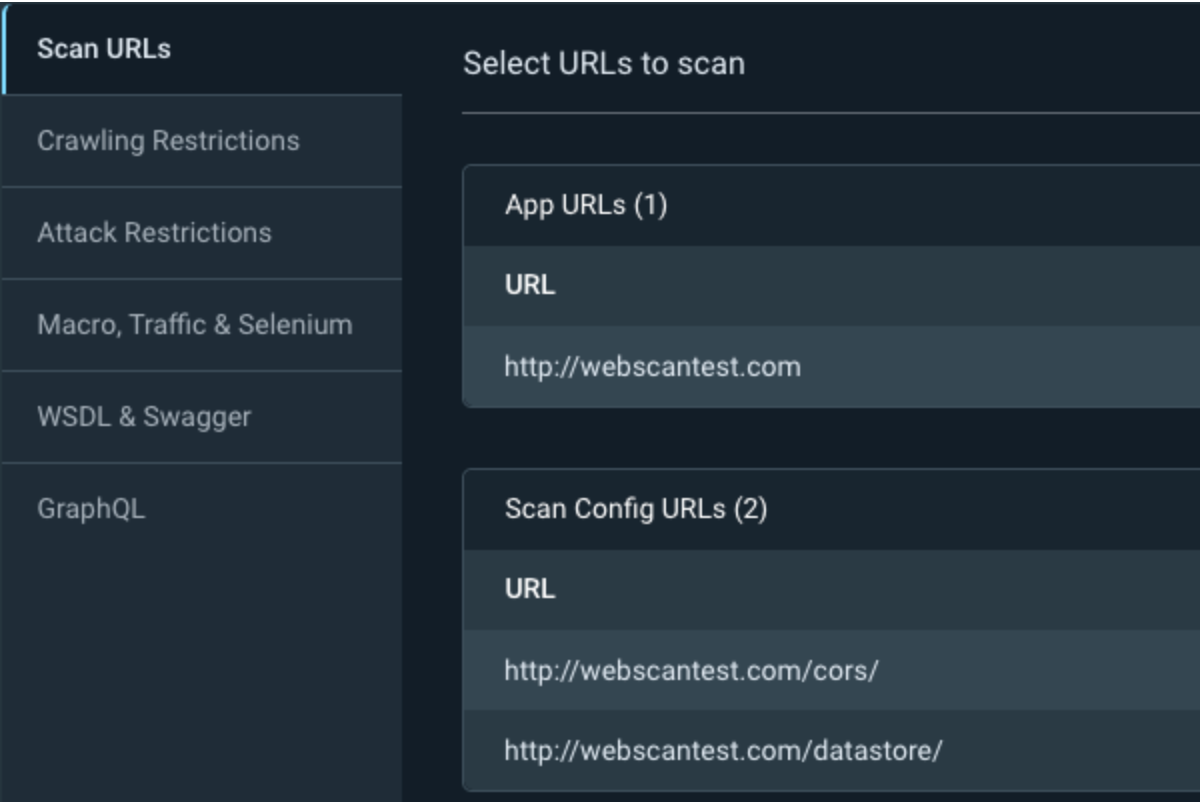
Another trick with the crawl restrictions is the ability to tell InsightAppSec to only scan specific pages or directories. First, add the directories to the Scan Config URLs under your scan scope, and then specify the target directory under the Crawling Restrictions.
You can optionally add the constraints to the Attack Restrictions so the scan still crawls the target pages, but doesn’t attack them.
If you have a very large web app, an advanced use case would be to create several scan configurations, specify different directories in each one, and kick off multiple scans against your application at the same time. Be careful because this will multiply the traffic being sent to your web server for each scan configuration you create.
https://docs.rapid7.com/insightappsec/how-to-configure-scan-scope/#scan-scope-configuration-example
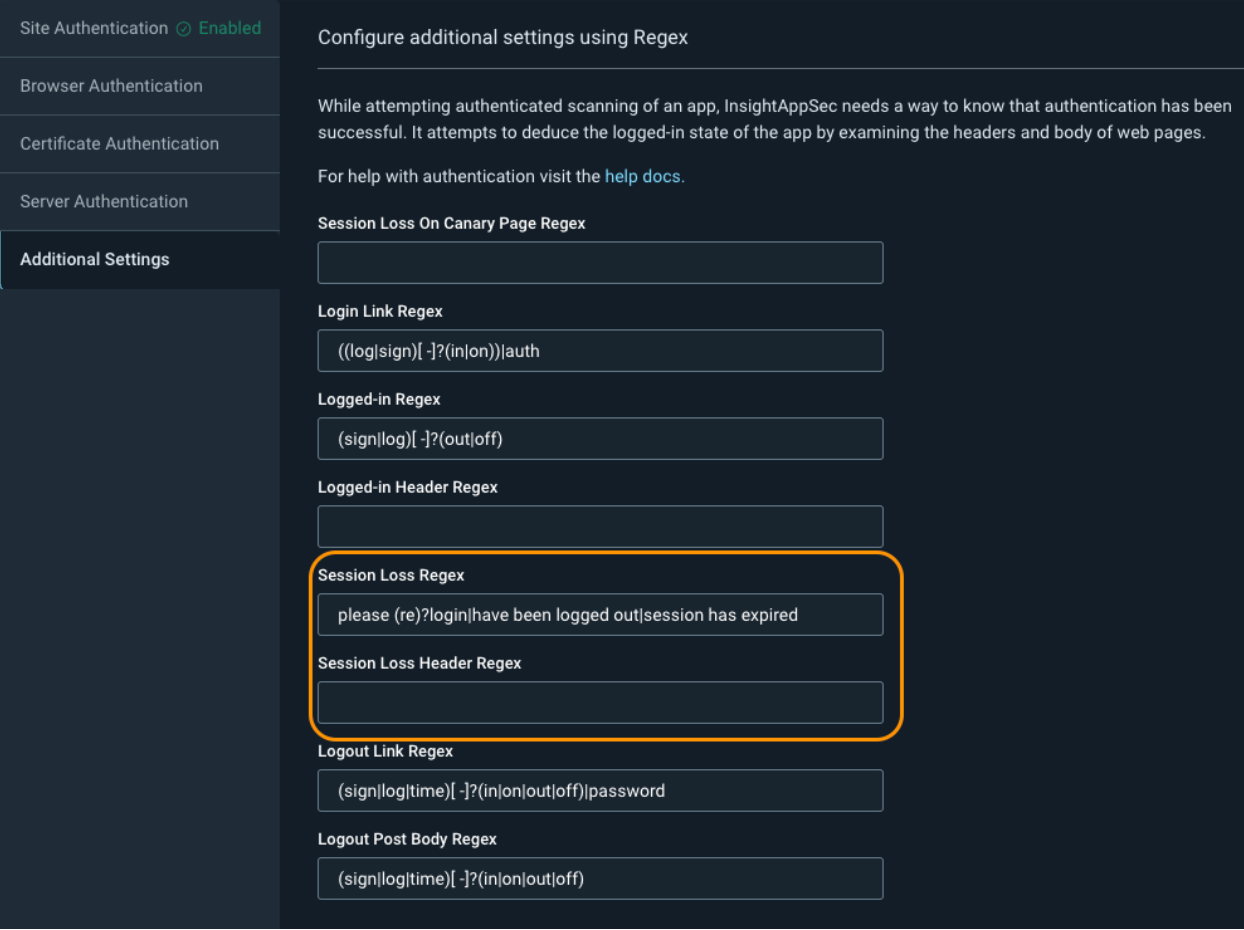
Next, we have Authentication -> Additional Settings. While you might not encounter this for all of your web applications, sometimes InsightAppSec will show that it was constantly detecting logouts in the scan logs. When this happens, the scan will attempt to log back in again, and if it keeps detecting these false session losses over and over, it can cause the scan to take a very long time to complete.
To fix this, we can adjust the Session Loss Regex or the Session Loss Header Regex depending on where the logs say the logout match was found, either in the response header or response body.
If the issue is in the header, it is recommended to delete the Session Loss Header Regex value and keep it blank. You can then change the Session Loss Regex to something that only exists on your login form. Some examples include: Remember my email|Forgot password?|Remember me|Keep me signed in|Stay signed in.
If the issue is in the body, you can remove the string that is causing the problem from the Session Loss Regex and add in additional strings from the example above for more accurate detection.
https://docs.rapid7.com/insightappsec/authentication/#configure-additional-settings-using-regex

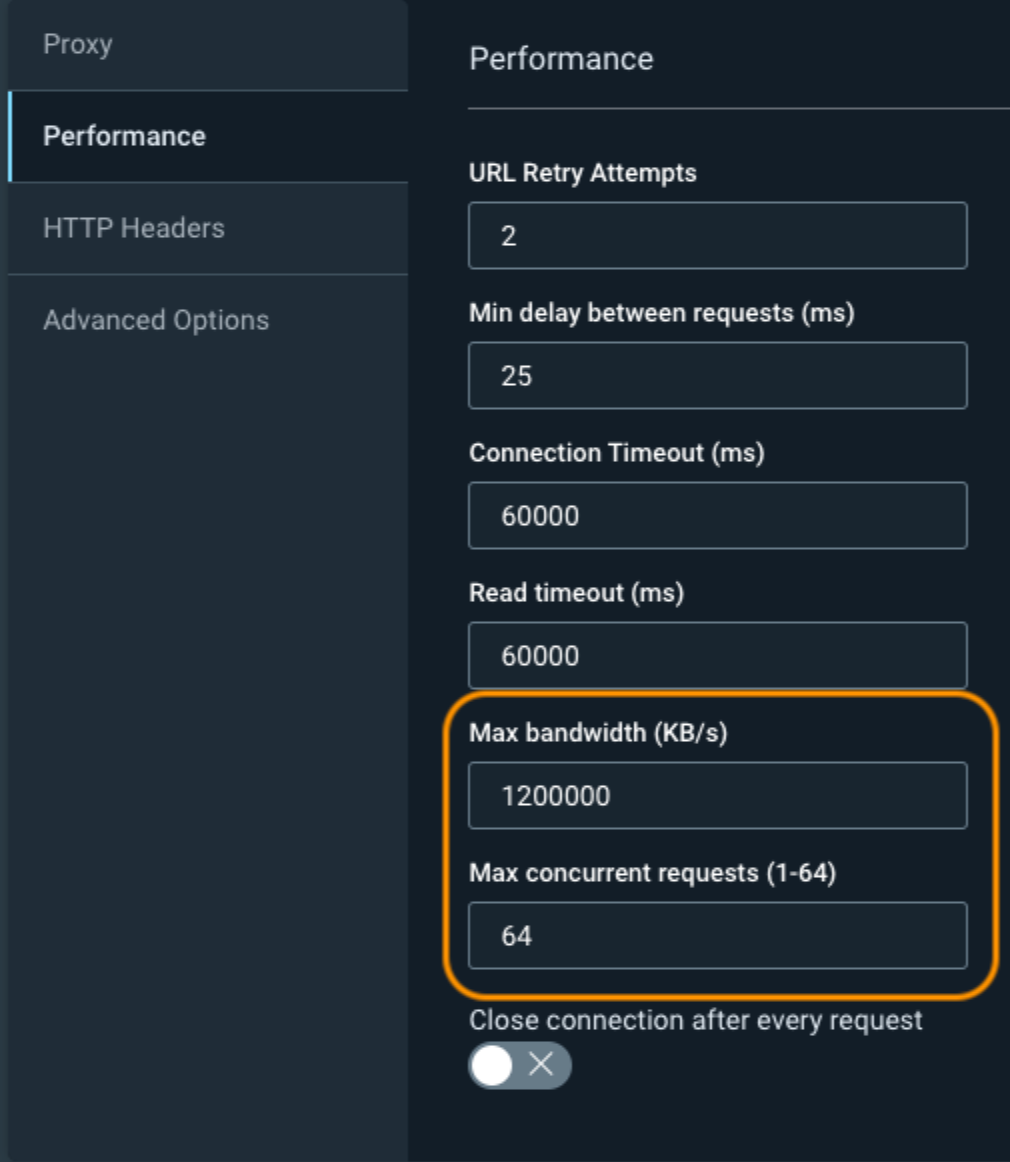
We now have Custom Options -> Performance, which you can adjust to increase the scan speed, but at the expense of hitting your web application harder. The two most common fields to adjust are the Max Bandwidth and Max Concurrent Requests.You should start by doubling these values and seeing how your web application responds to the increased traffic. If there are no issues, you can then continue to increase the values to what is shown in the screenshot below.
Optionally, you can adjust the URL Retry Attempts and the Min Delay Between Requests, but these have a much higher likelihood to cause problems for your web application or cause you to miss certain pages. Always work with your app developers to ensure that you don’t accidentally take down your application.
https://docs.rapid7.com/insightappsec/custom-options/#performance
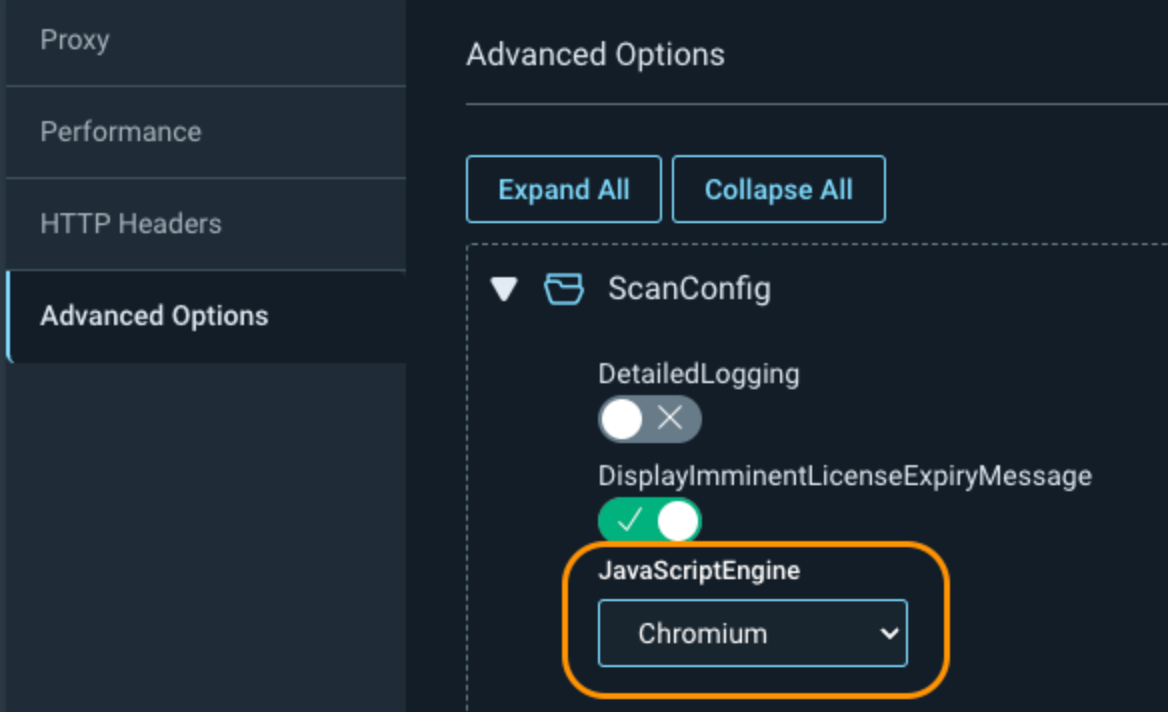
The next setting is under Custom Options -> Advanced Options -> ScanConfig -> JavaScriptEngine. This allows you to change the default engine that is used for your scan. Chrome is currently set by default, as it uses the older crawling engine. For faster and more accurate scanning, especially on modern web applications, this value should be switched to Chromium to benefit from Rapid7’s latest crawling engine.
https://docs.rapid7.com/insightappsec/advanced-options
https://docs.rapid7.com/insightappsec/advanced-options/#Engine-version-75
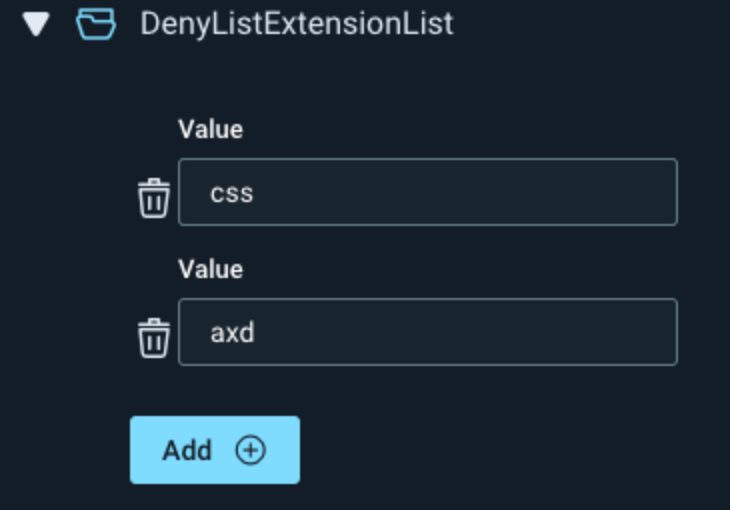
Also, under Advanced Options, if you don't want to scan specific page extensions, you can add them under either CrawlConfig or AttackerConfig -> DenyListExtensionList.
Optionally, if your scans are still running too slow, you can further adjust the Crawl Configuration and Attacker Configuration under the Advanced Options. More info can be found at the link below.
https://docs.rapid7.com/insightappsec/common-crawling-issues/#how-can-i-increase-scan-speed
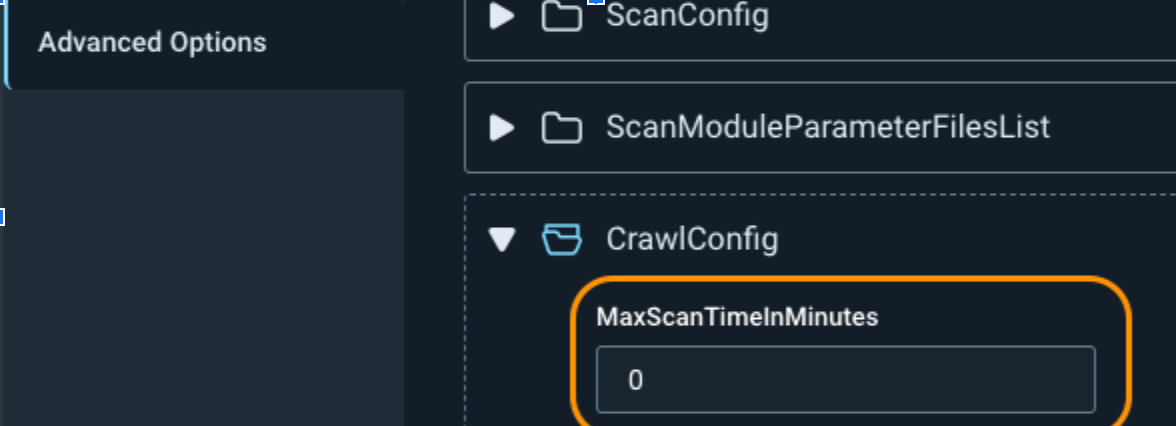
If you need to set a maximum amount of time for the scan to run, you can adjust the MaxScanTimeInMinutes under CrawlConfig. This stops the scan at a certain time, whether the scan is complete or not. This can cause your scan to miss directories and to not get a complete picture of your web application vulnerabilities, so only use it if absolutely necessary.

If you want to run faster validation scans, click into the scan results and click on Validate Scan, in the upper right, to only search for the vulnerabilities found during that scan. This has the added benefit of automatically adjusting the vulnerability status if the vulnerability is not found again. Just remember this isn’t running a full scan against your web application, so you won’t be discovering any new vulnerabilities.
https://docs.rapid7.com/insightappsec/test-vulnerability-remediation

There are many options for speeding up the amount of time it takes to run a scan. As always, if you continue to have issues with scan time or anything else scanning related, don’t hesitate to contact Rapid7 support for more assistance.
