Guide to HTTP Header Configuration
This guide is designed to show how to setup an authenticated web application scan using HTTP Headers using Metasploit as the target web application. We will also go over using the Firebug and Cookie Importer Add-ons in firefox to manually test HTTP headers.
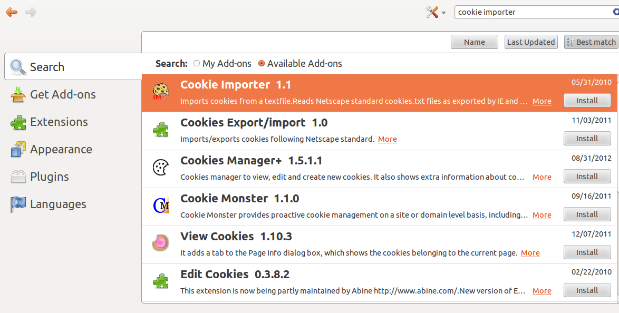
The first thing we want to do is open Firefox and download the ‘Cookie Importer' and ‘Firebug' Add-ons.
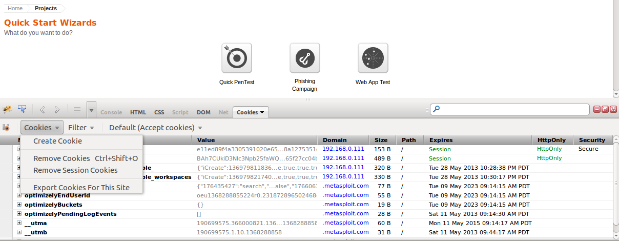
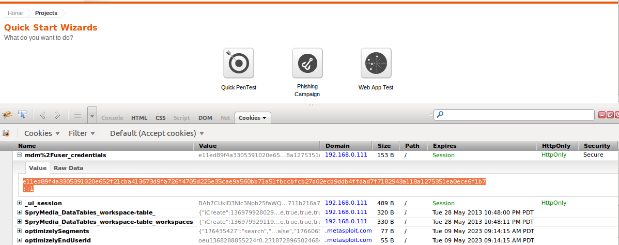
Now that we have our Add-ons installed we will want to restart our brower and then start Firebug and then enable Cookies in it and log into Metasploit. Notice once we log in we see several Cookies displayed, including the 2 Session Cookies we will be using for Header Authentication in Nexpose. Now click on the Cookies menu and select ‘Export Cookies For This Site'. This will export all the cookies from this list into a .txt file.
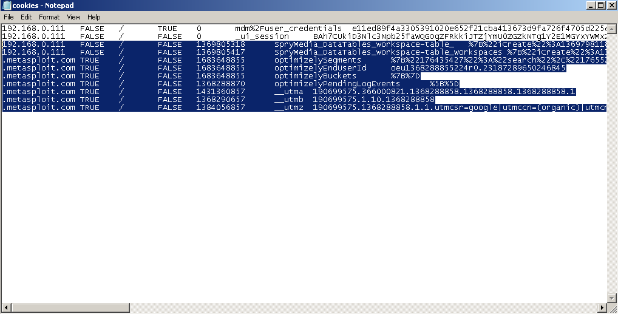
Next we will open the .txt file we created and highlight all the cookies except for the 2 session cookies (since these are what we need to authenticate) and then delete them and save the modified cookies.txt file.
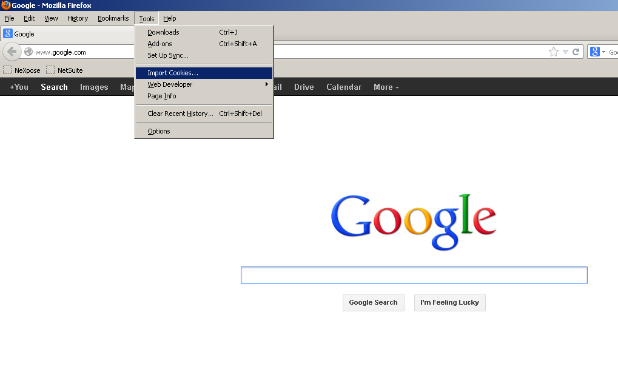
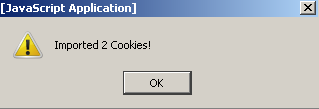
Next we will close the Metasploit Browser all together and then open a new browser and go to the Tools menu and select the Import Cookies option (which shows up after installing the Cookie Importer Add-on). Then select the modified cookies.txt file and import the cookies.
If this was done successfully we should get a message like this that says ‘Imported 2 Cookies!'
Now that we have imported our cookies successfully, we will put a Metasploit url in the field that is usually only available after logging in, for example:
https://192.168.0.111:3790/workspaces
If everything was performed correctly we should now be viewing this page even though we never logged into Metasploit.
If this happens we know we can use cookie information for web application authentication and if we are able to do this in a browser, chances are Nexpose will be able to do so too. There are a few reasons why testing this first is useful. One example would be if we have so many cookies that they won't all fit into Nexpose. Using this method we can test with different cookie combinations and narrow down our cookie list to only include the cookies that are essential for authentication. Another example would be if we believe we entered header information into Nexpose correctly but it doesn't appear to be working. This will also show if using header information for authentication isn't possible because the web application cookies are not transferrable between browsers, or additional authentication methods are in place.
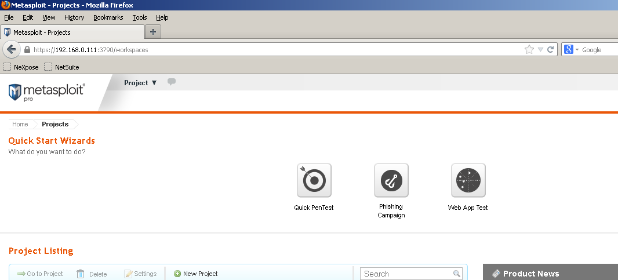
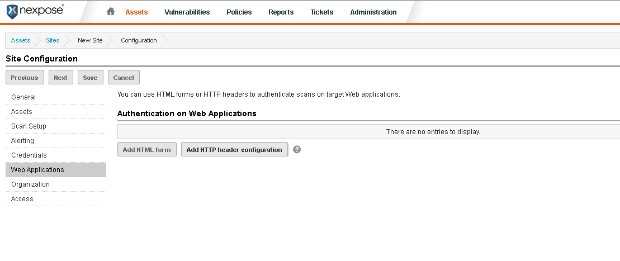
Now that we know that we can use cookies for authentication with this particular web application (Metasploit) we will go ahead and walk through setting up the scan template to do so. The first step is to log into Nexpose and then create a new site or edit an existing site and then select the Web Applications section.
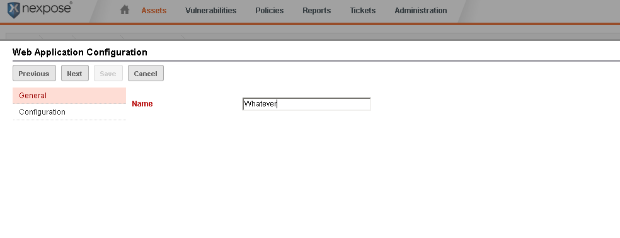
We can set the ‘Name' field under the General tab to whatever we want.
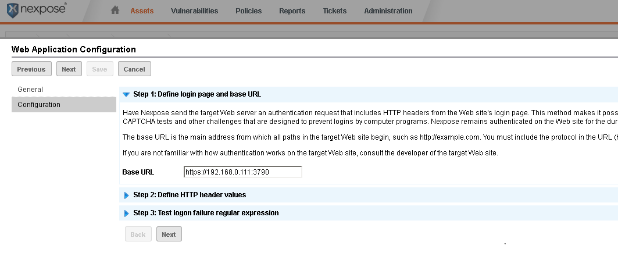
On the next screen we will want to set the base url for our web application. In this example, the base url for my copy of Metasploit is:
https://192.168.0.111:3790
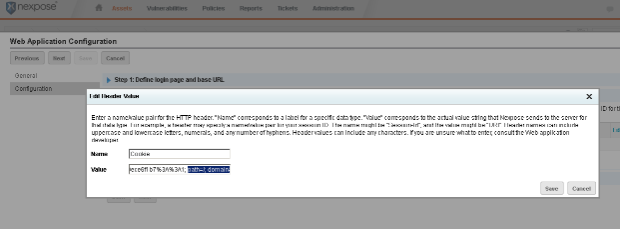
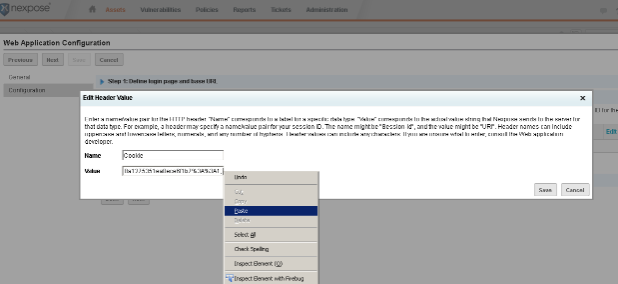
The next screen is where we enter or actual Header value(s). To do this we will basically want to copy the cookie value(s) out of Firebug (after we have logged into the web app) and paste them into the ‘Value' field in Nexpose. Notice we used ‘Cookie' (case-sensitive) for the ‘Name' field.
Notice when we paste the value in we get the following after the actual cookie value:
path=/; domain=localhost; Secure; HttpOnly
This should be removed, leaving just the actual cookie value followed by a semi-colon.
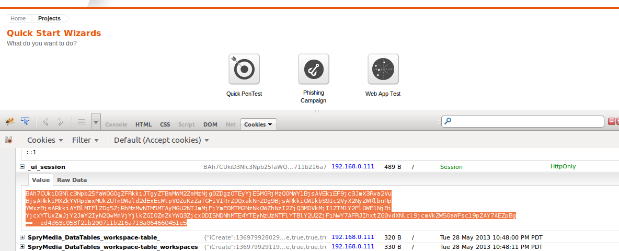
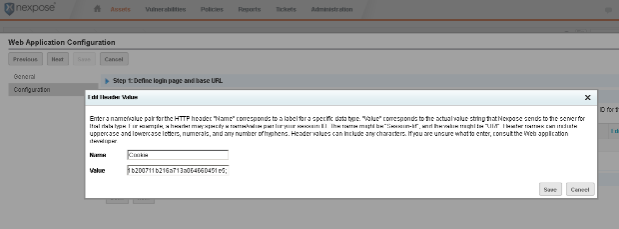
Since we need the 2 session cookies to authenticate with Metasploit we will want to copy the second session cookie value out of Firebug and then single space past the semi-colon that ends the first cookie entry and paste it into Nexpose. So the value for 2 cookie entries will basically be:
cookievalue1; cookievalue2
Again, we will want to remove the:
path=/; domain=localhost; Secure; HttpOnly
So only the actual cookie value (in this case ending in e5) remains, followed by the semi-colon.
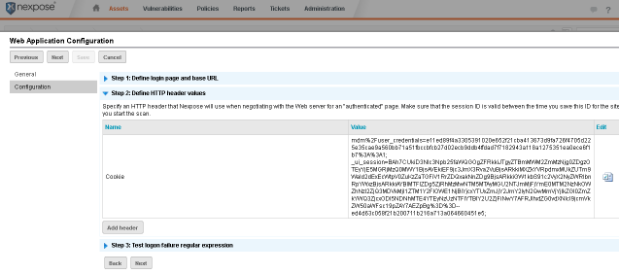
If we entered everything correctly, the next screen should look something like this, with the ‘Name' field set to ‘Cookie' and the cookie values in the ‘Value' field, separated by a semi-colon.
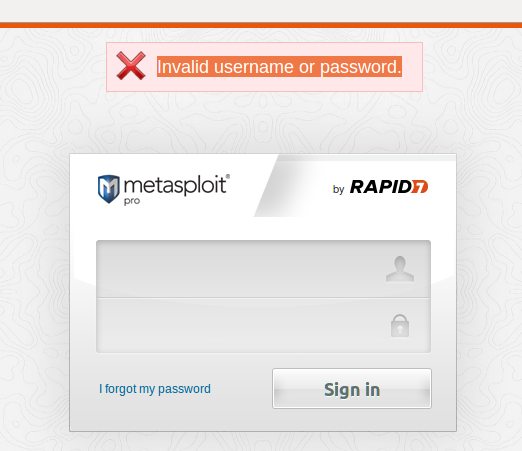
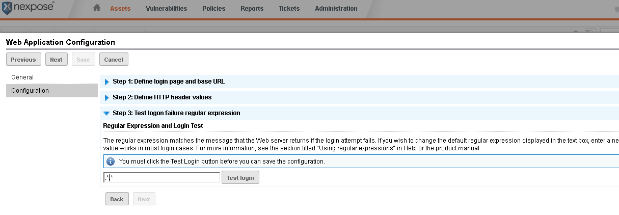
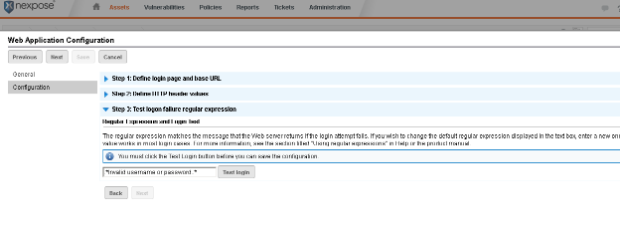
Next we will be entering the regex for a failed login attempt into Nexpose. This is just what we get when a login attempt into the web application fails. For Metasploit, it is ‘Invalid username or password.'
We basically just want to paste this value into Nexpose, between the first .* and the second .*
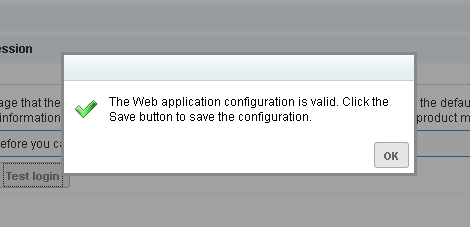
Once everything has been entered into Nexpose correctly, we will get the following when we click the ‘Test login' button.
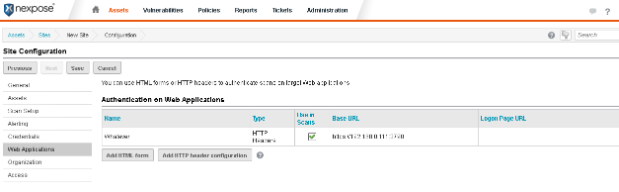
And once we have saved the header information save the configuration, then click save again to save the site configuration. At this point we are ready to scan.
That is the end of the walkthrough. Please keep in mind cookies will expire if we click logout or after a period of time, so setting up header information in Nexpose right before scanning the web application is recommended. Fortunately this process becomes easy after a couple of tries and once we have identified which specific cookies our web application needs for authentication. In terms of knowing whether or not the authentication actually worked, we can tell by looking at the scan log. If our authentication was successful, we will notice the scanner spidering urls that it would normally be unable to get to and also the size of the scan log itself will be larger (and we will possibly see more vulnerabilities). One final note, if the web app uses an irregular port (for example, 3790) we want to make sure we have this port included in the scan template.