We recently released AWS CloudTrail integration with Logentries – and not surprisingly we’ve seen a significant uptick in adoption as one of our most popular integrations. My job as director of customer success is to make things as simple for our customers as possible. One question that consistently pops up, is how to collect AWS CloudTrail logs from multiple AWS regions.
We follow Amazon’s best practices when it comes to integrating with, and receiving information from, CloudTrail. In short, this works as follows:
- When configuring CloudTrail, it will write events to a S3 bucket.
- You can configure Cloudtrail to send notifications to an Amazon SNS topic whenever new log events are recorded.
- You can get updates sent to an Amazon Simple Queue Service (Amazon SQS) queue, which enables you to handle these notifications programmatically.
- To configure Logentries to consume your Cloudtrail logs, simply add the URL of the SQS queue to the Logentries/Cloudtrail setup page.
Logentries speaks directly to the SQS queue inside of your AWS account, so an obvious question that presents itself is: If I’m running in multiple AWS regions, how do I get Logentries to pull from all of the regions?
The simple answer: you don’t. Make AWS do the work for you!
Following the steps outlined below, you’ll be able to monitor and analyze CloudTrail logs from any number of AWS regions all within one Logentries account.
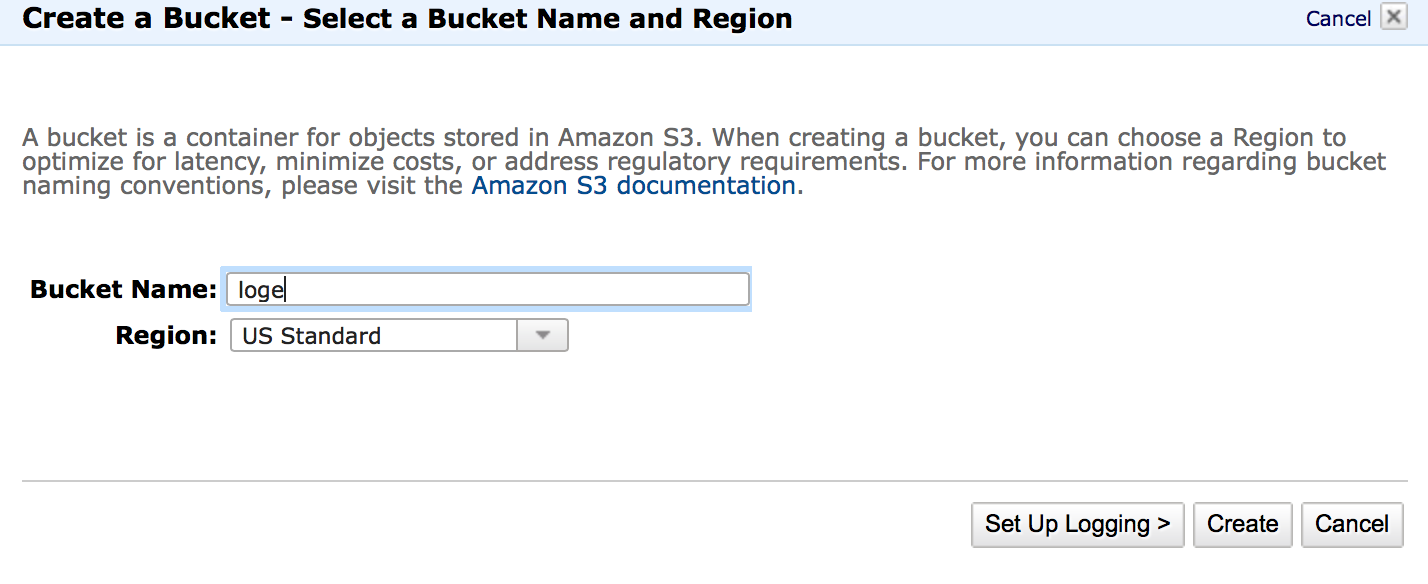
Create an S3 Bucket
If you’re new to the CloudTrail setup, the first requirement of CloudTrail logging is that the logs must go “somewhere.” In AWS, this somewhere happens to be a S3 bucket which you should create. Simply navigate to the S3 service and select ‘Create Bucket’. By default, all permissions required are given to the bucket – i.e. there is no extra permissions/configuration necessary to configure CloudTrail logging with Logentries.
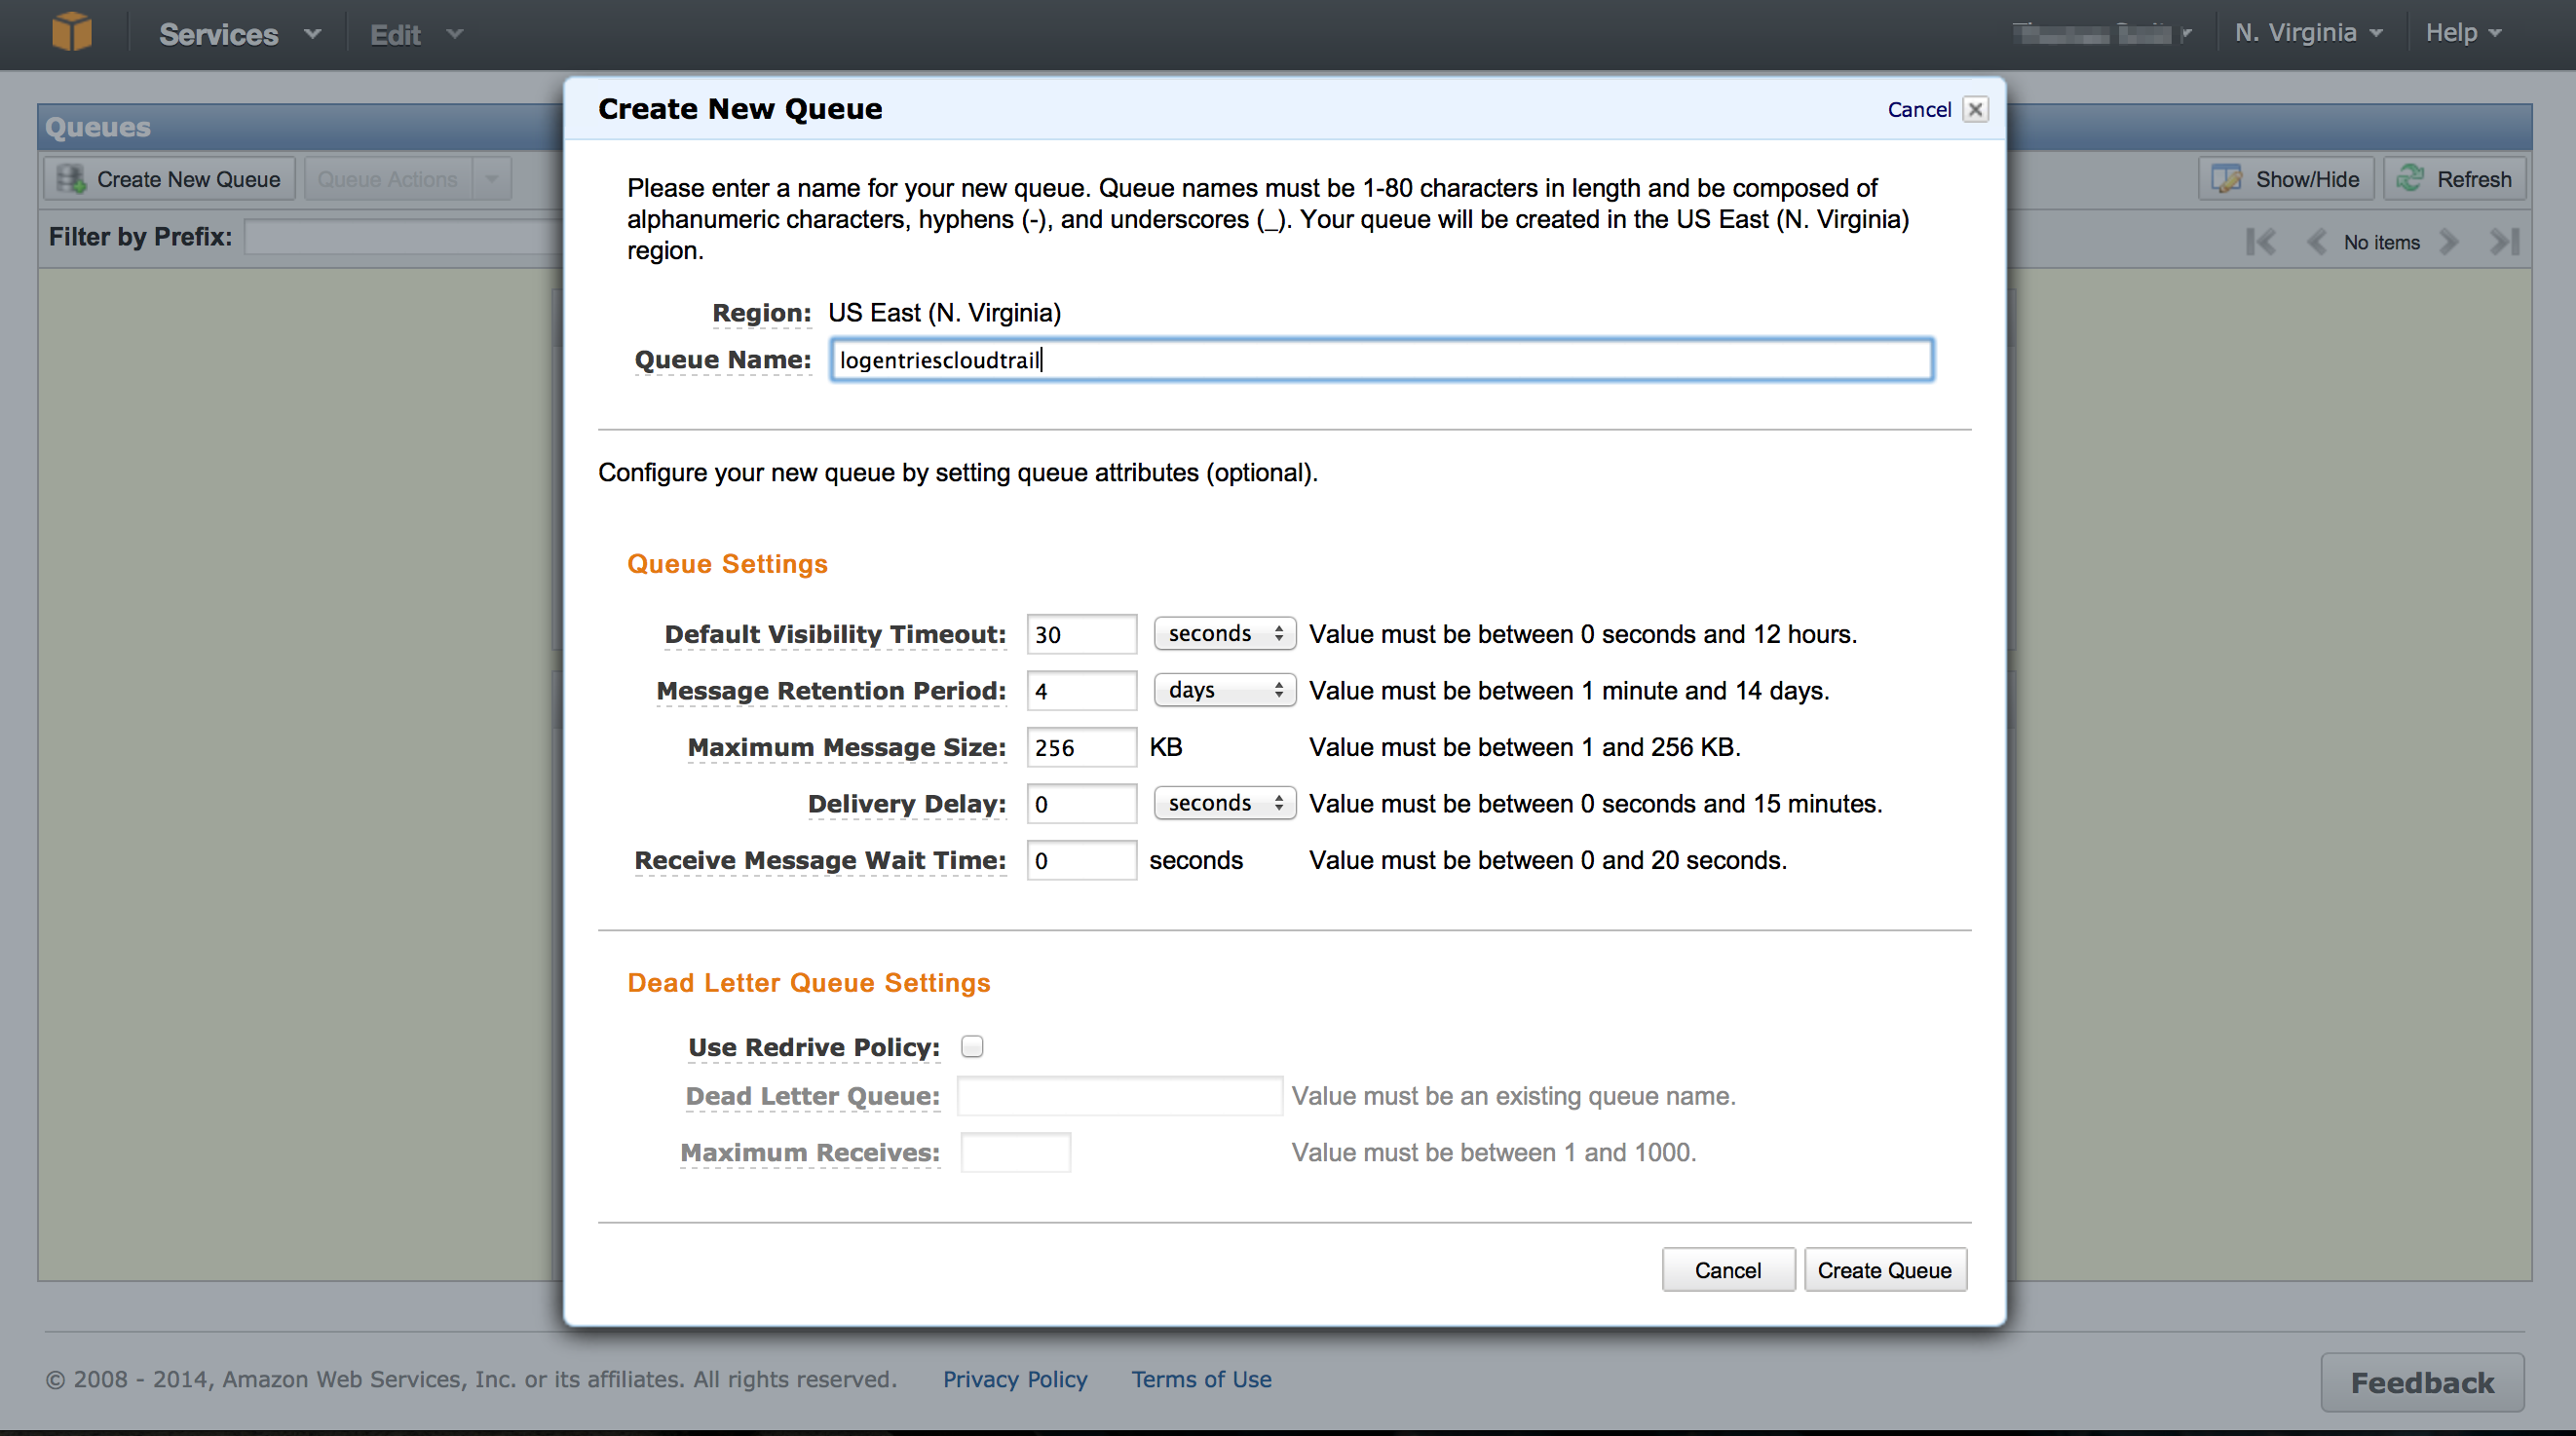
Create an SQS Queue in a Primary Region
Next up, we need to create an SQS Queue to allow Logentries to consume your CloudTrail data. Create a new Queue and provide a ‘Queue Name’ – default options are fine.
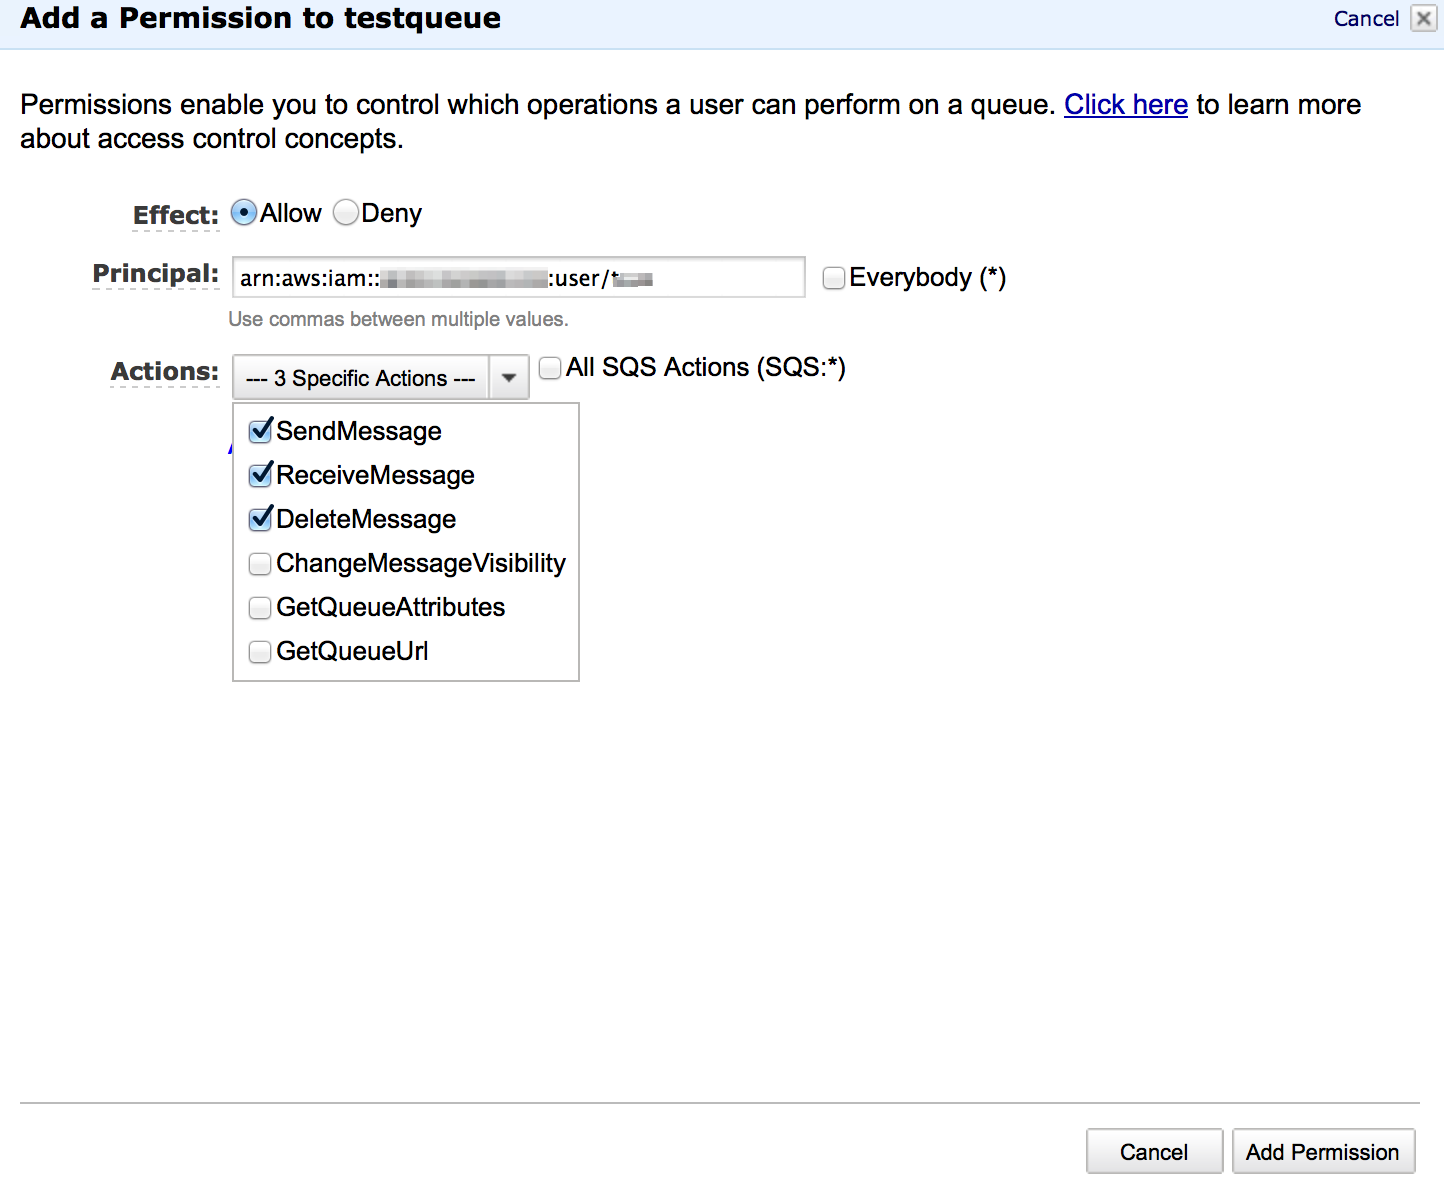
Add permissions to the SQS Queue
Once the queue has been created, the correct permissions must be applied. When adding permissions to the SQS queue, you need to add your full account number/name (officially called the AWS User ARN).
To get the User ARN navigate to the IAM Service, select the user that you want to utilize and click ‘Summary’. When the user is created within the IAM section, make sure that the user has at least ‘Read-Only’ access – so that the user has the relevant permissions to read the bucket. The string you need is available under User ARN in the ‘Summary’ section and follows this format:
arn:aws:iam::<account_code>:user/
Next add ‘Receive’, ‘Send’, and ‘Delete’ Actions to the SQS Queue(see below):
Enable CloudTrail in any region, and publish to an SNS topic
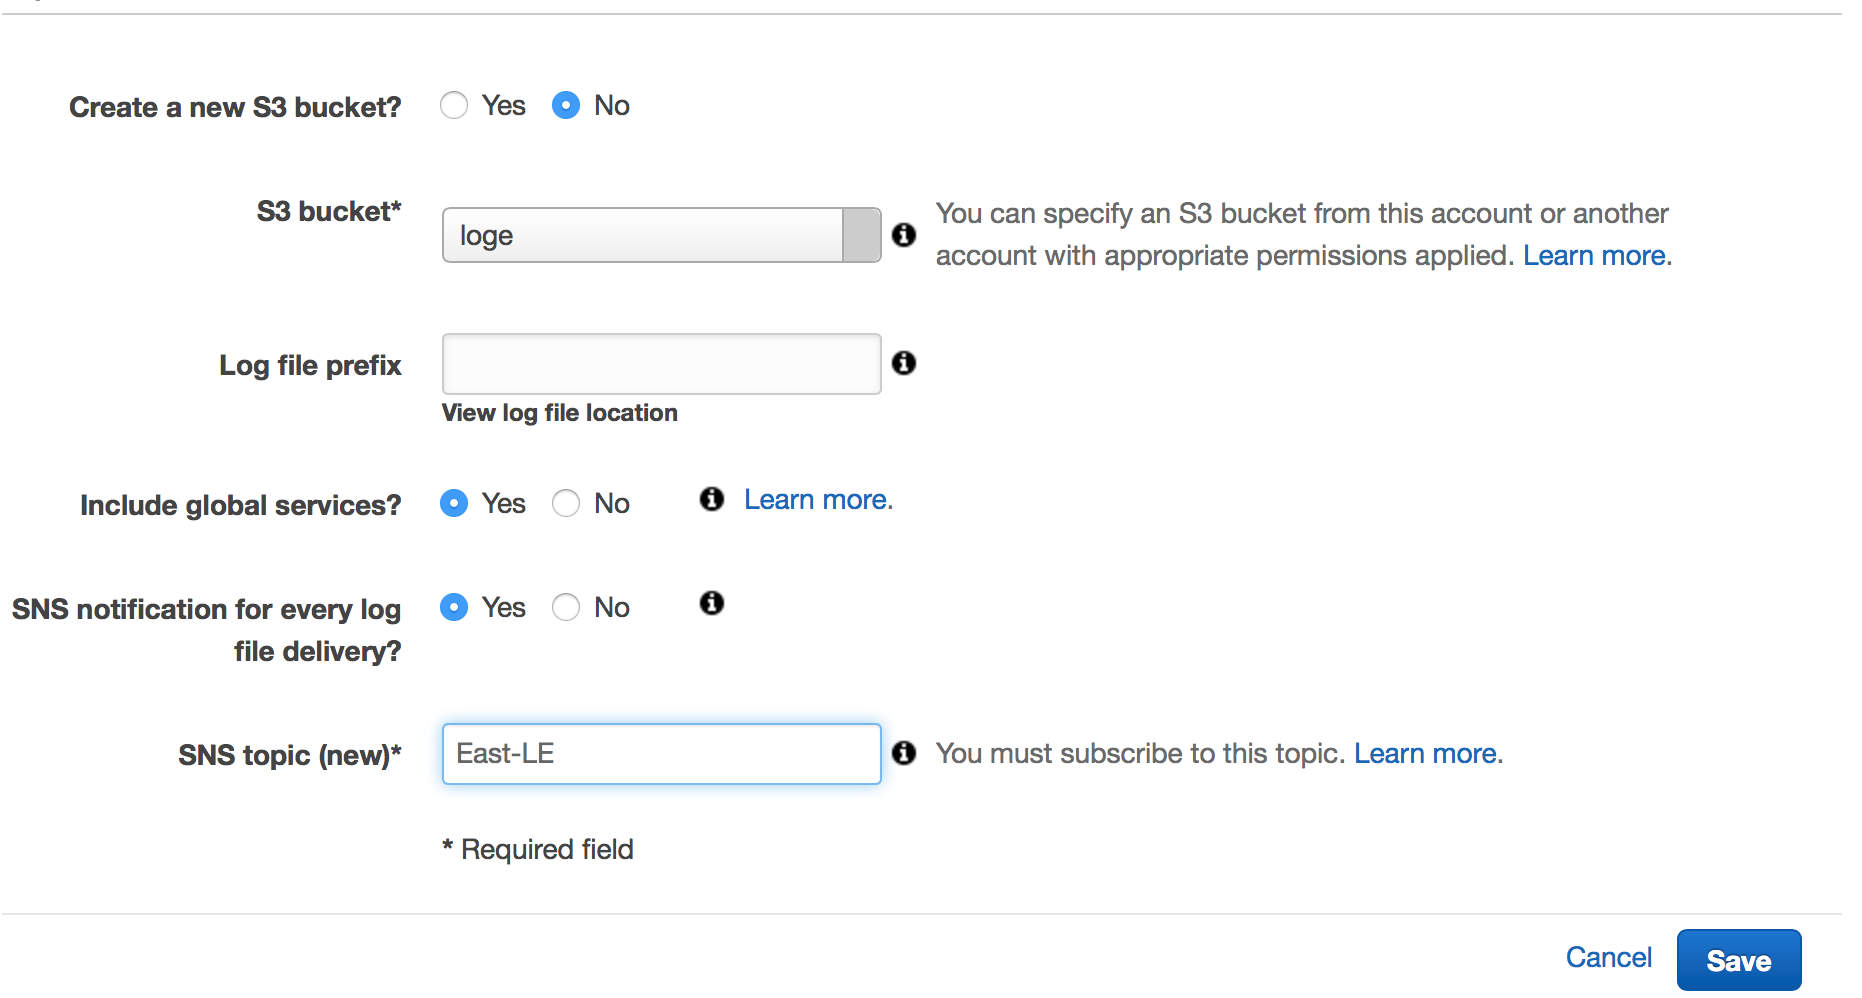
Once the above three steps have been complete, it’s time to enable CloudTrail in the relevant regions. Navigate to the CloudTrail Service in your AWS Console and turn on CloudTrail. Do not create a new S3 bucket, but instead select the S3 Bucket created in step one above from the drop down menu. Once you’ve done this, click the Advanced link. For the first region you enable CloudTrail for, remember to include Global Services under Advanced options – this record API calls from any global AWS services such as IAM or AWS STS. Make sure that “SNS Notification for every log file delivery” is checked, and finally, specify a SNS Topic to publish to. A new SNS topic name should be given – and will be created by CloudTrail.
Follow these above steps for each region that you want to collect CloudTrail logs from. NOTE: when adding subsequent regions you will want to exclude Global Services to avoid duplicate log events being recorded for your Global Services.
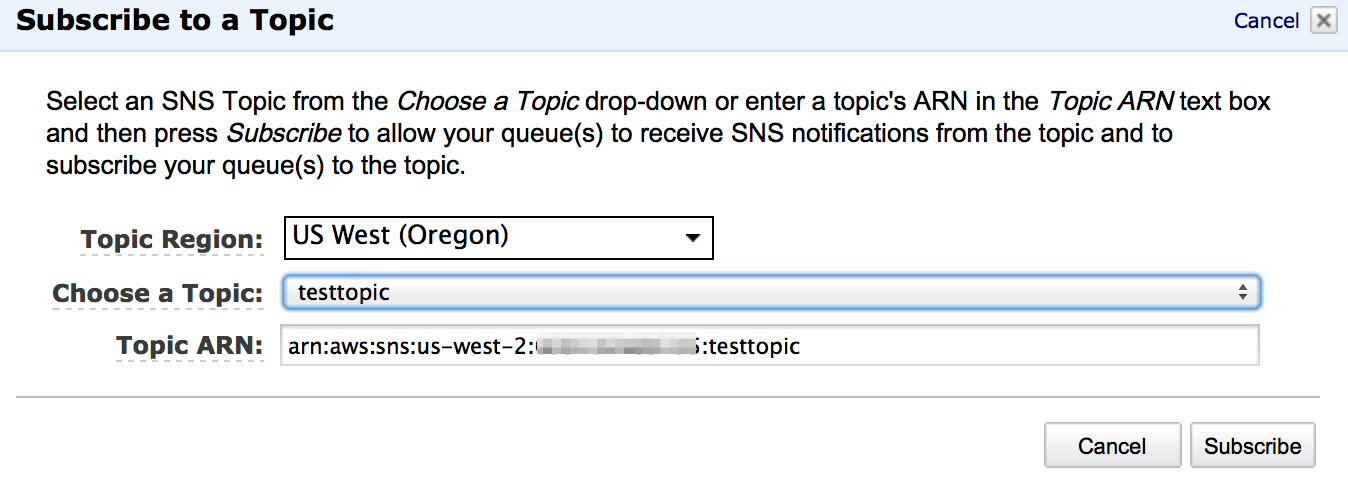
Subscribe the SQS Queue to the multiple SNS topics
Once each region has been setup, the last step in AWS is to subscribe your SQS Queue to each newly created SNS topic. Navigate to the SQS Service in your AWS Console and highlight the queue created in step 2 above. Under the ‘Queue Actions’ menu at the top select ‘Subscribe Queue to SNS Topic’. Use the ‘Topic Region’ drop down to select the region and the ‘Choose a Topic’ drop down to select the topic created in the previous step. Hit the ‘Subscribe’ button and wait for the confirmation that the queue has subscribed to that topic.
After selecting subscribe make sure to copy the SQS URL from the ‘Details’ section on the page.
Setup Logentries to Pull data from the SQS Queue
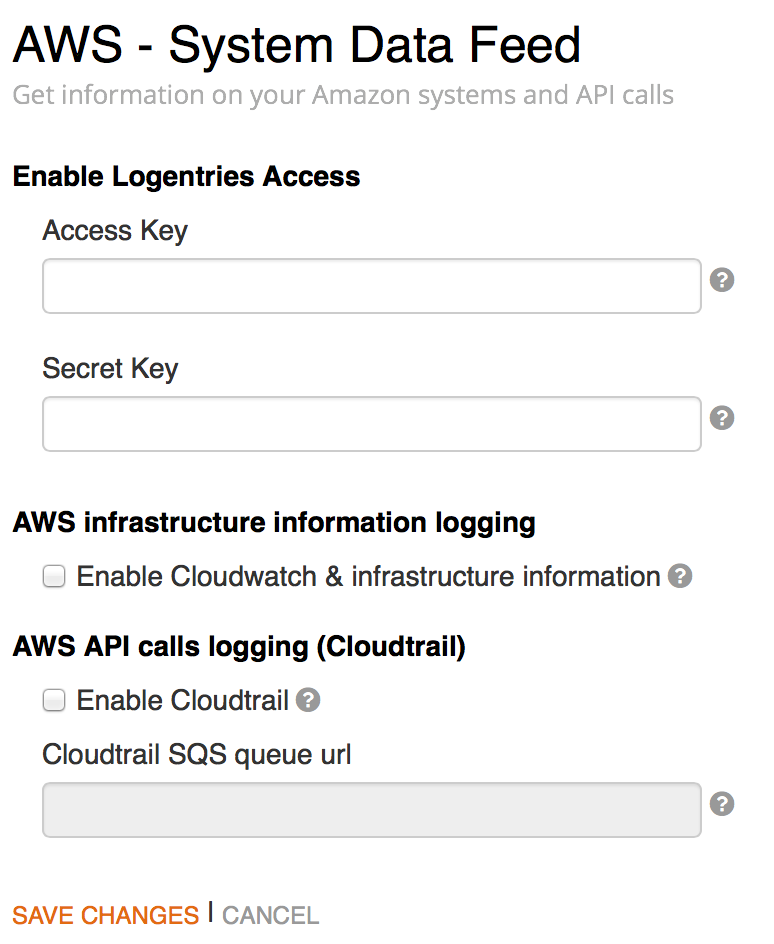
Login to your Logentries account and navigate to your AWS settings area (My Account -> AWS). Select enable CloudTrail, supply your IAM access key, secret key, and SQS URL that you have copied above. Hit Save! Note: your IAM access key and secret key are made available to your when you create a new IAM user and should be stored safely.
Log Data from CloudTrail will begin to stream in within approximately 15 minutes.
Sit back and let Logentries do it’s magic!
Visit our CloudTrail documentation to see some of the other cool things you can do – in particular we provide out of the box tags and alerts for important CloudTrail events. Have questions or ideas how we can make our CloudTrail integration better?