Introduction
Early this year, I posted an article on iOS Hardening that used animated GIFs to explain most of the recommended settings.
Since then, iOS 9 was released, bringing along many new features, including better support for Two-Factor Authentication, as iMessage and FaceTime now work without the need for app-specific passwords, and as your trusted devices now automatically get trusted when you authenticate using them
As many people will be getting new iOS devices this holiday season, I decided to write about some simple, but very effective settings you can configure on iOS, to improve security significantly and reduce annoyances.
This guide is meant for personal devices, but most of the recommendations here should apply to enterprise as well. However, some of the settings require making a device "supervised", which is typically not done on devices owned by employees.
First, let's described some annoyances, and what the features to resolve them and improve security are. Then, we'll go over how to deploy these settings to iOS devices. Some of these will be even more valuable to those of you that travel often, and end up having to use Wi-Fi, as well as leaving iOS devices in less-than-ideal locations without keeping physical control over them.
Warning:
Two of these settings will require you to set your device to be a supervised device. These are is the settings to prevent a device from being paired to iTunes, as well as from trusting new enterprise application certificates.
This means that you should only perform this change on devices that you own, but it also means that you will need to wipe your device in the process, and that restoring of a prior-to-supervision backup to a supervised device actually undoes the process. This is why I am posting this around the holidays, as it is an ideal guide for new devices, when you can benefit from a clean setup.
Ex: Restoring from iTunes or iCloud after supervising a device will simply restore it to its prior state, without the configuration profile.
No matter what, make sure you have good backups, but understand that you may lose data.
The settings that are not marked as "supervised only" can easily be used on existing devices.
Annoyances and Security Issues
Problem 1 - Ability to Trust Other Computers
Your iOS device prompts to trust each computer you connect it to. Then, if you mistakenly trust another computer, you'll need to delete all your network settings to delete that trust relationship.
While it's great that it doesn't trust computers by default, wouldn't it be nicer if it just did not ask?
Why would anyone want to trust another computer from their iOS device?
Benefits
No more annoying prompts, no chance of trusting a computer by mistake, and even if your iPad was stolen unlocked from your hands, the thief would not be able to back it up to iTunes for further analysis.
For an excellent explanation of why this setting is valuable, see this article by iOS Forensics expert. This article, as well as some other research he has performed is a big reason why I've decided that this setting made sense for me, and why I believe more people should be using it.
Note that the screenshots in his detailed explanation, at the moment, are not up to date for iOS 9 and the latest Apple Configurator.
Warnings
As mentioned above, this setting will require your device to be supervised, which means it will need to be wiped. Additionally, you will not be able to use iTunes, and even importing photos on other computers will be impossible. This, in itself, is a great feature, but consider how you use your device. If you use iCloud Photos and iCloud Backups, you probably very rarely use your device through USB for anything but charging, and if you use iTunes Backups, it will be possible to back your device up via the Apple Configurator later.
Problem 2 - Ability to Allow Untrusted Certificates
You're at the airport, or in a hotel. You hop on Wi-Fi, and before you can accept the captive portal's terms, so your VPN session can then be established, you receive a bunch of SSL/TLS warnings about untrusted certificates being used for your email, a page that was already open in Safari, or any other type of encrypted connectivity.
If you've ever received so many of those that you accidentally accepted one of them, and realized one of your email accounts tried to authenticate using that certificate and proceeded to rapidly change that account's password while in a state of semi-panic, this setting is absolutely for you.
Benefits
Your iOS device will now simply refuse to establish a connection when the certificate is untrusted. This will reduce the amount of pop-ups from background processes such as email sync, but will also prevent the accidental acceptance of such a prompt, which could lead to leaked data and credentials.
Warnings
If you often use your iOS device to connect to services that are protected by self-signed SSL certificates, you will be unable to do so after enabling this feature, unless you then install the appropriate certificate on your device. You can use the Apple Configurator to push any Root CA you need, as well as individual certificates. You will also lose the ability to connect to websites that, for some weird reason, decided to use self-signed certificates, which is not only rare but probably a bad idea to begin with.
Problem 3 - Redundant Prompts for Password Management
You use a password manager such as 1Password. You never want to be prompted again to use iCloud Keychain, or to save a password for a specific site in Safari (NO, NOT NOW, NOT EVER!!).
Benefits
While this is not necessarily a security improvement directly, as iCloud Keychain has some interesting security capabilities, it is a security improvement in the sense that it will prevent duplication of databases containing them. To me though, it's more about not being interrupted when logging into a website, or being asked to configure a feature I will never use.
Warnings
Autofill will be disabled for other fields as well. This is less of a problem if the password manager you use also allows you to manage identities, and other non-password information.
Problem 4 - Backup Options are not Enforced
You've decided how you want to handle backups on iOS.
The options you have are:
- iCloud Backup. Easy, automated, probably the best way to avoid accidentally losing data, but will backup your data in a way that defeats some security features such as end-to-end encryption on iMessage. If this is a big deal to you, remember that the people you communicate with using iMessage probably use iCloud Backup.
- iTunes Backups: Less automated, requires using a computer, but allows you to keep your data locally. If using iTunes backups, ensure that encryption is enforced, so that anyone with access to your computer can not simply restore the backup. You will also gain the ability to restore more items from the keychain, when using encrypted backups, meaning you will not have to login to as many apps after restoring. You can't use this if you decide to enable the features to mitigate problem 1.
- Apple Configurator Backup: Not automated at all, requires you to manually perform a backup. Those backups can be encrypted like iTunes backups, and can be performed from the Configurator host, in case you prevent iTunes pairing as shown in problem 1.
- Do not backup, rely on apps that sync data to other local systems or cloud services. (pro tip: you always need backups, especially when you thought you didn't. I lost many Crossy Road characters thinking that I didn't need to back up one device so frequently).
Benefits
Once you've decided what your backup strategy is, it's important to enforce your choice as much as possible to avoid things such as accidental clear text backups on iTunes, or accidental iCloud backups.
Problem 5 - Enterprise Certificates are Allowed to be Trusted
By default, your iOS device could prompt you to install an application signed by an enterprise. This is typically used to deploy corporate applications, but could also be used to distribute malware, as shown by Palo Alto with YiSpecter recently.
With iOS 9, Apple made the process safer, but someone with physical control of your device could definitely perform these steps by hand, and if it is a device used by multiple users, someone could be tricked into trusting an enterprise certificate.
Benefits
Your device will not accept new enterprise certificates and applications signed with them.
Warnings
If you actually need to install enterprise apps, you'll want to avoid this setting. This is also a device that will require a supervised device, meaning you will need to wipe it to enable the setting.
Personally, I have some iOS devices on which I know I will never install an enterprise app, so I turn this on, and feel smug about how I will not accidentally trust one in the future.
Problem 6 - Web Browsing Defaults are Less than Ideal
Ad tracking, pop-ups and other types of often distasteful ads making your browsing experience slower, less private and less secure.
Benefits
We will ensure that iOS and Safari are configured to reject third party cookies, force limited ad blocking as well as block pop-ups. Obviously, this is not a replacement for running a good Content Blocker, but it is a nice baseline to have.
Warnings
Some websites could break due to those settings, specifically regarding cookie handling. Two options will be provided in the guide, one more secure, one slightly less so but more compatible.
Let's do it!
Install Apple Configurator 2
From the Mac App Store, install the Apple Configurator 2. Prior versions will not work with iOS 9. Make sure no devices are connected via USB and start the Configurator.

Connect via USB
After ensuring you have good, working backups (better safe than sorry), if you plan to wipe the device and to make it supervised, sign out of iCloud to disable Activation Lock temporarily.
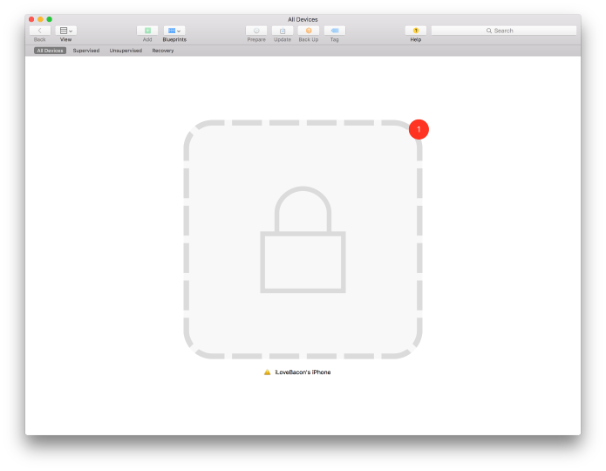
Connect your device to the computer running Apple Configurator 2 over USB. Ensure that you are under the All Devices tab. You will see your device appear. If a Lock icon appears, unlock the device.
Prepare the device
Select your device by clicking on it in the Apple Configurator, then click Prepare.
Supervise
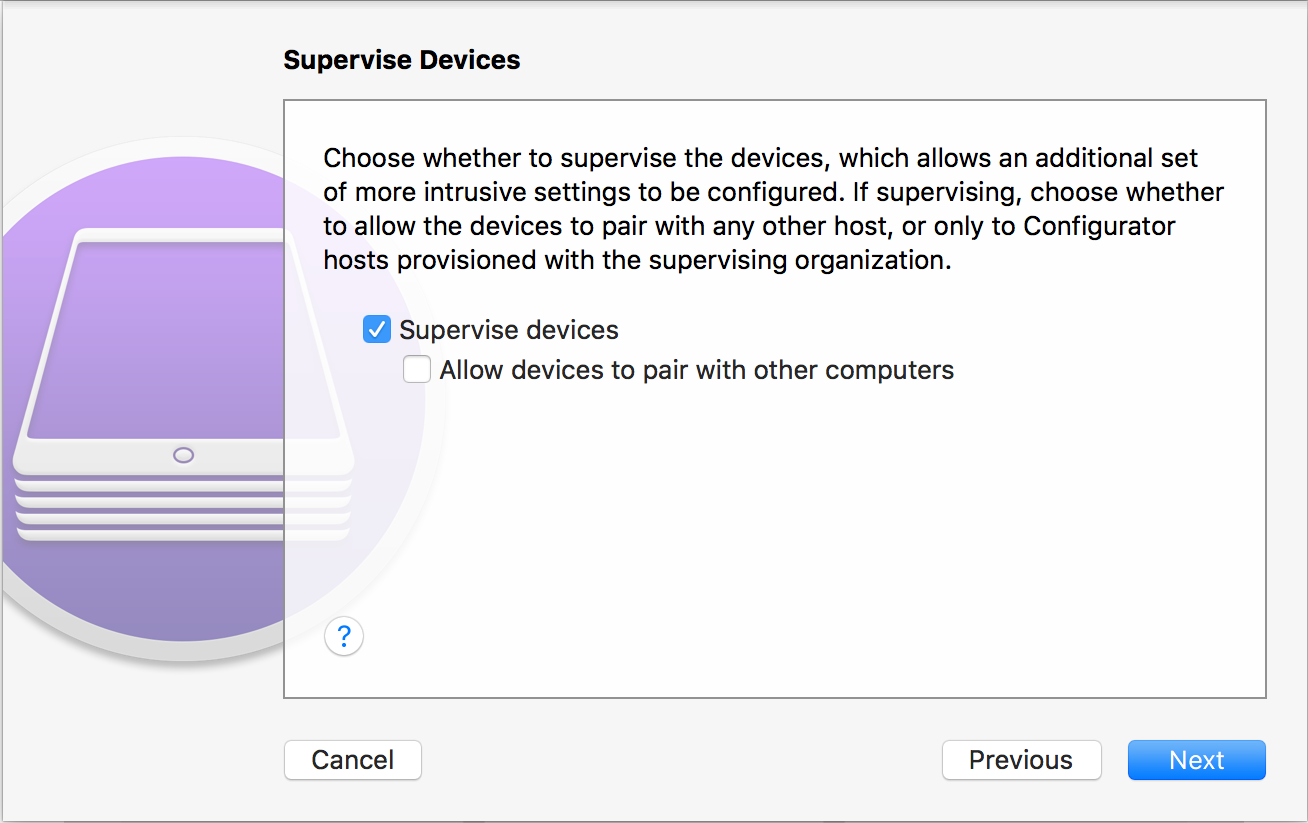
If you want to be able to pair-lock this device to just this computer, as well as to restrict enterprise applications, you need to supervise the device. Remember that this will require wiping the device.
If this is how you want to proceed, select Supervise Devices, and ensure Allow devices to pair with other computers is not selected.
Finish Preparing
Finish preparing the device by selecting:
- Configuration: Manual
- Server: Do not enroll in MDM (if you are performing those steps on a corporate device, you know what to do)
- Organization: Create a new organization. The names you put in there will appear in the configuration screens but do not have to be real. Only a name will suffice.
- Supervision Identity: If prompted, create a supervision identity. If you already had one, this means you already had supervised devices configured from this computer. If not prompted, you are either not supervising the device, or as you didn't have one before, an identity will be created automatically. The identity, in reality, consists of certificates used between the iOS device and Mac to authenticate the USB connection. Make sure those are backed up, since a lost supervision identity could mean having to wipe the device to modify the profile in the future.
- Setup Assistant: Show All Steps. You can customize this, but for personal purposes, it's not very useful.
The Configurator will start preparing the device.
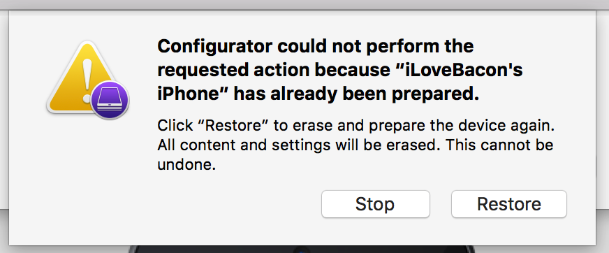
If you see such a prompt, remember that clicking Restore will wipe the device. In this case, the test device I am using already had data on it, was managed, etc.
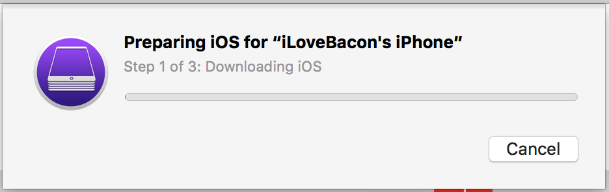
Then, the Configurator will download the latest version of iOS, install it, and prepare the device, which should take from A Long Time to Forever.
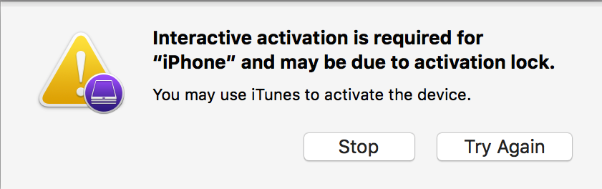
If your device had Activation Lock left enabled, you might receive this prompt. In this case, activate the device manually, then start over.
Done Preparing
Once the process is complete, your device should show up under the Supervised or Unsupervised tab, depending on what you chose. It is now ready to be configured.

Create a Profile
- In Apple Configurator, hit File, then New Profile.
- Name your profile, and see if you want to give it an identifier, description and more. These fields will be displayed only, except for the identifier, which will be used int he future to identify that profile and ask you if you want to overwrite it, if you ever modify it.
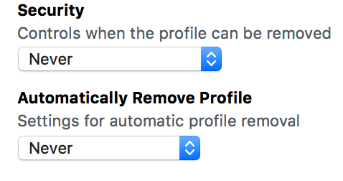
- The Security and Automatically Remove Profile field are interesting. If your device is supervised, it can't be paired to iTunes. You can chose to set the profile to be removable Always (dangerous, especially if you expected to prevent an adversary from being able to perform an iTunes backup!), With Authorization (a passcode that it will prompt you for, which I would recommend not storing on or with the device), or, the most secure option but most restrictive, Never. As for Automatically Remove Profile, for personal usage, I can't think of any reason not to set it to Never.
- Go to Restrictions and click Configure.
- For Problem 1, go to Restrictions, Functionality and ensure Allow Pairing with non-Configurator hosts (supervised only) is unchecked.
- For Problem 2, still in Functionality, ensure that Allow users to accept untrusted TLS certificates is unchecked.
- For Problem 3, in Functionality, ensure that Allow iCloud Keychain is unchecked, and that under the Apps tab, Enable Autofill is unchecked.
- For Problem 4, in Functionality, if you use iTunes backups, ensure that Force Encrypted Backups is checked and that Allow iCloud Backup is unchecked. If you want to use iCloud backup, ensure Allow iCloud Backup is checked, but the encryption setting will have no impact. If you want to use Apple Configurator backups, I recommend forcing encrypted backups and disallowing iCloud backup, though the forced encryption setting does not appear to apply to it, disabling iCloud Backup will prevent accidental online backups.
- For Problem 5, in Functionality, make sure Allow Trusting new enterprise app profile (supervised only) is unchecked.
- For Problem 6, under the Apps tab, ensure that Block pop-ups is checked, that Accept Cookies is set to From Current Website Only (most secure) or at least From Websites I Visit (more compatible, more secure than the default value). Under the Functionality tab, ensure that _Force Limited Ad Tracking_is checked.
- While you are creating the profile, feel free to configure additional security settings, such as enforcing better passcodes, or pre-configuring your Wi-Fi network name and password so you don't have to type those 127 random characters on a small device screen.
- Save the profile, close the profile window.
Apply the Profile
- Back on the main Configurator screen, select the device, then click Add, select Profiles, and browse to your recently saved profile. Add it.
- The device will be reconfigured automatically, which should take a few seconds.
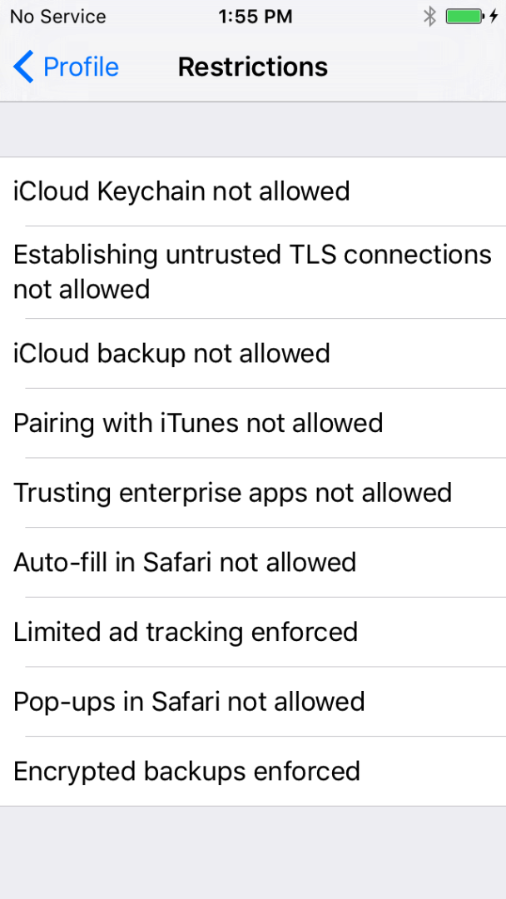
- Browse to Settings on your phone, go to General and select Profile. You should now see your profile, and if you drill down, get to a screen describing the configuration changes that apply.
Backing up your device, if you now prevent pairing and do not use iCloud Backup
If you've decided to supervise your device, prevent iCloud Backup as well as pairing to iTunes, use the Configurator to back your device up.
If you select your device, you should now see all the information about it, such as serial numbers, IMEI, and the fact that pairing is not allowed.
Click "Encrypt Local Backup", and configure a good password.
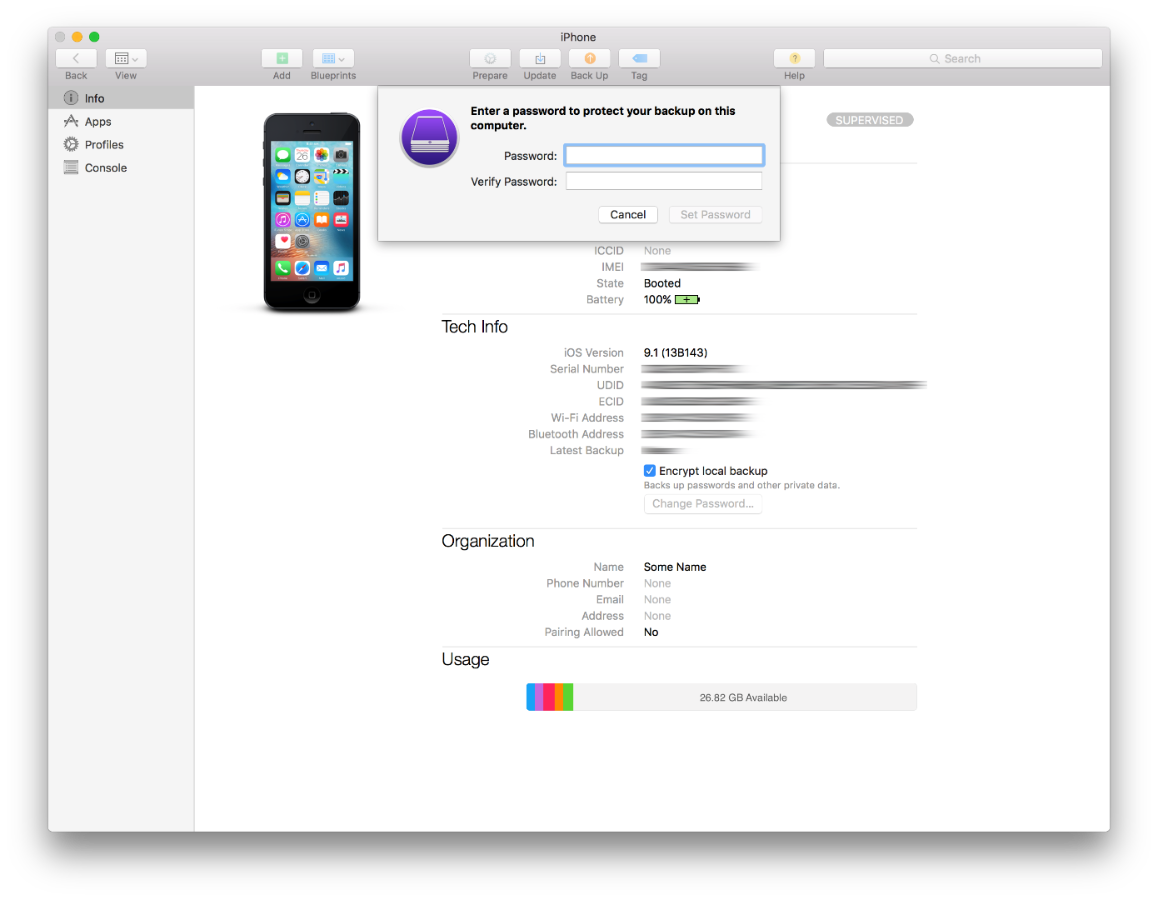
The backup password will be pushed to the phone, and a backup will be performed. Be sure to perform future backups frequently and that your password is stored safely.
Testing
To see how the changes we performed impact the behavior of the device, here are some examples.
Browsing to a HTTPS site with a self-signed certificate
As you can see, it fails, and does not allow you to make a dangerous decision consciously or by mistake.

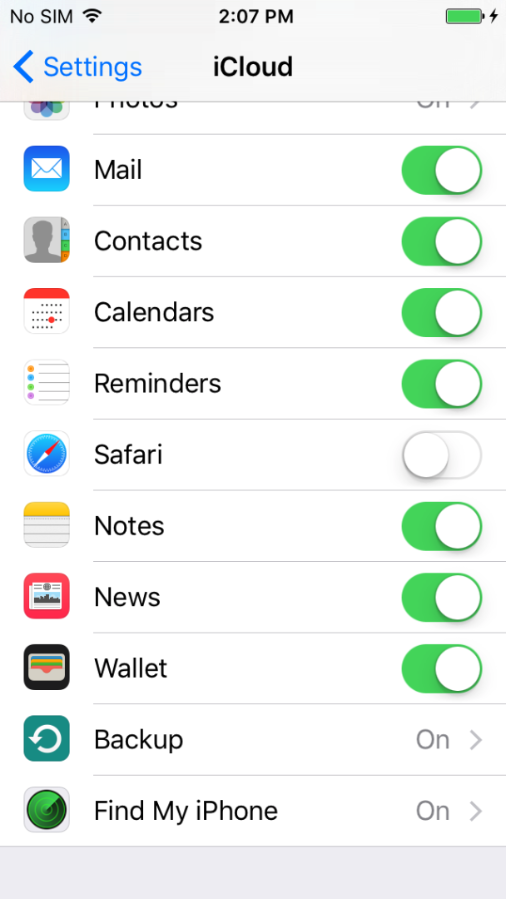
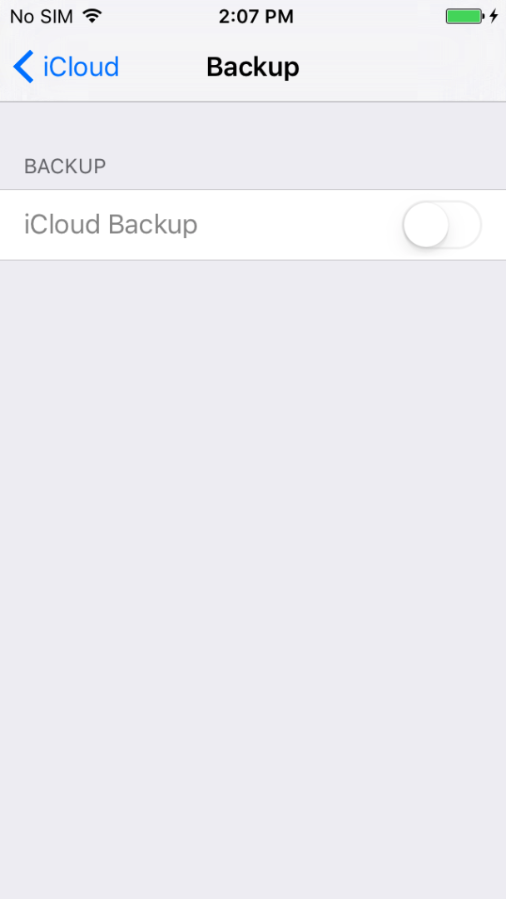
Trying to enable iCloud Backup
Weirdly, there seems to be a bug in iOS 9.1 that will show iCloud Backup as active on the iCloud pane, but when you drill down, you see it is disabled but greyed out.
Pairing
If you've prevent pairing, simply try to connect your device via USB to another computer you own, start iTunes or Photos and try to interact with it. The Trust modal dialog should not appear, and data will not be importable.
Final Words
In a world where most people use cloud services for things such as music streaming and photo storage, USB connectivity is less important than ever before for phones and tablets. As people travel with these devices more and more, attacks on the networks they connect to, or on the physical devices themselves, are more and more probable.
If you enable all of these features, you now have an iOS device that is less susceptible to man-in-the-middle attacks to steal data or credentials, that is more resistant to adversaries that might want to back it up to a computer to dig into the backed up data, is slightly better at handling websites securely, and that will enforce your backup strategy and be protected against malicious enterprise applications.
If you've only opted for the settings that did not require supervisions, you still have an improved posture, and I hope you will decide to supervise your next iOS device, as soon as you open the box!
Special thanks to Jimmy Vo for reviewing, and to Brendan O'Connor for commenting and making me realize that this article should be written.