If you have a large number of servers you may have a requirement to configure proxy servers in various parts of your network to accept messages and then forward them to a centralized logging solution or service. We regularly see this with larger customers where it makes sense to collect logs centrally before sending them on to Logentries for analysis. In some cases this can be a more stringent requirement where parts of your network may not have direct access to the public internet due to security related restrictions. If you find yourself in this situation and are wondering how to go about setting up, this post gives a primer on how to do this using Rsyslog (note most modern linux distributions ship with Rsyslog).
There are 3 main steps that you need to carry out to send data to a logging service via a proxy server as outlined below. Note in Syslog speak this is often referred to as configuring a Syslog relay.
- Step 1: Configure each host to forward logs to a centralized Syslog server
- Step 2: Create the relevant log files in your Logentries account
- Step 3: Forward log data from the centralized server to the logs you created in your Logentries account
Each step is described in more detail below. The instructions assume you already have a Logentries account. However the same instructions can be largely followed for any logging service that accepts Syslog input.
Step 1) Configure your hosts
The following is required to configure each host:
- Create an empty file “/etc/rsyslog.d/logentries.conf”, add the details below, and then save:
*.* @@PROXY_IP:10514
PROXY_IP is the IP of the remote proxy server we will set up shortly. Note this will forward all Syslog log data from the host machine to the proxy server.
- To forward data from log files other than standard Syslog log files (e.g.Websphere logs or DB2 logs) you will need to add additional details for each log file you would like to add to the “/etc/rsyslog.d/logentries.conf” file. Below is a sample logentries.conf file that contains the details you need to also forward data from (for example) websphere error and systemout logs.
$ModLoad imfile

#variables required for non-syslog log file forwarding – SystemErr.log

$InputFileName /var/log/IBM/Websphere/AppServer/SystemErr.log
$InputFileTag websphere-errors
$InputFileStateFile websphere-errors
$InputFileSeverity error
$InputFileFacility local7
$InputRunFileMonitor

#variables required for non-syslog log file forwarding - SystemOut

$InputFileName /var/log/IBM/Websphere/AppServer/SystemOut.log
$InputFileTag websphere-systemout
$InputFileStateFile websphere-systemout
$InputFileSeverity info
$InputFileFacility local7
$InputRunFileMonitor

#Add details for any more non-syslog log files here
#Copy the variables above for each file you want to add

$InputPollInterval 10

*.* @@PROXY_IP:10514
Step 2) Create Log Files in Your Log Entries Account
Next, create logs in the Logentries UI where you would like the log data to be forwarded to. Generally it makes sense to have a 1:1 relationship with logs on your host machines to logs on Logentries.
When setting these up via the Logentries UI, choose to ‘add a log’, then ‘manual configuration’, give the log a name and select ‘Token TCP’.
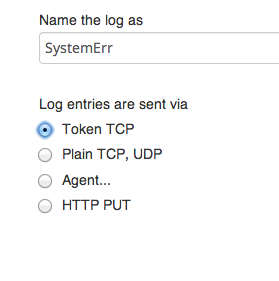
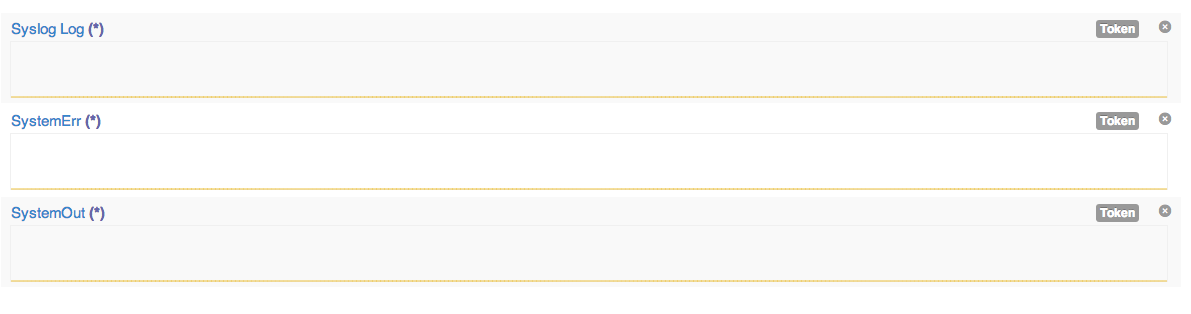
When you save the settings the log will be created in your Logentries account and will have a TOKEN value associated with it. Note you will need to use the TOKEN values when configuring the proxy server to route data into these logs. For this example I have created the following 3 logs in my Logentries account:
Step 3) Configure your proxy server
On the Proxy server, you will need to edit “/etc/rsyslog.conf” to accept incoming data from your different hosts. To do so uncomment the following two lines:
#$ModLoad imtcp
#$InputTCPServerRun 514
And update the port number to 10514 as follows:
$ModLoad imtcp
$InputTCPServerRun 10514
Next on the same machine, create the file “/etc/rsyslog.d/logentries.conf” and add the following template variables below. Note you will need to create a variable for each log file you create within your Logentries account in step 2. In this example we have created 3 variables as we want to map to 3 logs in the Logentries UI – i.e. the 3 log files from our host that we want to route via the proxy server (websphere’s systemout and systemerr logs as well as any Syslog events).
Each log file you create in Logentries will also have a unique TOKEN value that you will need to fill in below. The TOKEN value is used by Logentries to map the events from each of your different log files on your host to the relevant log in the Logentries UI.
$template Host1SyslogTemplate,"TOKEN %HOSTNAME% %syslogtag%%msg%\n"
$template Host1WebsphereErrorsTemplate,"TOKEN %HOSTNAME% %syslogtag%%msg%\n"
$template Host1WebsphereOutTemplate,"TOKEN %HOSTNAME% %syslogtag%%msg%\n"
After creating the template variables, add the following logic to filter the relevant events from your different host machines and to route these to the correct files within the Logentries UI. Note replace ‘HOST1’ with the name of the host forwarding the logs to the proxy server.
if $hostname == 'HOST1' and $programname == 'websphere-errors' then @@api.logentries.com:10000;Host1WebsphereErrorsTemplate
&~
if $hostname == 'HOST1' and $programname == 'websphere-systemout' then @@api.logentries.com:10000;Host1WebpshereOutTemplate
&~
if $hostname == 'HOST1' then @@api.logentries.com:10000;Host1SyslogTemplate
&~
The logic above sends the different log files from your host in step 1 (e.g. Host 1 – where Host1 is the name of the host you are sending data from to the proxy server) to separate logs in your Logentries account created in step 2. More precisely it sends the standard Syslog logs, and your websphere Systemout and Systemerr logs from Host 1 to different logs in your Logentries account, via a proxy server.
As a final step you will need to restart Syslog on BOTH MACHINES with the following command for these changes to take effect:
sudo service rsyslog restart
And thats it… feel free to get in touch via our support channel if you have any questions, or if you run into any roadblocks getting this set up.